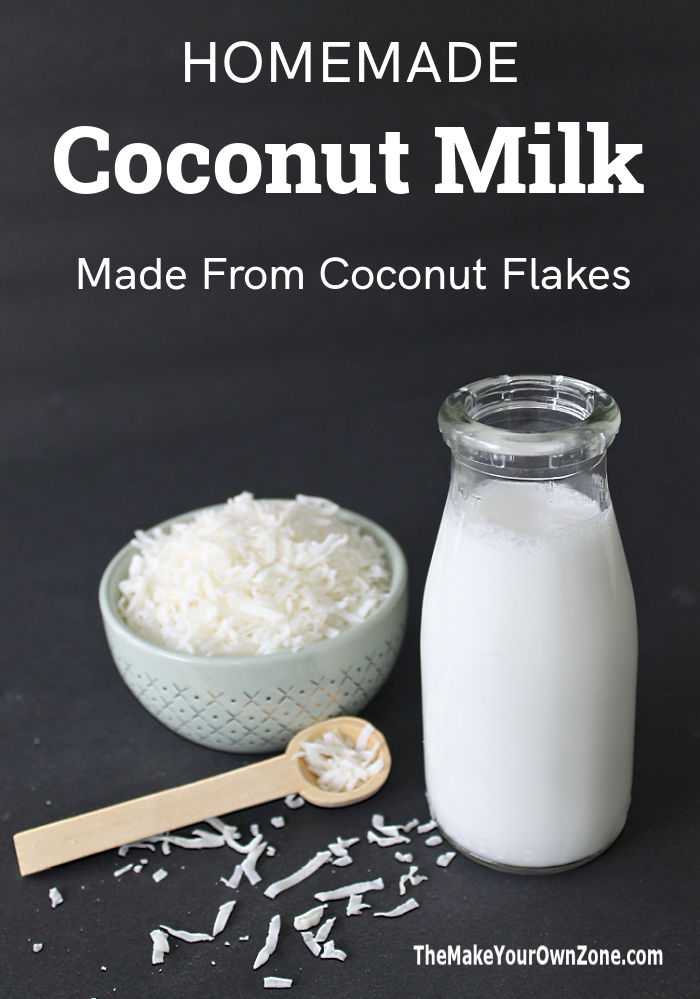
Make Your Own Coconut Milk
This post may contain affiliate links. Please read my disclosure policy for more information.
I’ve tried a few recipes lately that call for coconut milk which meant that I would usually buy the canned coconut milk in the store. But so often I wouldn’t need the entire can for the amount of coconut milk the recipe called for and whatever was leftover in the can would almost always end up going to waste and just getting thrown out later on. I decided I needed to find a better strategy and the answer was to just make my own homemade coconut milk!
How To Make Coconut Milk From Shredded Coconut
The simple method I now use for making homemade coconut milk uses just two simple ingredients – water and unsweetened coconut flakes (also known as shredded coconut). A blender is also needed for this method, and a high speed blender works the best (I use my Vitamix).
But what I like best about this method is that I can make just small amounts of my homemade coconut milk at a time. Most times I just make a 1/2 cup of my homemade coconut milk to use in a recipe and that’s all. Homemade coconut milk doesn’t keep very long so this is a good reason to make it in small amounts too.
My measuring formula is super easy too. If I want to end up with a 1/2 cup of coconut milk, then I use a 1/2 cup of coconut flakes. I then add water in just a little bit larger measurement, usually the next measurement up. So when using a 1/2 cup of coconut flakes, I add 3/4 cup of water.

Another example would be if I wanted 1 cup of coconut milk, I would use 1 cup of coconut flakes with 1.25 cups of water. Using this type of formula makes it easy to make just enough coconut milk for a certain recipe without having any leftover that might go to waste.
Now that we’ve taken a look at the measuring formula, let’s take a closer look at how I use the blender to make coconut milk.
Using The Blender To Make Coconut Milk
In the steps below I’ll be using my measurements that will result in about a 1/2 cup of homemade coconut milk:
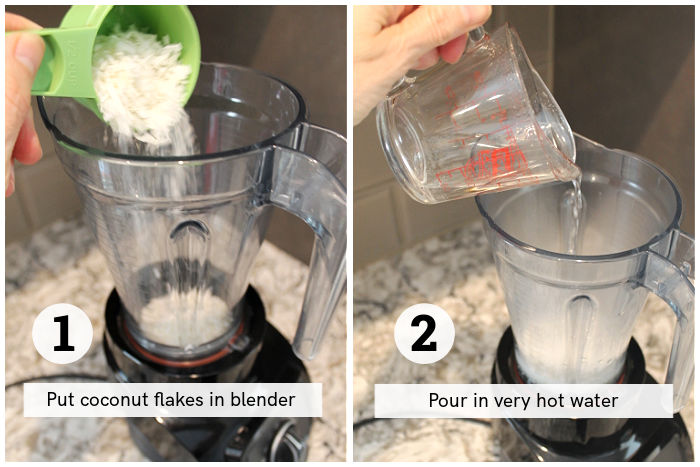
Step 1: Put the coconut flakes in the blender.
To begin, I pour a 1/2 cup of the coconut flakes into the blender.
Step 2: Add very hot water
Next, I measure out 3/4 cup of water and then heat it in the microwave for 1 minute and 30 seconds or until it just comes to a boil. Then I pour this very hot water over the coconut flakes in the blender.
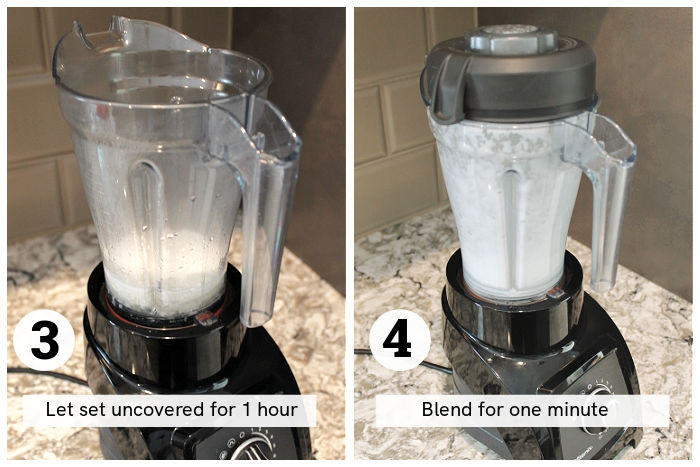
Step 3: Let the coconut flakes soak
Then I let the coconut flakes and the water soak together in the blender for one hour. This softens the flakes for blending and infuses flavor into the water too. I keep the cover off the blender during the soaking time.
Step 4: Blend for one minute
After the hour of soaking, I put the cover on the blender and then blend at high speed for one minute.
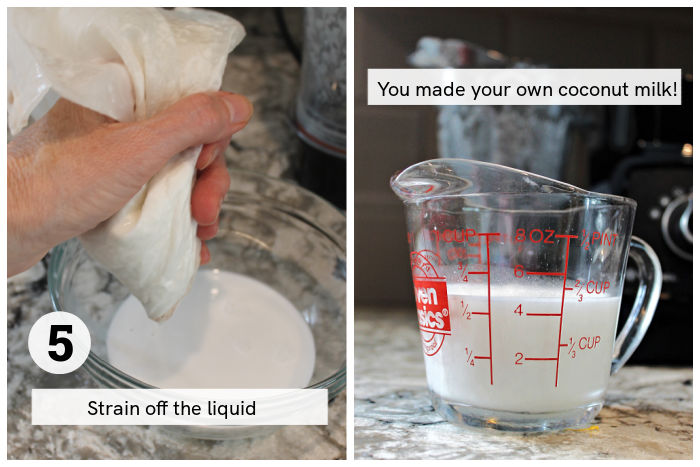
Step 5: Strain the mixture
Now that the coconut flakes and water are blended, you’ll need to strain the mixture. I use a nut bag for this step, but you can also use a fine mesh strainer.
And now your homemade coconut milk is complete! Using a 1/2 cup of coconut flakes with 3/4 cup of water will give you a final result of a generous 1/2 cup of homemade coconut milk.
This homemade coconut milk isn’t quite as thick and rich as the coconut milk in the cans, however I actually prefer this lighter version!
Homemade Coconut Milk Will Separate
Using this method for homemade coconut milk has been a nice way to make just a small amount that I might want for a recipe. However I’ve also learned that homemade coconut milk doesn’t keep for very long and will start separating very quickly. For this reason I usually make homemade coconut milk on the same day that I plan to use it in a recipe, and I just keep it out on the counter at room temperature, giving it a stir again if needed.
It’s possible to keep your homemade coconut milk for a day or two in the refrigerator, but when it’s cold and it separates, the top layer will be firmer. In fact you could tip over your bottle of homemade coconut milk and it might not move! But for a couple of days you can still stir it back together and use it.

Using Homemade Coconut Milk for Curry
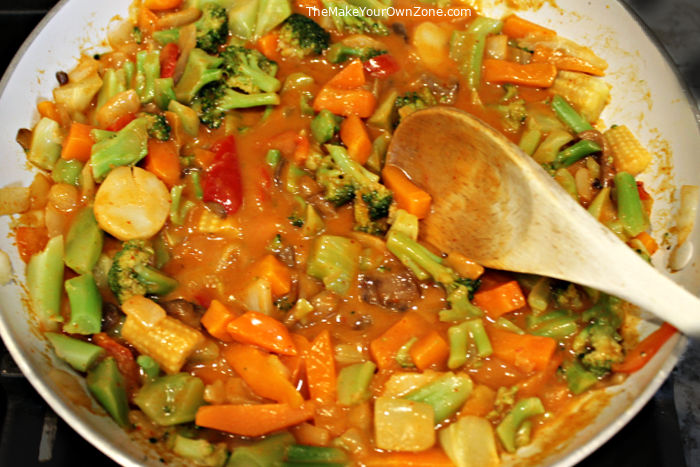
So what do I end up doing with my little 1/2 cup of homemade coconut milk? I like to make my own Thai Coconut Curry Sauce! This easy sauce is my frugal solution for adding spice to vegetables and rice so that we have a homemade alternative when the hankering for some Thai take-out food strikes. You can find that recipe here: Thai Coconut Curry Sauce for Vegetables
So if you’ve ever been frustrated because a can of store-bought coconut milk is more than you need, try making your own coconut milk. It’s a simple way to make any size batch that you need!
More Homemade Ideas:
Homemade Coconut Milk
Equipment:
- High Speed Blender
- Nut Bag or Fine Mesh Strainer
Ingredients:
- 1/2 cup Unsweetened Coconut Flakes
- 3/4 cup Water
Instructions:
- Place the 1/2 cup of unsweetened coconut flakes into the blender.
- Heat the 3/4 cup of water just to the boiling point. I heat mine in the microwave for one minute and 30 seconds so that it is just starting the bubbling of coming to a boil.
- Pour this very hot water over the coconut flakes in the blender.
- Let the coconut flakes and the hot water sit uncovered in the blender for one hour so that the coconut flakes soften and infuse the water with their flavor.
- After this soaking time, put the cover on the blender and blend on high for one minute.
- Empty the blended contents into a nut bag or a fine mesh strainer and strain the liquid off, squeezing as needed to get the maximum amount of liquid strained off.
- This homemade coconut milk will keep for only 2 or 3 days. If it separates during that time, you can stir it back together. If I am using my homemade coconut milk the same day that it was made, I do not refrigerate it. If I am going to use it in the next day or two, I refrigerate it and stir it back together again as needed.
- This recipe will yield a generous 1/2 cup of coconut milk. See the notes below for other size batches.
Notes:

I’m assuming that because I doubled the ingredients is why my milk had a solidified top. lol but it was delicious despite the little chunks of “coconut oil”. I’m just going rely it sit to room temperature and see what happens.