Colorful Tie Dye Easter Eggs
Making Easter eggs is an annual tradition that let’s me do a couple of my favorite things – play with color and play with kids. The little ones always seem to enjoy the unpredictable surprise that each egg can bring as you work on it and truth be told, we adults really enjoy the same thing too! And when all the work is done and you see your beautiful eggs all gathered together, it’s certainly one of those happy little pleasures in life that can always bring a smile.
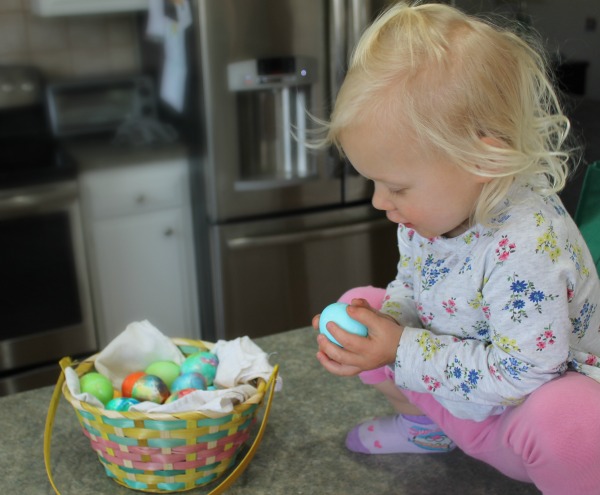
This year for egg decorating time I decided to use a couple of methods I’ve used in the past. We first did some plain colored eggs dipped in dye made from Kool-Aid. This is a fast and easy method that kids always enjoy.
Related Reading: How To Make Natural Easter Egg Dyes
The second method was to make some tie-dye eggs using food coloring dripped onto wet paper toweling that then gets wrapped around the eggs. I used this method a few years ago but had never written about it and I thought the grandkids might enjoy trying this technique that was new to them too. We were very pleased with our results!
Making these homemade Easter eggs is pretty simple to do and something that the youngsters can help with. I did this project with a 4 year old and 2 year old who needed adult help here and there but were still able to have a lot of fun with it.
Using Food Coloring and Paper Toweling to Make Colorful Easter Eggs
To make this project you’ll need hard boiled eggs, plastic wrap, paper toweling, liquid food coloring, and squirt bottles of water with just a bit of vinegar added.
Here are the steps: (a printable version is included at the end too)
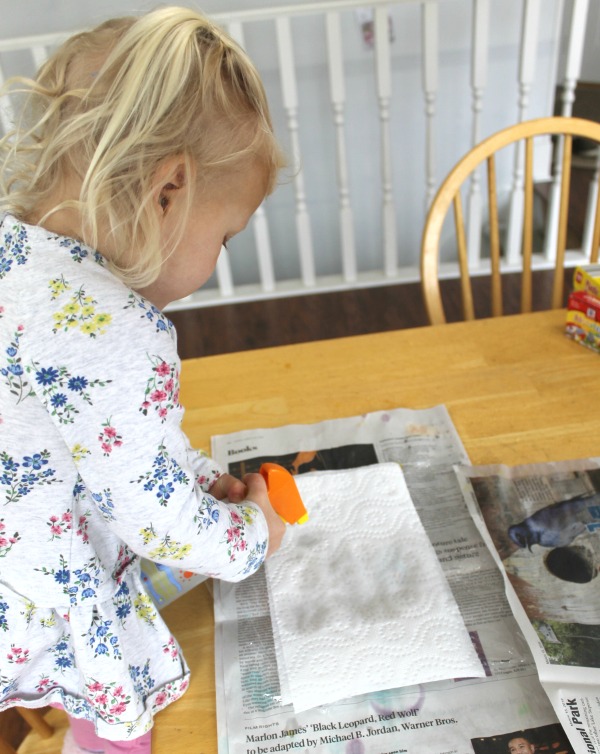
Step 1 – Begin by laying down something to protect your work surface (we used newspaper). Then lay down a piece of plastic wrap. On top of the plastic wrap put a couple sheets of paper toweling.
Step 2 – Next, you’ll need to moisten the paper toweling. The best way to do this is to put water, with just a bit of vinegar, in a spray bottle and squirt it around until the towel is just moistened (you don’t want it dripping wet). I honestly don’t know if the vinegar is necessary, but the thought is that it helps make colors absorb more into the eggshells so I usually include it.
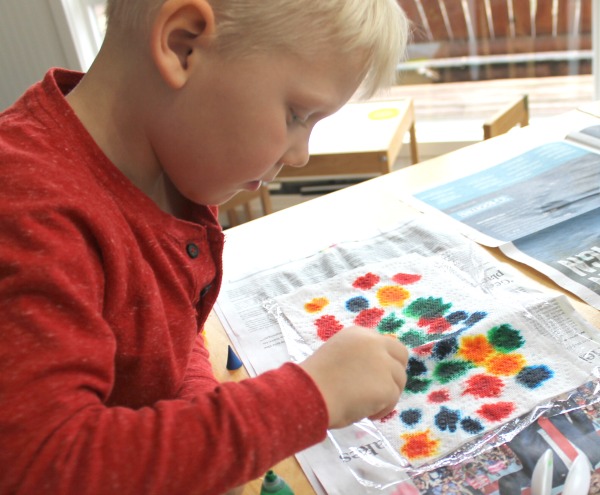
Step 3 – Once the paper toweling is moistened, place drops of the food coloring here and there on the moist paper toweling. This is the part the kids enjoy the most!
Step 4 – Place a hard boiled egg in the middle of the colored paper toweling and then wrap the towel around it. You may also want to give it a few more squirts with the spray bottle so all the food coloring is moistened into the toweling.
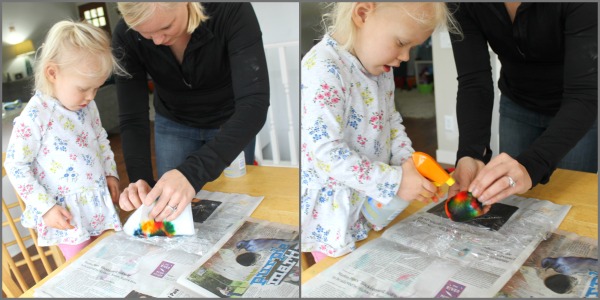
Step 5 – Then wrap the piece of plastic wrap around the towel and the egg. As you can see in the photo, by this time you might have some colorful fingertips too. 🙂
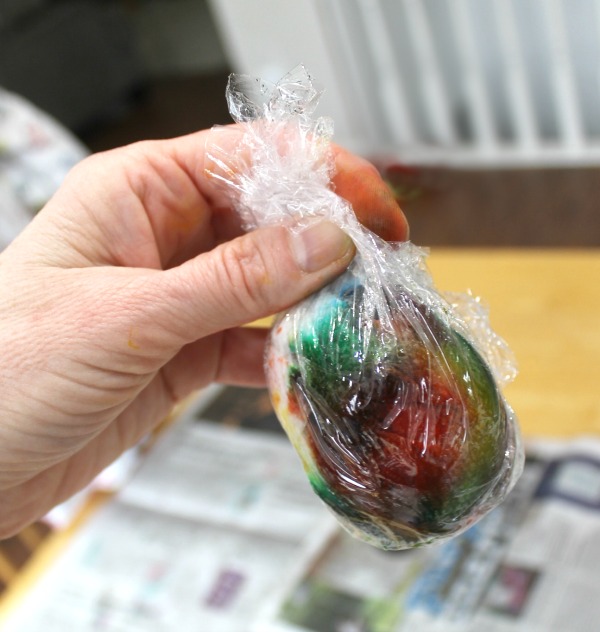
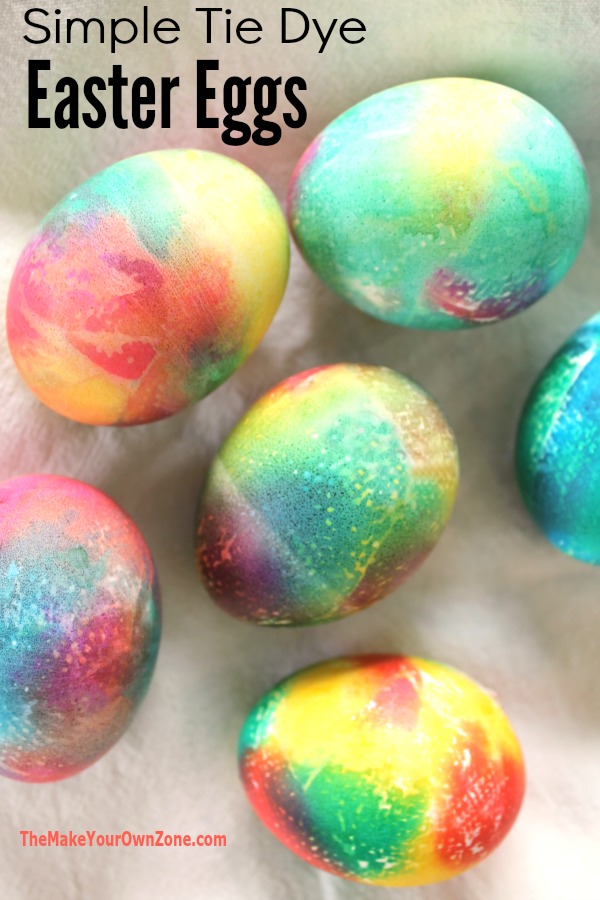
Step 6 – Let the wrapped egg sit for about 30 minutes. (You can also wait about an hour if you want a more deeply colored egg). Then unwrap and enjoy your beautiful tie-dye eggs!
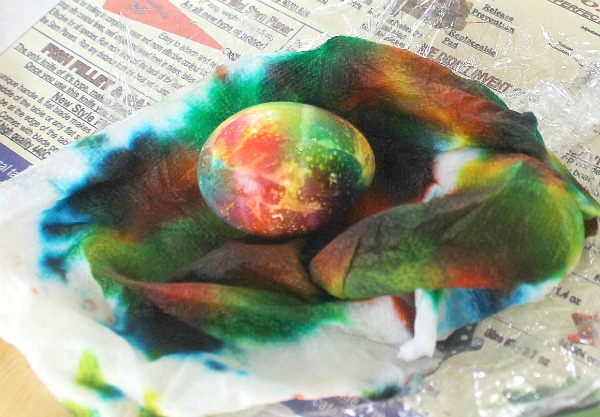
Your finished eggs may show some of the imprint of the paper toweling, but that just adds to the charm of the homemade coloring process. And the kids won’t even notice! They’ll just enjoy unwrapping their eggs to reveal the fun patterns they’ve made.

Colorful Tie Dye Easter Eggs
Materials:
- Hard Boiled Eggs
- Plastic Wrap
- Paper Toweling
- Liquid Food Coloring
- Spray Bottle of Water with small amount of vinegar added
Instructions:
- Begin by laying down something to protect your work surface (we used newspaper). Then lay down a piece of plastic wrap. On top of the plastic wrap put a couple sheets of paper toweling.
- Next, you’ll need to moisten the paper toweling by squirting it with the spray bottle of water that has a bit of vinegar added. Squirt it around until the towel is just moistened (you don’t want it dripping wet).
- Once the paper toweling is moistened, place drops of the food coloring here and there on the moist paper toweling. Cover enough of an area to be able to wrap an egg.
- Place a hard boiled egg in the middle of the colored paper toweling and then wrap the toweling around it. You may also want to give it a few more squirts with the spray bottle so all the food coloring is moistened into the towel.
- Then wrap the piece of plastic wrap around the toweling and the egg. Let the wrapped egg sit for about 30 minutes. You can let it sit for up to an hour if you want more deeply colored eggs.
- Finally, unwrap the egg to reveal the pretty colorful pattern you have created.

The tie eggs are so neat and I plan on coloring some eggs with this technique. And enjoy your time off. I have made the knit swifter covers, they are great too. Thanks.
I think you’ll have making the eggs Anne, and I hope you are enjoying the swiffer covers too!