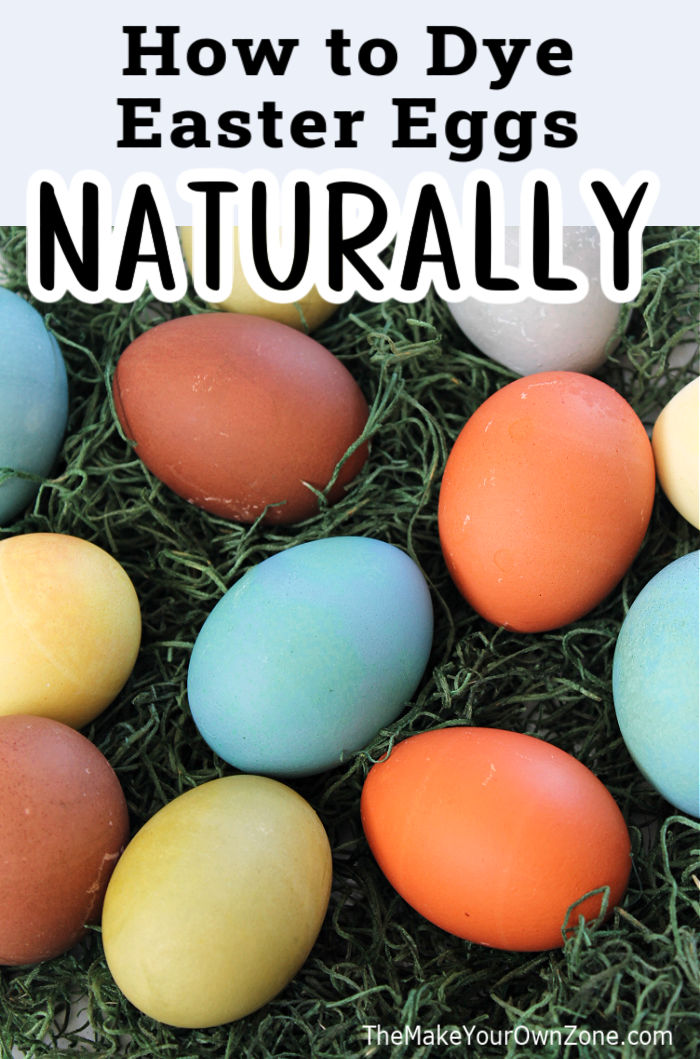
How To Make Natural Easter Egg Dyes
I’ve tried several different egg dying ideas over the years, but making natural egg dyes from food items is one of the more interesting methods that I keep coming back to again and again. It takes a little more patience and is a bit like a science experiment sometimes, but in the end you’re rewarded with an assortment of colorful Easter eggs dyed with the colors of nature. Here are six colors you can try if you’d like to make your own natural egg dyes too.

I use a two-step process for naturally dying my eggs. First, I make the dye bath water by heating and soaking different food items (which I will call “food stuffs” for the instructions below). The second step is to hard boil the eggs in the dye bath water which is when the eggs will absorb the color. This is the basic method I use, although a couple of the colors may need to soak for a few more hours after the egg is cooked, and one color (the yellow) is just a matter of soaking an already hard-boiled egg.
The First Step – Make the Dye Bath
When I make natural Easter egg dyes, I use a two-step process. Here’s how I do it:
For the first part of this process, I combine 3 cups of water, 3 tablespoons of vinegar, and whatever food item I’m using to color the water (more on that below). I bring it to a boil, and then turn down the heat to low and let it simmer for 20 minutes to let the food stuff fully color the water. I then take it off the stove, strain off the colored liquid into a bowl, and discard the soggy food stuff. I let my colored dye water sit for a while to completely cool off (if you introduce an egg that is still a little cold to very hot water, the egg could crack). You can also put it in the refrigerator to help it cool down faster.
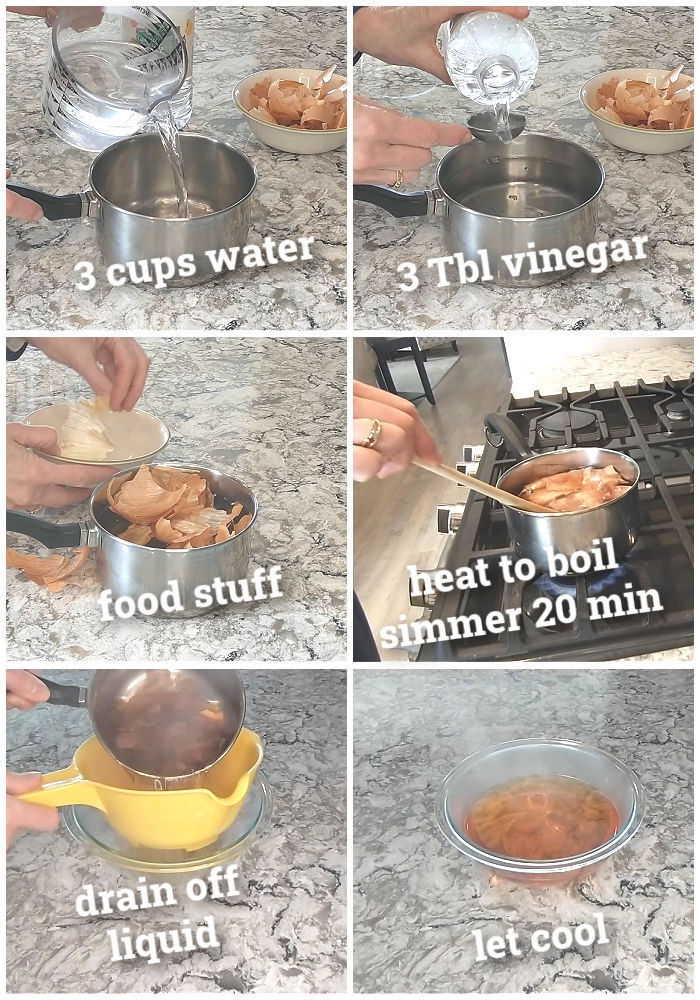
You don’t necessarily have to use the 3 cup measurement but it’s about the right size for small saucepans. If you want to make more or less, just use 1 tablespoon of vinegar for each cup of water.
The thought behind using vinegar in the natural Easter egg dyes is that the acidic vinegar will etch and roughen up the eggshell somewhat which helps it absorb more of the dye. It’s easy to include the vinegar in the mixture so I always do, but you could also try it without the vinegar if you don’t have any.
The Second Step – Boil the Eggs in the Dyed Water
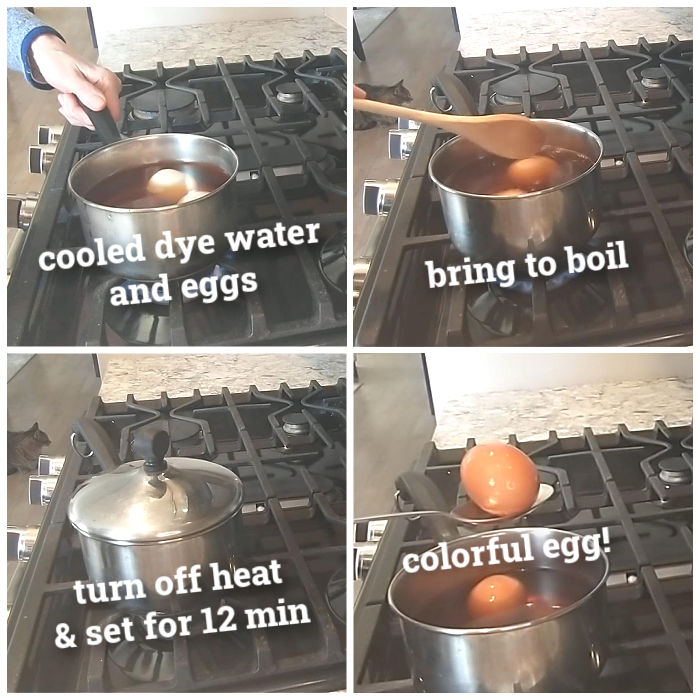
Now you can move on to the second part of the process, which is hard-boiling and soaking your eggs in the naturally colored dye water you made in the first step.
I take room temperature eggs and put them in a small saucepan with one of the batches of cooled off dye water. I bring it to a boil, and then turn off the heat and cover the pan and let the eggs cook and soak in the hot water for 12 minutes. After that time the eggs should be hard boiled and will have taken on some color and can be removed from the water to dry.
You can also watch this video showing how this process works:
Six Ideas for Natural Egg Dye Colors
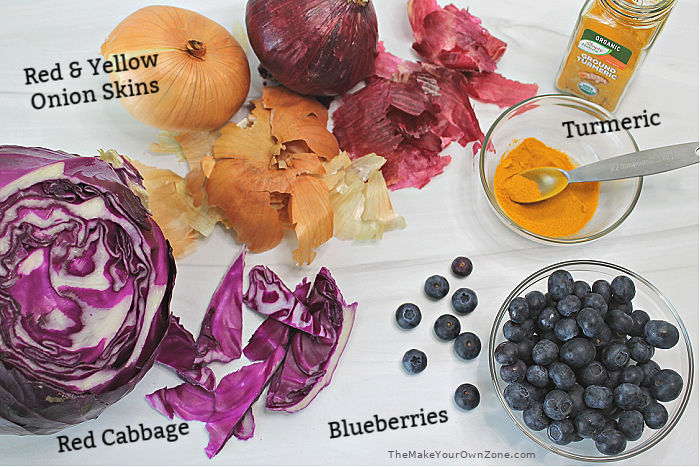
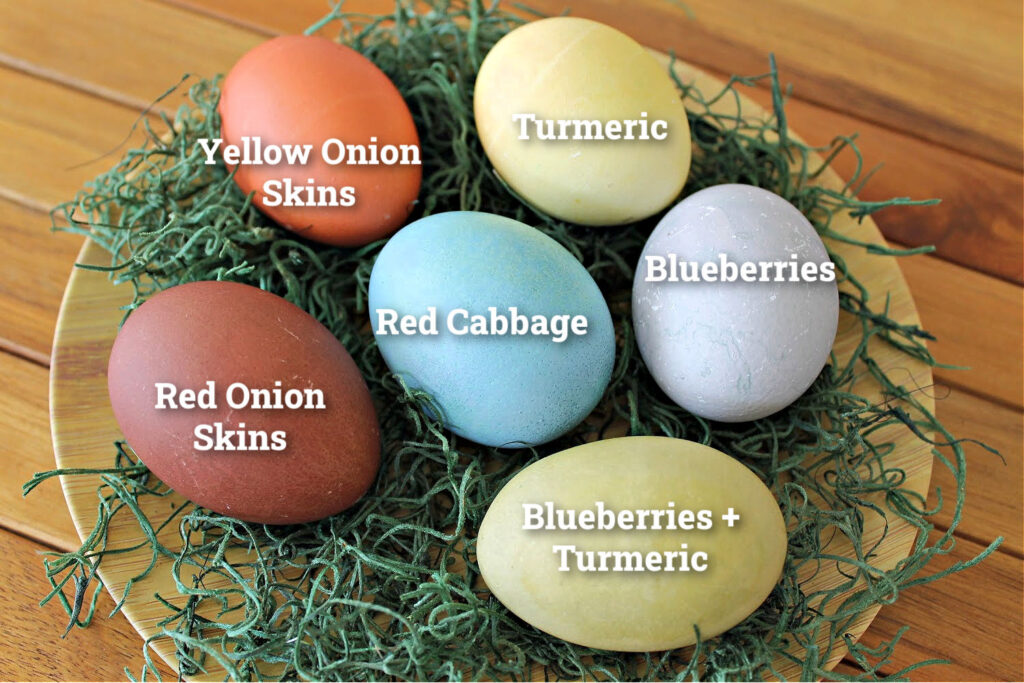
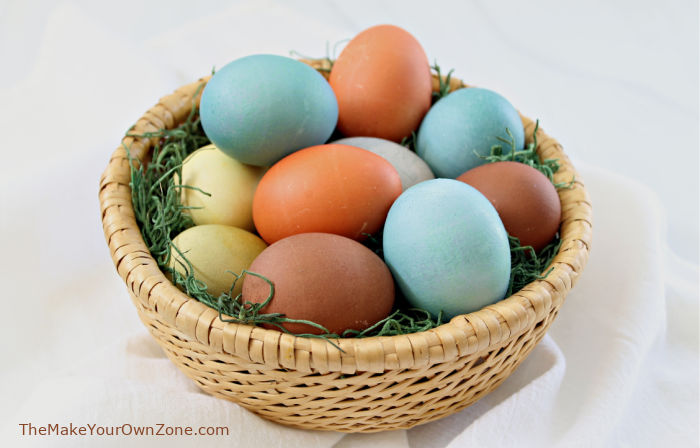
Now let’s look at the fun colors you can make with this method! Here are six ideas using natural food stuff to create your rainbow of naturally dyed eggs. More complete instructions are in the printable instructions below, but here’s a quick overview.
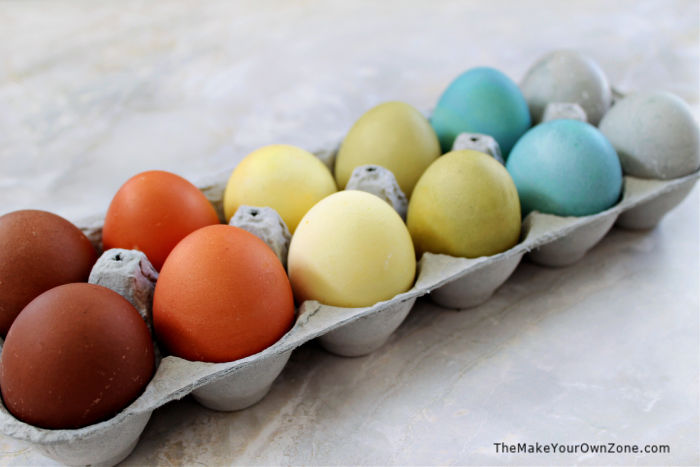
Red Onion Skins = Dark Brownish Red
A handful of red onion skins mixed in with the vinegar water will give you a beautiful, deeply colored reddish brown egg
Yellow Onion Skins = Dark Orange
A handful of yellow onion skins will give you a lovely orange egg. You can see yellow onion skins being used in my video above.
Ground Turmeric = Yellow
This method is just a little different as you simply soak a hardboiled egg in a cup of water with 2 to 3 teaspoons of turmeric. After a few hours of soaking, you’ll have a lightly colored yellow egg.
Red Cabbage = Blue
This color is the most magical as the dye bath water is a reddish purple color, but the resulting egg is a wonderful robin’s egg blue. This egg will need to soak for several more hours after the hard-boiling of the egg, but your patience will definitely be rewarded.
Blueberries = Violet/Gray
Blueberries will give you a pretty egg with muted tones of gray and/or violet. Save the blueberry dye water when you’re done and use it to make the green eggs . . . .
Blueberries + Turmeric = Green
I always save my blueberry dye water after I make the violet/gray eggs. I add in a teaspoon of turmeric and boil a couple more eggs which come out green. An easy way to get some bonus green eggs without making a whole separate dye bath!
Patience is a Plus when Naturally Dying Eggs!
For a couple of the colors, you’ll see your results quite fast. Both the red and yellow onion skins give you deeply colored eggs quickly. But for some of the other colors, don’t be afraid to let those eggs soak for several hours, maybe even overnight in the refrigerator. You’ll most likely see the colors deepen more, although they do reach a saturation point eventually.
I was reminded of this when I looked at back at the photos from previous years that I wrote about. Apparently I’m not nearly as patient with my blueberry dye bath anymore because you can see those getting lighter as the years go along!
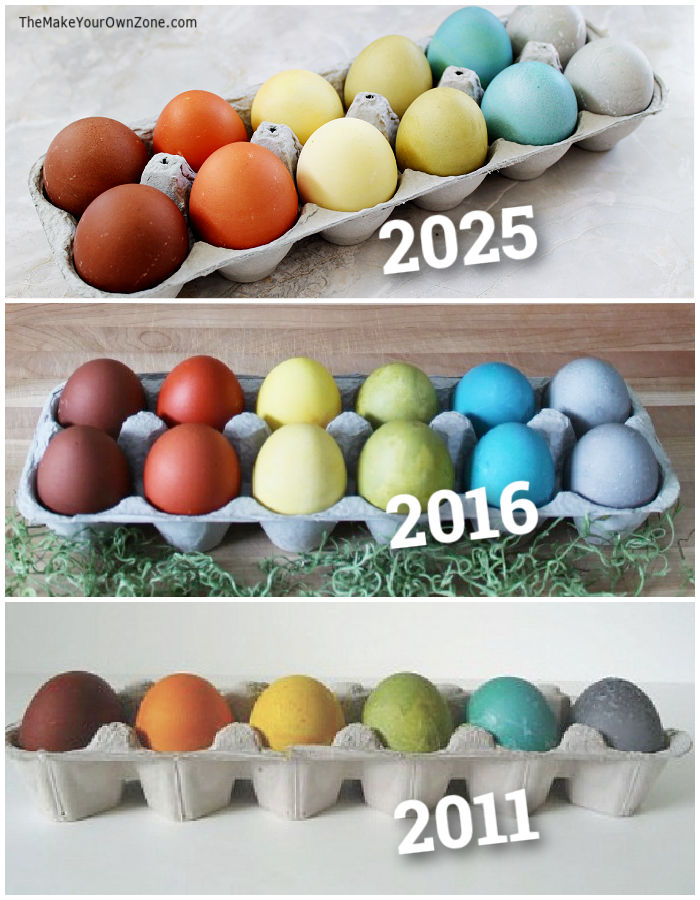
Just remember to enjoy the process and to appreciate the variety when you make your own!
This post was originally published March, 2016 and updated April, 2025.
More DIY Easter Egg Ideas:
How To Dye Easter Eggs Naturally
Equipment:
- Small Saucepan
Materials:
- 3 cups water
- 3 Tbl vinegar
- assorted food stuff (see notes below)
- eggs
Instructions:
General Instructions:
Make The Dye Bath Liquid
- Combine the 3 cups of water and the 3 tablespoons of vinegar in a small saucepan. Add your food stuffs (see the list below for which foods to use to make certain colors).
- Put the saucepan with the vinegar water and food stuff on the stove and bring to a boil. Once the mixture is boiling, turn the heat down to a low simmer and let set for 20 minutes so the water can absorb more color.
- Remove from the heat and drain the liquid from the pan into a bowl, and discard the soggy food stuff.
- Let the dye water cool completely before moving on to the second part of the process which is boiling the eggs. If an egg that is still cold from the refrigerator is introduced to liquid that is still hot, it could crack.
Boil the Eggs in the Dye Liquid
- Put your egg(s) in a small saucepan with the cooled dye liquid. Put on the stove and heat to just starting to boil.
- Turn the heat off and cover the pan. Let the eggs set like this in the pan for 12 minutes to hard boil and soak up the color. See notes below for each individual color.
Making the Six Different Colors:
- Dark Reddish Brown: Use a handful of red onion skins in the vinegar water to the make the dye liuqid. For the second part of the process, you should see the eggs nicely colored at the end of the 12 minutes.
- Dark Orange: Use a handful of yellow onion skins in the vinegar water to make the dye liquid. For the second part of the process, you should see the eggs nicely colored at the end of the 12 minutes.
- Blue: Use chopped red cabbage (about a 1/4 of the head of cabbage) in the vinegar water to make the dye liquid. For the second part of the process, the eggs will be just barely colored at the end of the 12 minutes. Transfer the dye water to another container with the eggs and let them soak for several more hours and they will turn a lovely shade of robin's egg blue.
- Light Violet/Gray: Use about 3/4 cup of blueberries in the vinegar water to make the dye liquid. For the second part of the process, the eggs will be lightly colored at the end of the 12 minutes. You can transfer the dye water and eggs to another container and let them soak for several more hours to deepen the color.
- Green: Save the blueberry dye bath liquid and add 1 teaspoon of turmeric. The eggs should be a light shade of green after the 12 minutes.
- Yellow: This is the only color that does not require making a heated dye bath liquid first. Instead, simply combine 1 cup of water with 2 or 3 teaspoons of ground turmeric. Add a hard boiled egg and let it soak for several hours to absorb the color. Note: Turmeric does not completely dissolve in water and may settle during the process. You can give the container a little swish every now and then. If some turmeric does settles on the egg it can also create some interesting texture to the color.
Notes:

When you peel the eggs, does the color go through and the egg itself is colored?
My recollection is a little bit of color comes through, but not much.
I have done this type of egg dying for years.. but I peel my eggs.. dye them and then cut them in half and make Deviled eggs.. they look so pretty on the Easter Buffet table.. I actually have to tell people they are eatable…
I had never thought of that, but it sounds like a fun way to make your deviled eggs!
Your colored eggs are really beautiful. I love how dark and others are bright. I was wondering if you have ever tried using fresh beet water after they are cooked. I have not done that yet, but will in the future.
I have not tried beets yet, but someone else left a comment on another site that beet water with brown eggs makes lovely deep purple eggs. I will have to remember that!