How To Make Your Own Stretch Bracelets
This post may contain affiliate links. Please read my disclosure policy for more information.
When it comes to making your own jewelry, a DIY stretch cord bracelet might be the easiest bracelet to make. After all, even little kids can string beads onto some cord, right? So true – BUT – I’ve learned that there are a few little tools, tips, and tricks that make the whole process go a little more smoothly and give you a finished homemade stretch bracelet you can enjoy.
I recently decided it was time to put my tools and tips to use and update some of my bracelets. No longer was I looking for the shiny metals and Swarovski crystals that I liked wearing with my professional wardrobe, and instead I wanted natural looking beads to go with jeans. It was time to gather my supplies and make my own stretch bracelets!

How To Make A Bracelet With Stretch Cord
Once again, making stretch bracelets is quite easy to do. However as with most DIY projects, I’ve learned that having some helpful tools and knowing a few little handy tricks makes the project more enjoyable. Here are six tips I’ve found helpful to know as you complete the steps to make your own stretch bracelets:
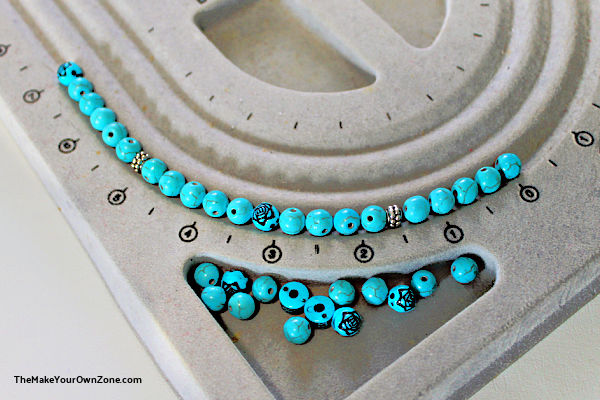
#1 – Lay Out Your Design First
While not absolutely necessary, a Beading Board Tray sure comes in handy and I love using mine. They allow you to lay out a pattern or design with the beads before you start stringing and I find that I usually do more rearranging on the board than I anticipated before I’m finally happy with my finished design. The board is also marked with inches so you can make sure your design will be the correct finished size before you begin stringing. You can also get cute little mini bead boards that are just for making bracelet-sized jewelry. And when it comes to deciding how long to make a stretch bracelet, a small adult size is 7″, medium is 7.5″ to 8″, large is 9″, and plus size is 9.5″. I have tiny wrists so I usually do a 7″ size.
#2 – Prestretch Your Elastic Cord
Many people also wonder what the best cord is for making stretch bracelets and I’ve found that the Stretch Magic cord in the .7mm size is a very good all-purpose cord for stringing these bracelets. But before starting to string your bracelet on your stretch cord, give it a “pre-stretch”! This can help prevent the cord from stretching too much more over time and causing a looser fit as you wear your bracelets.
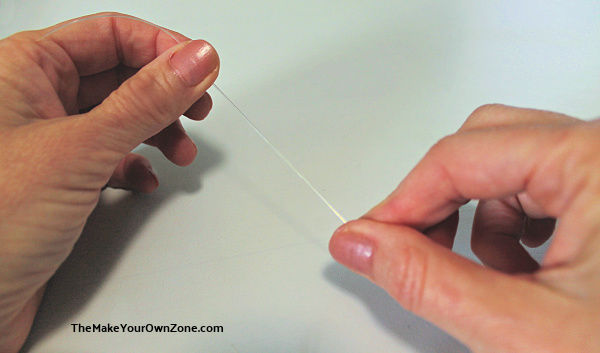
When I get ready to make a stretch bracelet, I cut a 12″ piece of the .7mm elastic, and then hold it in one hand and run it between the thumb and forefinger of my other hand, pulling it a little bit and giving it a gentle stretch as I go. I do this three or four times to pre-stretch the elastic cord.
#3 – Scotch Tape Can Be A Bead Stopper
You can buy bead stoppers to help when stringing your beads so they don’t all come flying off the other end of the cord as you go, but I’ve found a piece of scotch tape is an easy cheapskate alternative. I just put a little piece on the end of my cord, and start stringing my beads. When I’m done stringing, I just snip off that little end of cord with the tape on it.
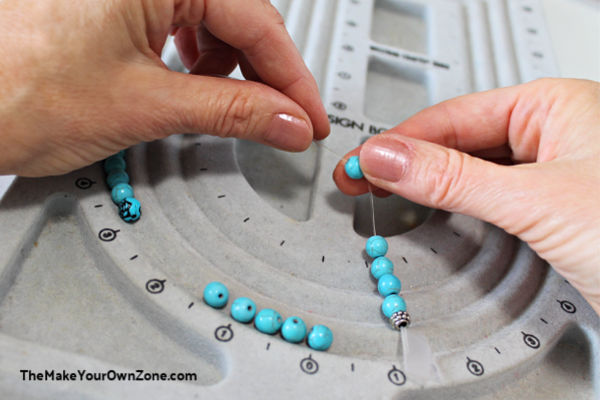
#4 – Start Stringing by Beads With Larger Holes
One way to overcome the worry of how to hide a knot in a stretch bracelet, is to make sure your knot ends up where you might have a bead in the design with a larger hole, so you can slip the knot into that bead when you are done. So if you have a spacer bead with a larger hole, or perhaps are adding a charm and the focal beads around the charm have larger holes, start stringing there, even if it’s the middle of the design you laid out on your board. Remember, you are ultimately making a circle and things will all match up in the end.
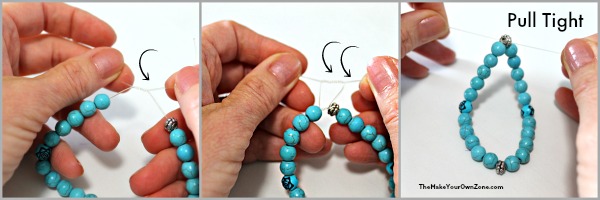
#5 – Finish Up With A Surgeon’s Knot
Once the beads are all strung, it’s time to finish things up by tying a knot. But instead of a regular knot, you might want to try what’s known as a surgeon’s knot, which isn’t as complicated as it sounds. You do the first half of the knot as you always would, but when doing the second part of the knot, as you are passing one end of the cord over and under the other end, do it one more time. Then pull the knot tight as usual. This gives you a knot that’s more durable.
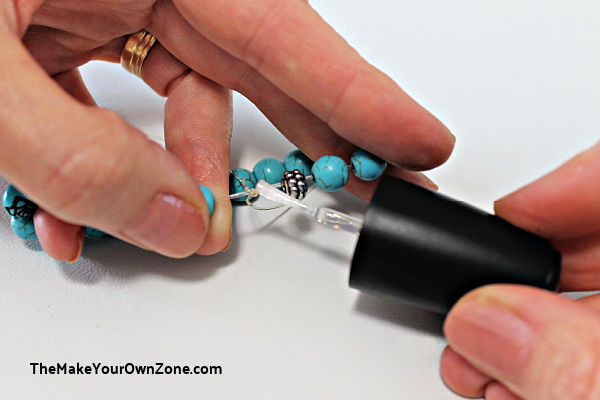
#6 – Reinforce the Knot With Clear Nail Polish
Finally, I give my surgeon’s knot a little extra reinforcement. While you can also use something like E6000 Glue to do this, I like to make my stretch bracelet without glue and just use my cheapskate method of dabbing on a little bit of clear nail polish. The nail polish brush makes it easy to apply too.
After applying the nail polish I let it sit for a few minutes to dry before trimming off the ends of the elastic. Sometimes I feel like trimming the elastic ends off is the most stressful part of the whole process for me as I try to trim it close for a neat knot, but not so close that I feel like I’ve compromised the knot.
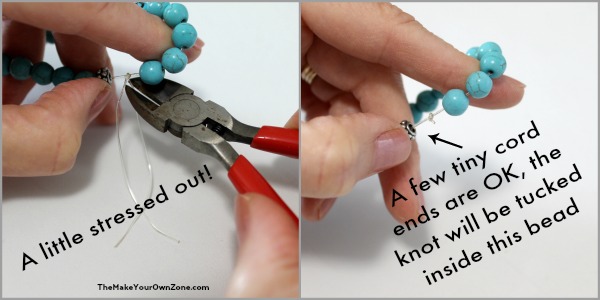
Finally, when it comes to trimming the ends of the elastic, I have a set of small jewelry making tools, and the wire cutting tool makes a great snipping tool for cleanly cutting the ends of the elastic to finish up the bracelet. I’ve used these little tools on so many occasions for other things around the house too. A couple times my menfolk have laughed when I come with my little itty bitty pliers or snippers to help them fix something, but my jewelry tools can get in small places that their regular sized tools can’t (so there, hmmph!!)
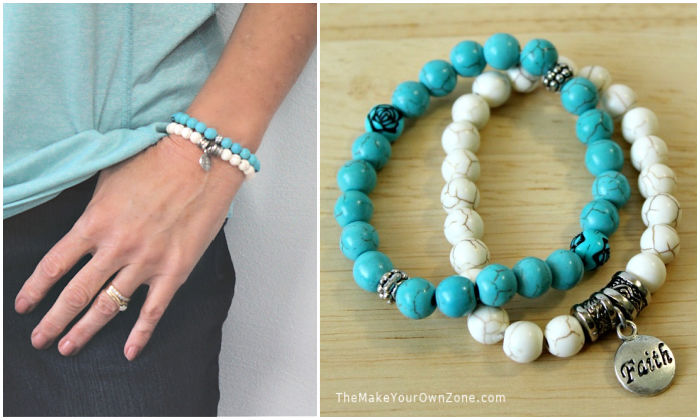
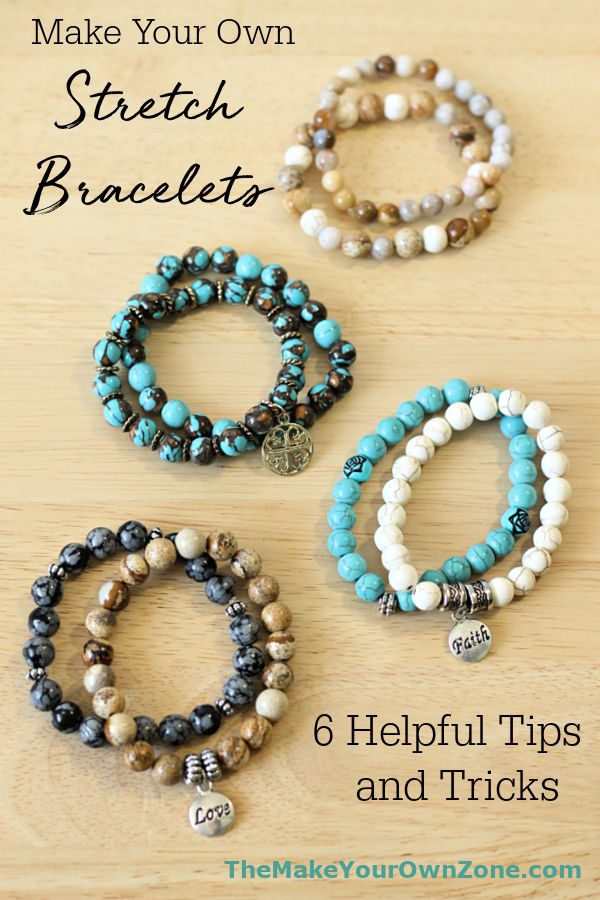
And then another bracelet was complete! I thought this turquoise one looked nice with another white bracelet I had made.
It’s Fun To Find Beads For Stretch Bracelets!
Part of the fun of making stretch bracelets is that they’re a pretty quick and simple project so it’s easy to make a bunch, and it can be stylish to wear a bunch of them together too. Plus when you’re at the store there are so many pretty colors to choose from, it’s hard not to want to buy dozens of beads.
I ended up buying six strands of beads on sale at Michaels Crafts (I used 8mm size), plus I scored a few cute charms from a clearance rack. Then I rummaged through the beads in my craft stash and found some accent beads and spacer beads I could use. I ended up with six pretty new bracelets – PLUS – two simple bonus bracelets that I quickly strung together from the leftover beads. Eight new bracelets altogether!
Now, I just need some new outfits to match the new bracelets. Just kidding . . . sort of . . . even cheapskates like new outfits now and then!
You Might Also Like To Try:
How To Make Stretch Bracelets
Materials:
- .7 mm Stretch Magic Elastic Cord
- Beads of your choice (I used 8mm size)
- Charms, accent beads, or spacer beads (Optional)
- Clear Nail Polish (or E6000 Glue)
- Also helpful – Beading Design Board, Jewelry Wire Snippers, Scotch Tape
Instructions:
- Decide on the length of your bracelet and the design you want to create with your beads. It can be helpful to lay out your bead design on a bead board/tray to make sure you are satisfied with your design before you begin stringing. (see notes below for suggested bracelet sizes).
- Cut a 12" length of the Stretch Magic cord.
- Prestretch the cord by holding one end of the cord and pulling it between the thumb and forefinger of your other hand, to gently stretch it. Pull and gently stretch it like this three or four times.
- Begin stringing your beads. You might find it helpful to put a small piece of tape at the end of the stretch cord to keep the beads from falling off as you go. Wherever you begin stringing is also where your knot will end up so if you have any beads in the design with larger holes, begin stringing there as it will be easier to hide your knot in those beads when you are finished.
- Once the beads are all strung, finish up by tying a knot. For extra knot security, try a surgeon's knot. This knot is done by making the first half of the knot as usual, and when doing the second half of the knot, pass the end of the cord under and through one additional time. Then pull the cord tight to finish the knot.
- Reinforce the knot by dabbing on some clear nail polish or glue. Let it dry for a few minutes, and then cut off the remaining long ends of the cord close to the knot.
Notes:

This has been very helpful and it is going to make things easier, thanks so much!
I just repaired a stretch bracelet for my wife and your tips helped a lot! Except, I put a small dab of clear nail polish on the knot like you said, and thought it was good to go! Good thing I had a small cookie sheet underneath, because when I picked the bracelet up the nail polish disintegrated the elastic cord! Thank God for the cookie sheet! So I re-strung the beads and tied the surgeon’s knot and added glue this time. She loves it! Thanks again!
Thanks for sharing! I think I am going to try to do this myself! I need to pick up a little hobby besides shopping! LOL
I love the easy way you can make your own jewelry. Very pretty and professional looking.
Thanks a lot for your tips. They’re very very useful!
Your website has lots of great information! I especially like the DIY jewelry making tips. Thank you for sharing your knowledge of all things that women love! 💜
Thank you
I would like to learn how to make bracelets for my self
Ty for your great advice I have been making stretch baracelet for a bit now but either my cord is too heavy to fit thru my hole of beads or I get the tying wrong ty for your input I will try again your way 😊
Wonderful tutorial! I’m always searching for new tips and tricks! Thank you for sharing 🙂
I have a question does the nail polish really hold the bracelet together I am not sure if I missed anything u said thank u
The nail polish works like a sealant on the knot. This is a little extra security to assure that the knot will not come undone after you’ve completed the bracelet.
Beverly, thank you for your article, I have not attempted a bracelet yet. Can you advise what size are the beads that you use? I’m looking on Amazon, it’s hard to tell what the correct size is.
My beads are the 8mm size which I think is a nice size for bracelets.
Best to use 4-8 mm beads for a woman’s bracelet, and 10-12 for men’s.
Do you always tie a knot, or have you tried crimping the wire?
If you’re using stretch cord, you’ll have to tie a knot. I’ve also made bracelets using wire and crimp beads, but those are not stretchable bracelets.
I’m a beginner at this. I have collected jewelry for the last 25 years and since beading has become so popular, I’ve bought several bead strings on sale at Hobby Lobby also at Etsy. Your tutorials have been very helpful in direction and color.
Thanks so much!
I make stretchy bracelets and I find the best elastic to use and the most comfortable is to cut small strips of old panty hoses and tuck knot under bead with a little glue. Everything else I have tried over time ends up hurting my whist, They are also skin colored.
But you don’t see or feel the cord because there are beads on it…
Thank you for sharing, I enjoyed it. Would you happen to know how to put a clasp on a bracelet? I’m new to this so any help would be greatly appreciated.
Homemade bracelets with clasps are usually strung on wire and held in place with “crimp beads” which you flatten down with a small pliers. Once you have those supplies it’s quite easy to do.
What type of needle do you use? I’ve used a large eye and a folded piece of thin wire but I’m certain there is something else I’m missing.
I usually use beads with a large enough hole that I can just string them onto the wire or elastic I’m using without any need of a needle. I think most of the time when needles are used it’s for stringing the very small seed beads.
I use any small size with about a four inch thread which I tie to the end of the elastic and then pull it through the bead.
Hi Bev, I’m so glad to have found you! I love your blog and really enjoy making things!
Where do you by your charms? I want to make bracelets for sisters and co workers for Christmas. I would like them symbolically special for each.
I just go lucky and found my cute charms on a clearance rack at Michaels Craft Store.
Love it what about children what sizes for stretch bracelets
For a children’s size bracelet, I would try a finished size of about 6″
I’m a grown woman and have only a 6” wrist hard to find things small enough so going to try to make my own
Whats the string call the one you used? And where can I find it at?
I use the Stretch Magic brand and the packaging just calls it “bead and jewelry cord”. I prefer the .7mm size. You should be able to find Stretch Magic at any craft store that has a beading section. I usually buy mine at Michaels.
I make my stretch bracelets the same way as you; with the exception of the scotch tape! I use a clothes pin at the end of my stretch cord! 🙂 Happy beading!
Thank you so much foe this information. I am new to jewelry making. I love fashionable pieces that are different and making my own gives me the opportunity to do just that – be different!! Keep up the wonderful work!!!
I loved your comment It’s Hard To Stop Making Stretch Bracelets, I seriously laughed out loud. I am addicted and a beadaholic!
Your instructions are excellent and easy to follow. Appreciate the advice about
pre-stretching the cord as well as most usable cord size.
Have you tried adding a connector bead to your stretch bracelets? I am wondering how that would work?
Regards,
Sandra
No, I have not advanced to that level yet!
Thanks for this, Bev. I have made them before, but I like your technique better and will give it a try!
I hope these techniques will help you make some fun new bracelets Judith!
Thank you so much, Your instructions are easy to follow. I made my first bracelet, hoping to make more..
So glad I found this.
Thank you!!