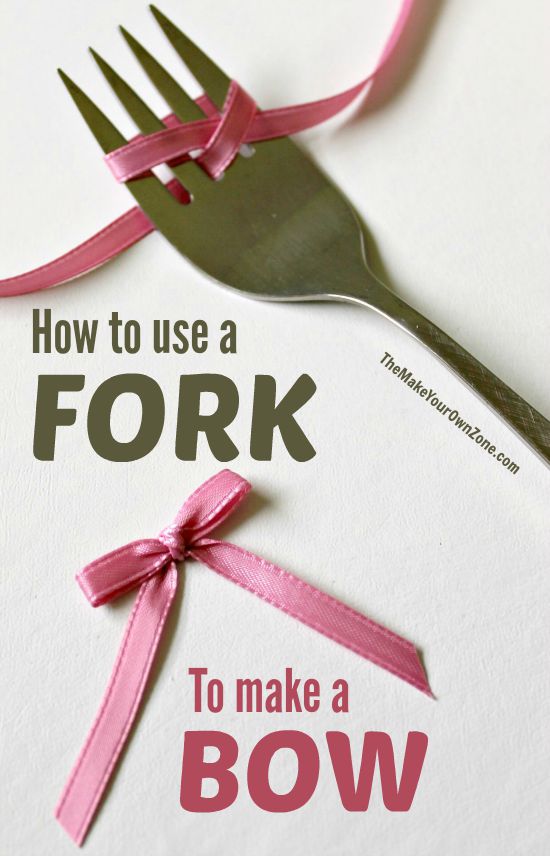
Use A Fork – To Make A Bow!
Making bows can be a fiddly business. We loop, and tie, and pull on skinny little pieces of ribbon and hope when we’re done that we end up with something kind of straight and pretty looking. It can leave even crafty folk feeling rather fumble fingered. Wouldn’t it be nice if we had a little loom or something to make the job easier?
The good news is it’s simple to make a loom for tying bows. Just walk in the kitchen and get a fork! I used a large serving size fork for the pictures in the tutorial below, which made a nice bow about 1.5″ across. You can use a regular table size fork too, but you’ll have very tiny mini-sized bows.
How To Use A Fork To Make A Bow
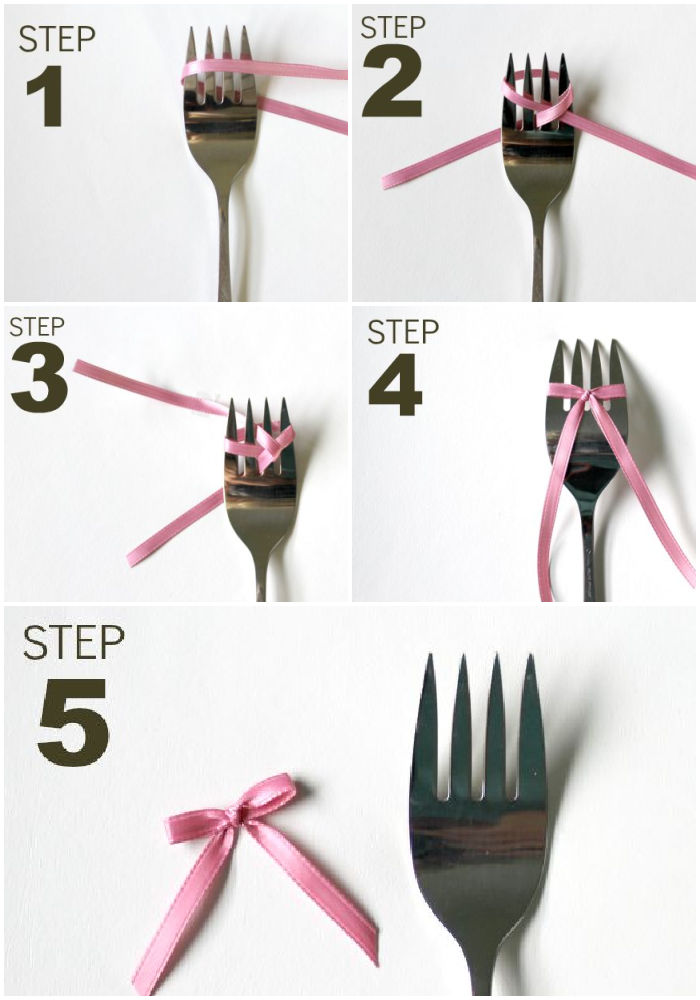
Here are the steps you’ll need to follow for wrapping the ribbon around a fork in a way that will help you make a bow:
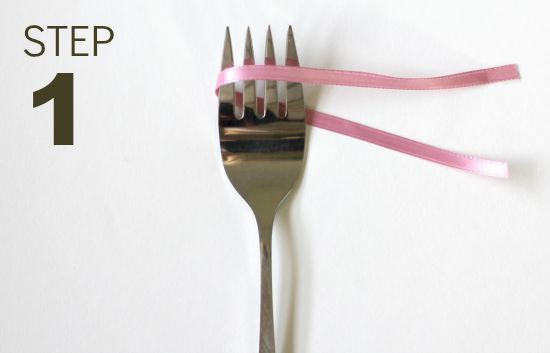
Step 1: Wrap the ribbon around the fork so that one end of the ribbon is laying behind the fork, and one end of the ribbon is in front of the fork.
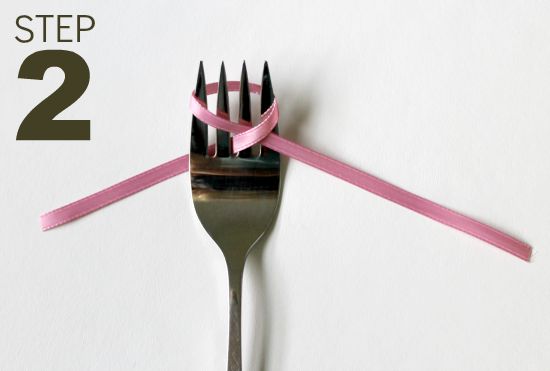
Step 2: Take the end of ribbon that is laying behind the fork, bring it around to the front, and pass it between the middle two tines of the fork, BELOW the ribbon in the front.
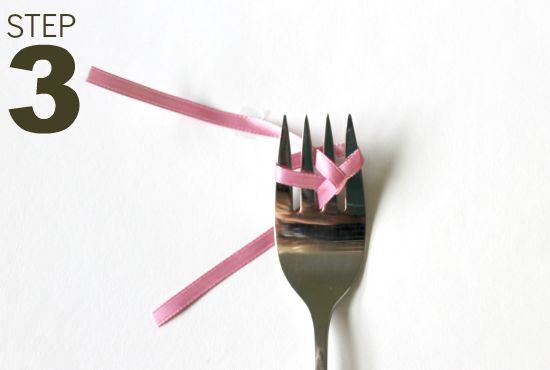
Step 3: Take the other end of the ribbon that is in the front, and pass it between the middle two tines of the fork, ABOVE the rest of the ribbon in the front.
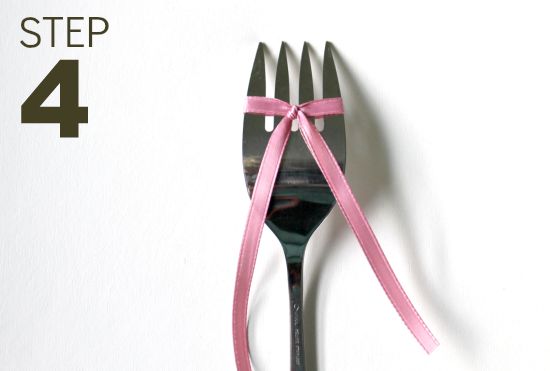
Step 4: Turn the fork over and tie the two ends of the ribbon tightly. I found it helpful in this step, to adjust the ends of the ribbon so they were hanging as I would want them to look in the finalized bow. You may even want this side to be the front of your bow.
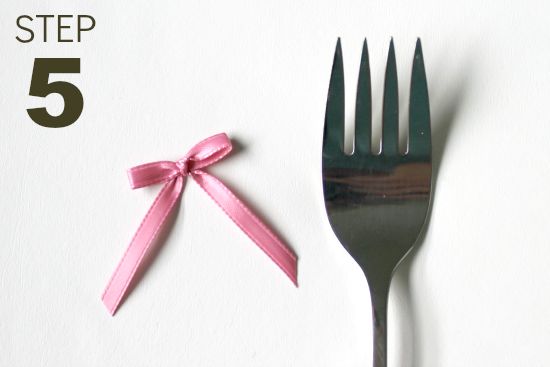
Step 5: Remove the bow from the fork and trim the ends as needed.
Once you know the method, you can branch out from there and use other household items for this trick too. I’ve seen this method done with potato mashers, combs, and even garden rakes! The size of the utensil you use will determine the size of your final bow.
How to use a fork to make a bow
Materials:
- Large serving size fork
- Ribbon
Instructions:
- Wrap the ribbon around the fork so that one end of the ribbon is laying behind the fork, and other end of the ribbon is in front of the fork.
- Take the end of ribbon that is laying behind the fork, bring it around to the front, and pass it between the middle two tines of the fork, BELOW the ribbon in the front.
- Take the other end of the ribbon that is in the front, and pass it between the middle two tines of the fork, ABOVE the rest of the ribbon in the front.
- Turn the fork over and tie the two ends of the ribbon tightly. I found it helpful in this step to adjust the ends of the ribbon so they were hanging as I would want them to look in the finalized bow. You may even want this side to be the front of your bow.
- Remove the bow from the fork and trim the ends as needed.

I have always wanted to know how to tie neat, little bows like this and never – before now – come across how. It just shows you are never to old to learn about new and lovely things; many thanks to you, Beverly!
A great way to make bows!
Thank you so much! Off to make bows. LOL!
You are a creative genius! I wish Id found you years ago. Thank you.
hi. what is the length of the ribbon for making a bow using a fork
Depending on the size of the fork you are using, you will need about 10″ to 12″ of ribbon.
Dear Bev,
I’ve been a flower arranger and involved in crafts for 60 years. This is the first time I’ve made such beautiful bows incorporating different ribbons and different colours.
Thank you for showing me how to successful, beautiful bows. My house and crafts are in for a great change.
Thank you,
Delighted
P.S. please show me any other wonderful tips you have worked out. (Simple, please)