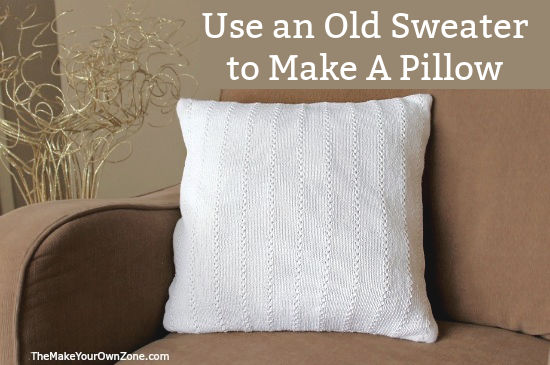
How To Make A Sweater Pillow
I’ve finally gotten around to a craft project I’ve been meaning to get to for a loooong time now. I finally made a pillow from an old sweater!
It’s been over a year since my mom passed an old sweater along to me. The sweater didn’t fit – and wasn’t really my style – but I kept it around anyway with the intention of using it for this particular craft project. And I kept it around, and kept it around, and just never seemed to find the time to sit down and sew. FINALLY, no excuses! I cracked out the sewing machine and had my new pillow done in about 20 minutes. It was a pretty simple project!
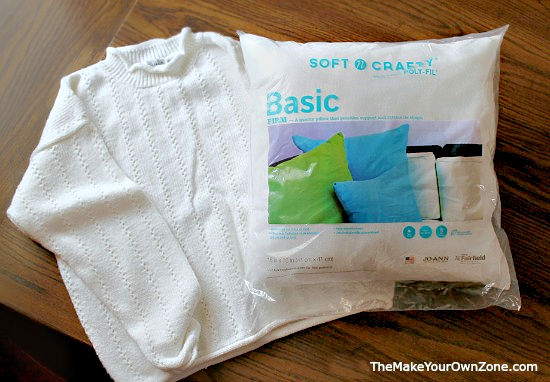
To make a pillow from a sweater, I used a 16″ Pillow Insert![]() (or sometimes called a pillow form) bought at the fabric store but you could be thrifty and re-cover an old pillow too. The size you decide to make your pillow will also depend on the size of the sweater you’re repurposing. You will need to be able to cut a square from both the front and the back of the sweater that’s 1″ larger all around than the pillow you are covering. (This will give you a 1/2″ seam allowance for sewing). For my project I cut a 17″ square.
(or sometimes called a pillow form) bought at the fabric store but you could be thrifty and re-cover an old pillow too. The size you decide to make your pillow will also depend on the size of the sweater you’re repurposing. You will need to be able to cut a square from both the front and the back of the sweater that’s 1″ larger all around than the pillow you are covering. (This will give you a 1/2″ seam allowance for sewing). For my project I cut a 17″ square.
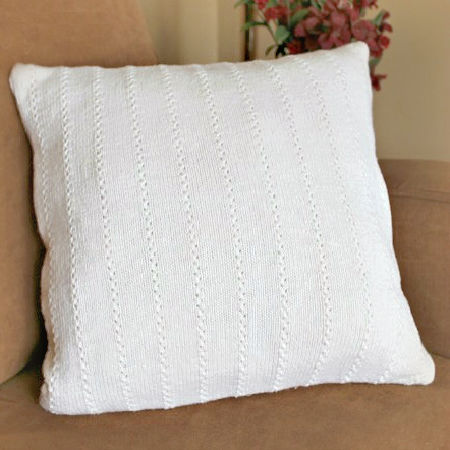
The sweater I used was a basic off-white sweater with just a little bit of a cable knit look to it. You could perhaps use a sweater with more of a pattern but remember that can create a few more challenges when sewing to have stripes or designs or whatever lining up correctly at the seams. I’ve also seen this type of project done with Christmas sweaters for the holidays which is a really cute idea too.
How To Make A Sweater Pillow
To make your sweater pillow you will need the following supplies:
- An old sweater
- A pillow insert or an old pillow to recover
- A yardstick or measuring tape
- Pencil
- Sewing pins
- Sewing machine
- Hand needle and thread
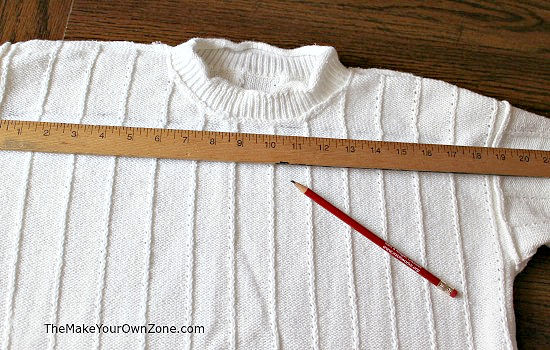
1. To begin, turn your sweater inside out. Lay the sweater on a flat surface and smooth it out so there are no wrinkles.
2. Using your yardstick (or a measuring tape) measure and mark off a square that is 1″ bigger than the pillow you are covering.
3. Cut out the square, cutting through both layers of the fabric (the front and back of the sweater).
4. Leaving the two layer together with the right side of the fabric facing in, pin the two layers together around each side.

5. Using your sewing machine, sew the two layers together around three of the sides using a 1/2″ seam allowance. On the fourth side, sew only half way, leaving the remaining half of that side open.
6. Trim any of the seam allowances as needed, and then turn the piece right side out.
7. Insert the pillow form (or the pillow you are re-covering) in through the opening.
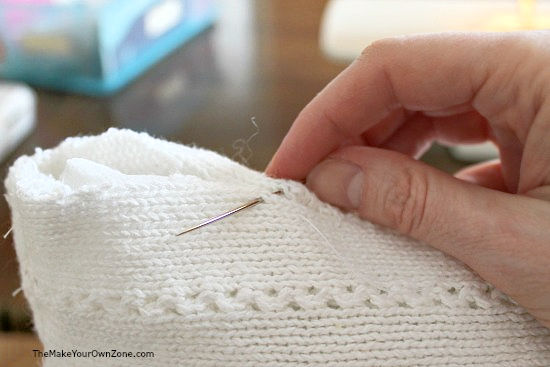
8. Sew up the opening in the last seam by hand to close the pillow.
And now you have made your own sweater pillow! Give yourself a pat on the back, especially if you’ve used an old sweater that you just had laying around because you’ve created a pretty close copycat of pillows (like these sweater pillows![]() ) that would cost you more money!
) that would cost you more money!

How To Make A Sweater Pillow
Equipment:
- Yardstick or Measuring Tape
- Pencil
- Sewing pins
- Hand needle and thread
- Sewing Machine
Materials:
- An old sweater
- Pillow insert (or old pillow to recover)
Instructions:
- To begin, turn your sweater inside out. Lay the sweater on a flat surface and smooth it out so there are no wrinkles.
- Using your yardstick (or a measuring tape) measure and mark off a square that is 1" bigger than the pillow you are covering.
- Cut out the square, cutting through both layers of the fabric (the front and back of the sweater).
- Leaving the two layer together with the right side of the fabric facing in, pin the two layers together around each side.
- Using your sewing machine, sew the two layers together around three of the sides using a 1/2" seam allowance. On the fourth side, sew only half way, leaving the remaining half of that side open.
- Trim any of the seam allowances as needed, and then turn the piece right side out.
- Insert the pillow form (or the pillow you are re-covering) in through the opening.
- Sew up the opening in the last seam by hand to close the pillow.
