DIY Gift Bag Wall Art
Over the years I’ve found dollar stores to be a great way to get all kinds of things at a low price. I would have to say though that one of my most favorite things to buy at the dollar store is gift bags. Sometimes I make my own gift bags, but there are plenty of times I just pop over to the dollar store and get the bag I need. But did you know there’s another way to use those frugal little bags besides just gift giving? You can use gift bags to make your own DIY artwork too!

It doesn’t take much crafty expertise to get the job done either. If you can cut your gift bag to a size to fit inside a picture frame, then you can do it!
To get started you’ll need a gift bag with a cute picture or design on the front and a picture frame of a size to go around it. Like me, you might get lucky and find just the size frame you need at the dollar store too and then the whole project will only cost you $2.
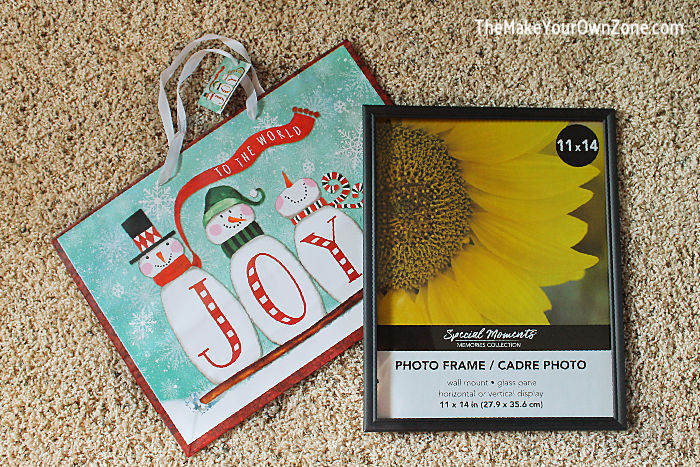
So how do you know where to cut your gift bag so that it fits in the frame? I think the easiest way to do that is to use the glass inside the frame as your cutting template. This is my preferred way because you can see through the glass which in turn makes it easier to see what you are doing.
Open up any prongs on the frame that are holding the glass in, and then remove the glass. Remove any ribbon or string handles from your gift bag and make sure your gift bag is laying flat. Then lay the glass from the frame on top of the gift bag, and position it so that the gift bag design is nicely centered under the glass. Trace around the glass with a pencil.
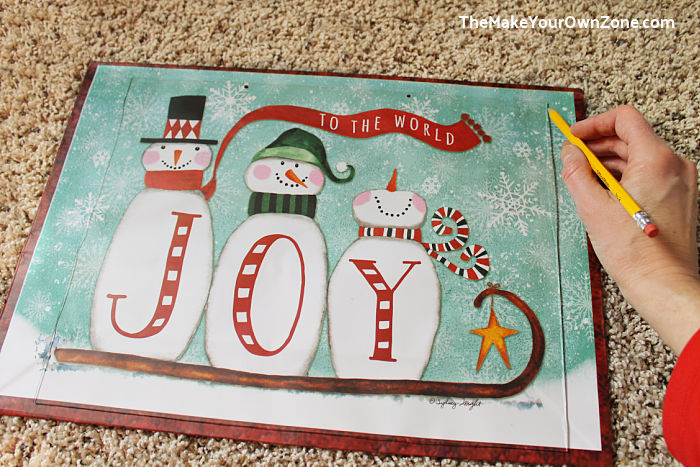
Now you may noticed in the picture above, that the two little holes at the top of the bag from the ribbon handles are within my cutting area. And at the bottom, a little bit of the brown edge on the bag is within my cutting area too. BUT – if you’re using the glass as a template, there’s usually about 1/4″ or so around the edge that the frame will cover so you’ll want to be mindful of this when positioning your glass. This can work to your advantage if you want to keep something covered (like the holes at the top), but you don’t want to inadvertently cover part of the design that you want showing either.
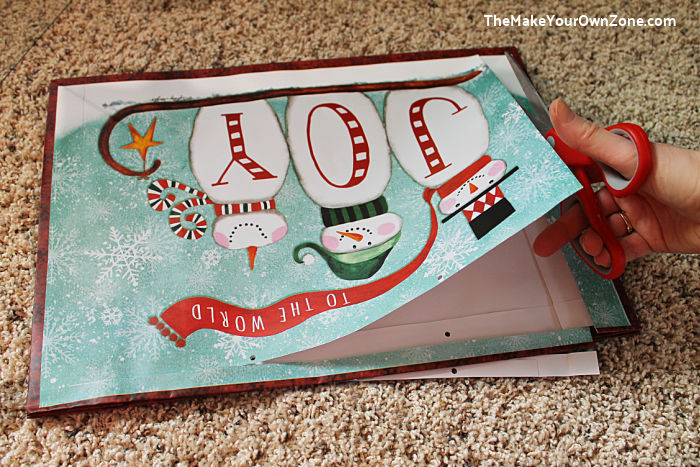
Next, you’ll cut out the picture on the gift bag, using the pencil line that you drew around the glass as your guide.
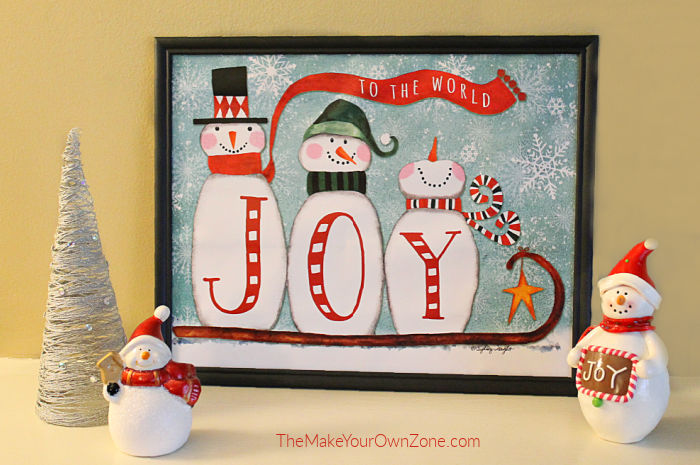
To finish things up, just put your new gift bag “picture” inside the frame. Operation DIY Dollar Store Decor is complete!
{You can also make your own String Christmas Trees like the one pictured above}
This gift bag art is fun to do around Christmas time when there are lots of holiday gift bags to choose from and many of us are looking for ways to add a few more decorations around the house. But of course this project can work for any other holiday or special occasion – OR – no special occasion at all! There are plenty of non-seasonal gift bags with pretty designs too that can be used for a frugal and simple way to decorate a wall or mantel all year long. Any time is a good time to Make Your Own 🙂
DIY Gift Bag Wall Art
Materials:
- 1 Gift Bag (any size and pattern of your choice)
- 1 Picture Frame (in a size to correspond with your gift bag)
- Pencil
- Scissors
Instructions:
- Loosen any prongs on the back of the picture frame that are holding the glass in place, and remove the glass. (You will be using the glass as your cutting template).
- Lay your gift bag flat and place the picture frame glass on the bag so that it is nicely centered over the design on the bag you wish to cut out and frame. You may need to remove the handles from the gift bag for this step too. Using your pencil, trace around the glass. Put the glass back in the frame.
- Using your scissors, cut along the pencil line that was drawn.
- Place the cut-out gift bag piece into the frame to complete your DIY wall art.
Notes:
More Crafty Christmas Ideas:
