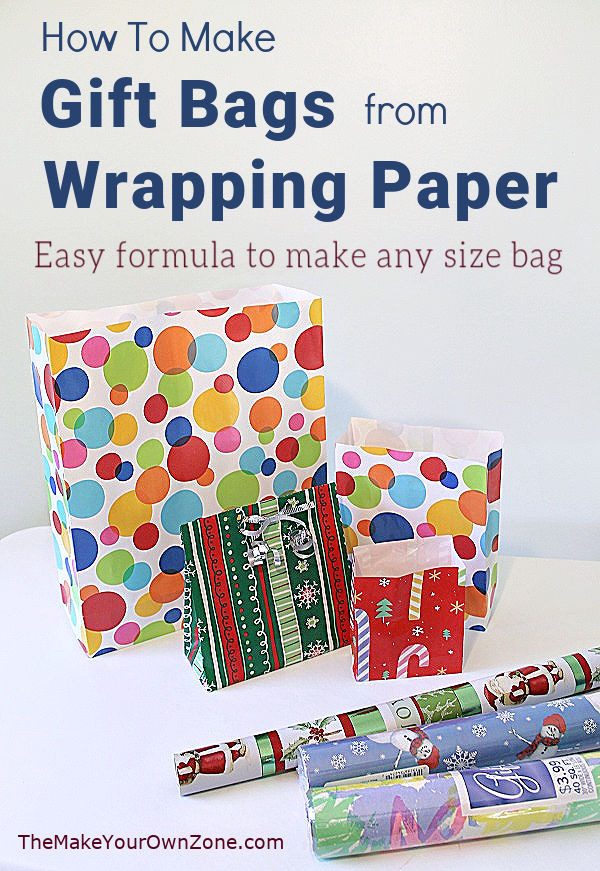
Make A Gift Bag From Wrapping Paper
During a recent closet cleaning my Dad discovered several large rolls of gift wrap in his house that he knew he would most likely never use. Rather than just toss them out, he did what most parents of grown children do. You check if the kids want it. I’ve done the very same thing! But in this case I said Yes, I’ll take the gift wrap and decided I would figure out how to make gift bags from wrapping paper. It turns out it’s pretty easy to do!
Now those of you that are quick on the uptake might be thinking – Hey, if you’re going to get out the wrapping paper, scissors, and tape, well then just wrap the present! Why bother to make a gift bag? My answer to that is “oddly shaped gifts”. Not everything you want to wrap is easy to wrap (which is why gift bags have become so popular!) Having this quick strategy to make your own gift bags lets you be frugal and use up extra wrapping paper and still get your gifts covered in a way that doesn’t turn out all lumpy looking.
So with just a few easy folds and a bit of tape, you’ll be able to create a handy little gift bag. My method allows you to make larger or smaller bags too using a simple formula. You can get started by watching the video below, and complete written steps and photos are included below too.
How To Make Gift Bags From Gift Wrap
Here are the steps you’ll follow to make a gift bag using gift wrap paper. In addition to having some wrapping paper you will need some clear tape and a scissors.
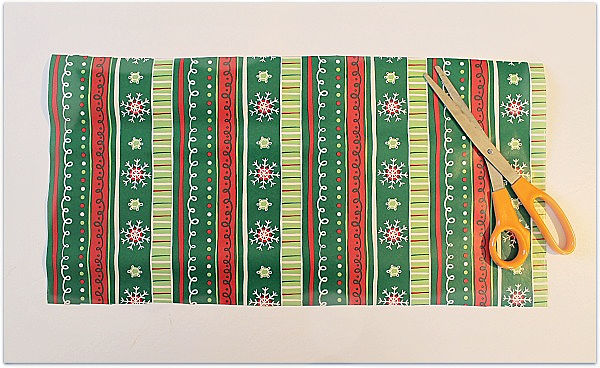
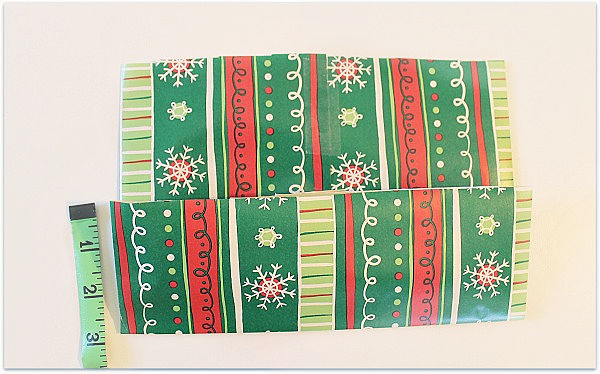
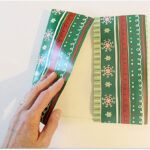
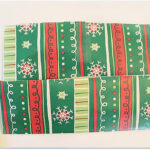
Step 1: Begin by cutting a piece of gift wrap twice as wide as it is high. In the pictures here I’m using a piece 18″ x 9″
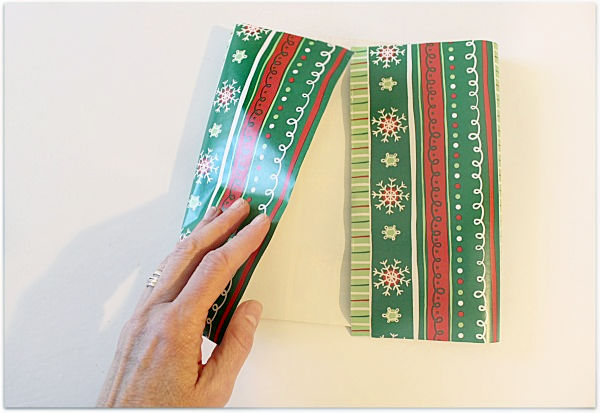
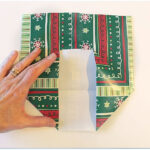
Step 2: Turn the paper over so the right side is facing down. Then bring both sides towards the middle and overlap them a bit.
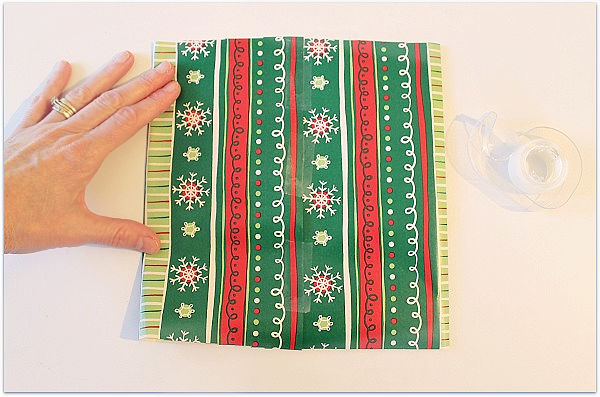
Step 3: Tape (or glue) the piece together in the middle where it is overlapping. Press down on the outside edges to crease them.
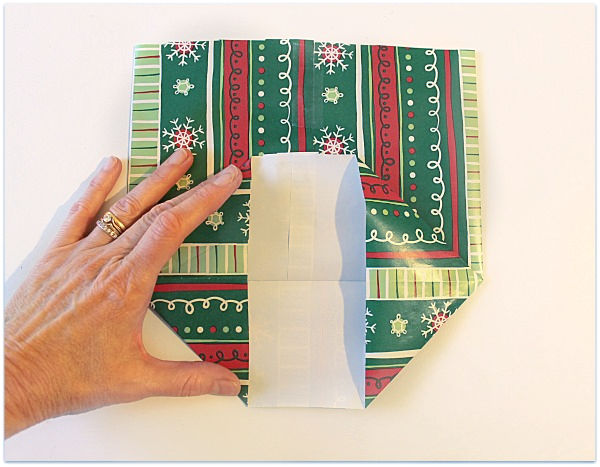
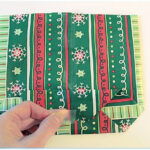
Step 4: Next you will fold up one third of the bottom. In this example of an 18″ x 9″ piece, I am folding up 3″.
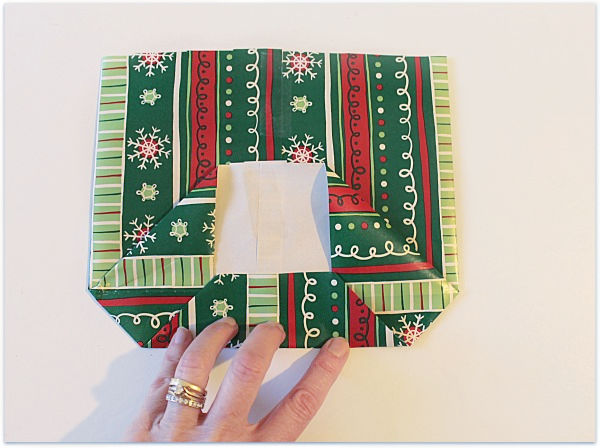
Step 5: Open up the folded area as shown below and crease the new folds. I usually add a little extra tape inside on the top half to secure the seam area.
Step 6: Then fold up from the bottom, and down from the top, meeting in the middle and overlapping a bit, and tape down. This is the bottom of your bag so don’t be shy with the tape and get everything taped down well.

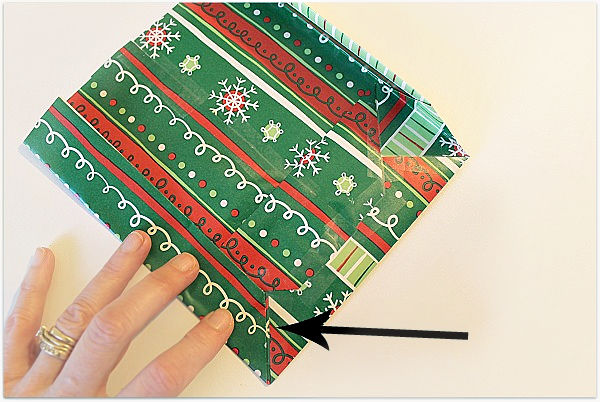
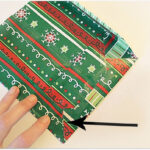
Step 7: Now you will fold in from the sides as shown below. I line things up in the bottom corners when I do this as shown by the arrow. This step is just to help make a few creases to create side gussets on the bag when you open it up.
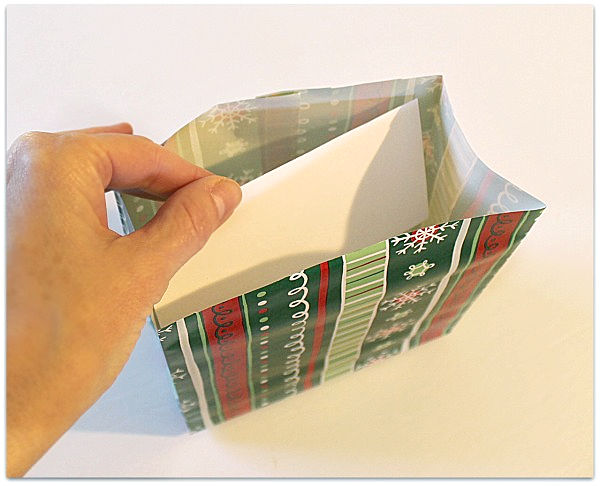
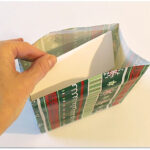
Step 8: Finally, open everything up. You will need to carefully make the side folds a little more crisp and get them going in the right direction. You may want to make some of the other folds more crisp too. If you would like a sturdier bottom for your gift bag, cut a piece of light cardboard to the appropriate size (index cards work well on smaller bags) and lay it in the bottom of the bag.
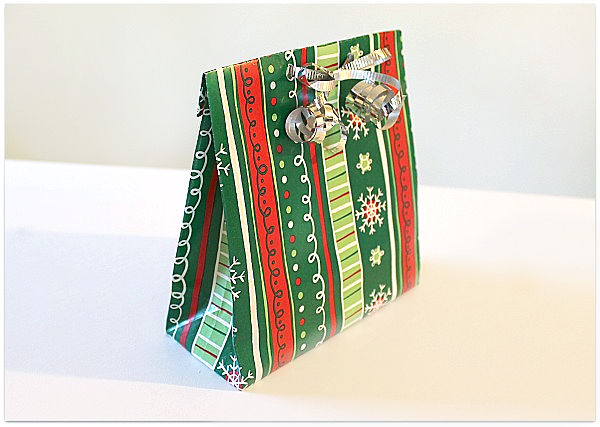
Step 9: Once your gift is in the bag you can secure the top either by simply folding it over and taping it, you can be more decorative and punch a couple holes in the top and thread a ribbon through to tie the bag shut. Because wrapping paper is not as sturdy as a store-bought gift bag, folding the top over in some way seems to work the best for closing the bag.
My favorite thing about this strategy is that the formula works whether you want a large bag or a small bag, and is an easy way to use up scraps and leftovers of wrapping paper. As long as your piece is about twice as wide as it is high, and you fold up about one third to make the bottom, you’ll end up with a gift bag with good proportions.
That being said, maybe you want to make a short squatty bag, or a tall skinny bag. This process can still work for those situations too. You can adjust the ratio of the width to the height as needed, and still use the same type of folds to make the bottom and sides.
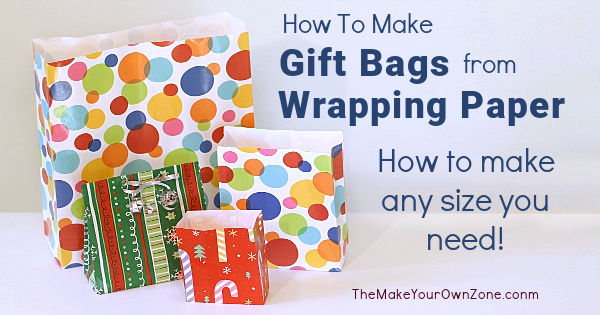
One more quick tip is that many gift wrap rolls are 30″. If you cut off a 15″ piece from the roll (so your piece is twice as wide as it is high) you will have the perfect size piece to make a nice medium sized gift bag. (The largest of the four bags shown in the photo above is the 30″ x 15″ size.)
Gift Bags made using Gift Wrap Paper
Equipment:
- Scissors
- Tape
Materials:
- Gift wrapping paper
- Small piece of cardboard (optional for bottom of bag)
Instructions:
- Begin by cutting a piece of gift wrap twice as wide as it is high. For example cut a piece 18" x 9".
- Turn the paper over so the right side is facing down. Then fold both sides towards the middle and overlap them a bit. Tape the piece together in the middle where it is overlapping. Press down on the outside edges to crease them.

- Next you will fold up one third of the bottom. For the example of an 18" x 9" piece, you would fold up 3".
- Open up the bottom folded area as shown and crease the new folds. Add a little extra tape inside on the top half to secure the seam area.
- Then fold up from the bottom, and down from the top, meeting in the middle and overlapping a bit, and tape down. This is the bottom of your bag so tape everything down well.
- Now you will fold in from the sides, I line things up in the bottom corners when I do this as shown by the arrow. This step is just to help make a few creases to create side gussets on the bag when you open it up.
- Finally, open everything up. You will need to carefully make the side folds a little more crisp and get them going in the right direction. You may want to make some of the other folds more crisp too.
- If you would like a sturdier bottom for your gift bag, cut a piece of light cardboard to the appropriate size (index cards work well on smaller bags) and lay it in the bottom of the bag.

This gift bag DIY is awesome! I appreciate the step-by-step tutorial and video resources. I agree, using gift bags is much easier than wrapping presents.
Thanks this was lovely !