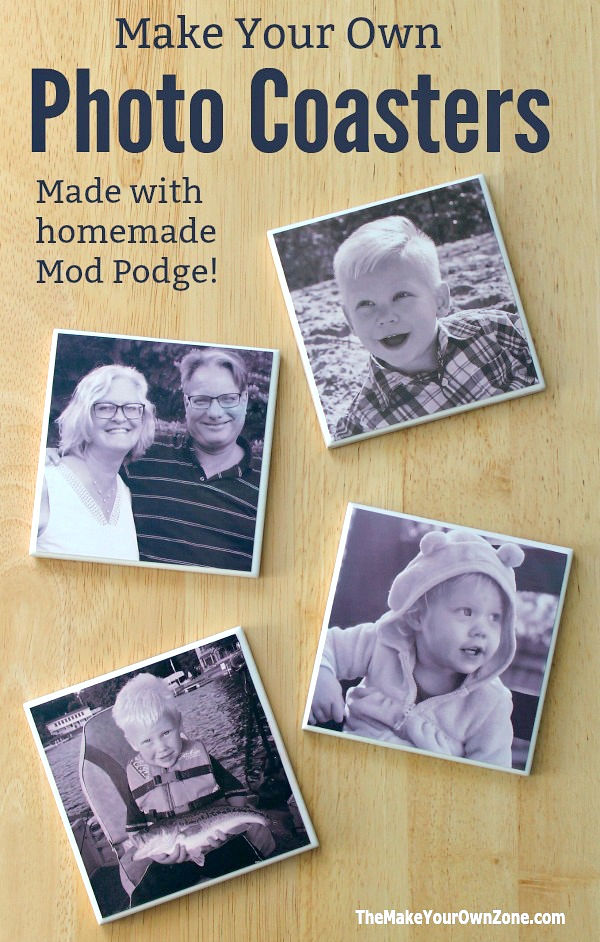
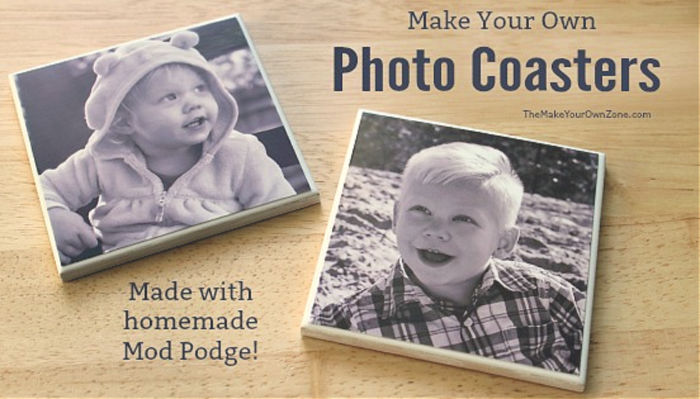
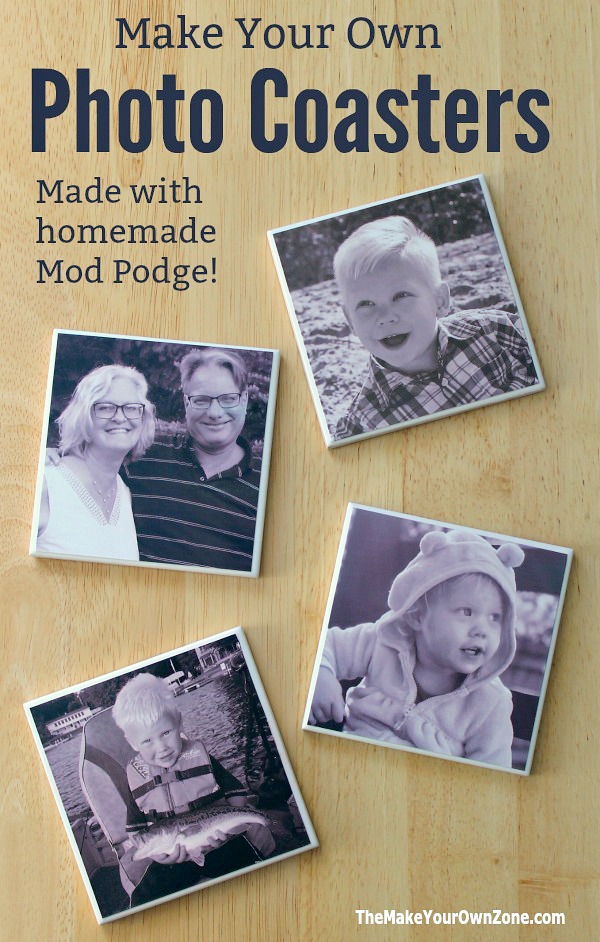
DIY Photo Coasters
Ever since I first started making my own mod podge several years ago, one of my favorite ways to use it has been to make homemade ceramic tile coasters. Seriously, I look for excuses to make more DIY coasters. I have them for different seasons and holidays and make them for gifts and have them scattered here and there all around the house.
This time around though, I decided to try something just a little different for my next batch of coasters. Instead of using scrapbook paper, I wanted to try making some photo coasters. Would it work?
Now because I like my projects to be frugal projects, I wanted to see how this would work using photos I printed at home using my own computer printer, and I wanted to use my homemade mod podge. If it didn’t work using those two criteria, then it would be back to scrapbook paper as usual.
You can find the recipe for my homemade mod podge here: How To Make Your Own Mod Podge
You can read my updated post on making coasters here: How To Make Your Own Tile Coasters
Using Photos on DIY Tile Coasters
For all my coasters I used black and white photos printed on 4×6 photo paper, which I then trimmed down to size to fit on 4″ square ceramic tiles.
And here’s what I discovered.
A coat of homemade mod podge under the photo, and then over the photo, changed the black and white tones slightly into more of a sepia toned photo (there seemed to be some new pinkish understones to the photo).
Now, was this a problem? Actually, no! I liked the slightly subtler tones and hubby agreed saying they looked kind of “arty”. And honestly, for someone who had not seen the photos before it went on the coasters, they would probably not even pick up on this slight change to the black and white quality.
However if you want to stay more true to the black and white tones, you can try not putting on the top layer of mod podge, and instead just spraying on a couple layers of the sealant. In the comparison photo below you can see the difference between the two finishes.
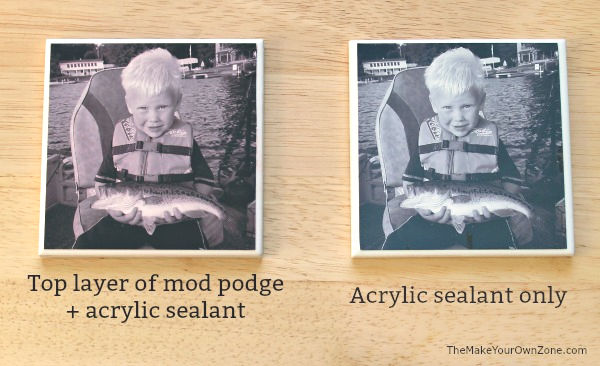
This is one of my favorite pictures of my little grandson by the way, after he had caught his first fish a couple years ago. When I asked him about it later he told me “Yup, I caught a big ole bass”. Such a cutie patootie 🙂
So yes, I considered this project a success with the homemade mod podge and just gave myself a reason to make a whole bunch of new coasters (like I needed a reason – haha). As cute new photos come along, I’ll be ready to turn them into coasters!
How To Make Homemade Photo Coasters
Here are the steps to make these DIY tile coasters using photos. As you’ll see, none of these steps is hard or complicated, but you need the patience to let things dry in between coats. (printable instructions are at the end of this post too).
#1 – Brush a layer of homemade mod podge on your ceramic tile
#2 – Lay on the photo, pressing down slightly so it sticks
#3 – Let dry several hours, or even overnight
#4 – Brush a light layer of homemade mod podge over top of the photo
#5 – Let dry several hours, or even overnight
#6 – Spray on a coat of Acrylic Sealer
#7 – Let dry several hours
#8 – Stick a piece of adhesive backed felt to the underside of the coaster
(Note: I have not tried this yet with color photos so do not know how that process might turn out. I have also not tried this with store bought mod podge to know those results).
Also if your ceramic tiles have tan sides and/or have a barcode printed on one of the sides, you may wish to paint them with some white paint.
Once again, I was happy to be able to create my coasters with my frugal homemade mod podge. I love that I can do so many of my crafty projects with my thrifty alternative. Don’t be afraid to give it a try – I think you’ll find it works very well and it’s a great money saver too. A couple projects you can try are:
I hope you have fun looking through your family photos and finding the ones that are special to you for this project too.
I know I’m already enjoying looking at those happy smiling faces on my new coasters. Hopefully I’ll actually be willing to set my cup of tea on them!
How To Make DIY Tile Photo Coasters
Materials:
- 4"x4" White Ceramic Tiles
- Black & White Photos on Glossy Paper
- Mod Podge (See notes below for a DIY version)
- Foam Applicator Brush
- Spray Acrylic Sealer in Gloss Finish
- White Felt with adhesive back
- White Paint (as needed)
Instructions:
- Trim your photos as needed to fit the size of your tiles.
- If your ceramic tiles have tan sides or an obvious barcode printed on one of the sides, you may wish to paint the sides with white paint.
- Using the foam brush, brush a light coat of mod podge onto the tile and then lay your photo on top, pressing down a bit so the photo sticks to the tile.
- Let dry for several hours, or preferably overnight.
- Next, brush a light coat of mod podge over top of the photo. Once again, let this dry for several hours, and preferably overnight.
- Spray a light coat of acrylic sealer over your coaster to finish up the top of your coaster.
- Finish up the underside of your coaster by cutting a piece of the adhesive backed felt to the size of your coaster and sticking it on.
Notes:

Does the photo have to be done with a laser jet
I just used my little ink jet printer, so I believe any home printer would work OK for this project.
Thank you so much for that wonderful guide! I really enjoy all the modern digital photos and other related things but for me, absolutely nothing beats printed pictures that you can touch with your hand and look with your own eye and not on the screen! I guess I’m just getting emotional as I grow older but oh, well. What can you do, haha! I’m definitely trying to make one of those but first I have to do spare copies of the photos because I’m pretty bad at such things and will definitely ruin a few photos at the start!
I also still love printed pictures and make it a point to always keep some here and there throughout the house. They will always bring a smile to my face 🙂