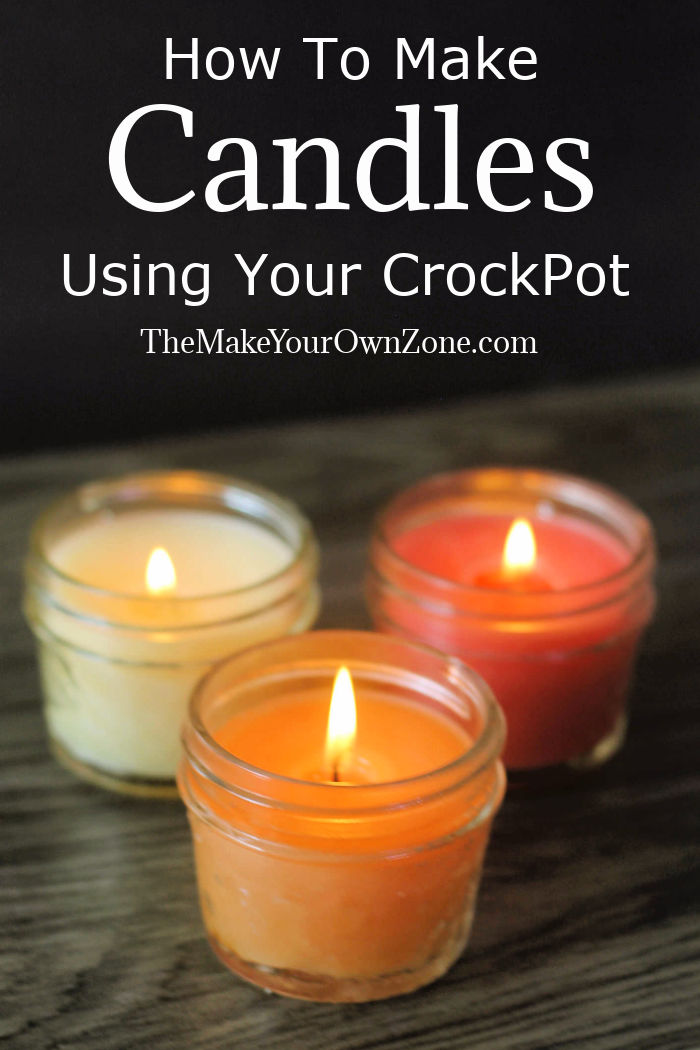
How To Make Candles Using A Crockpot
This post may contain affiliate links. Please read my disclosure policy for more information.
One of my favorite kitchen appliances has always been my crockpot (also known as a slow cooker). It’s been a very handy tool for those times when you need to cook something, but you’d kind of like to ignore it for several hours too. But this week I learned that crockpots can have uses beyond food. Did you know you can use a crockpot for candle making? Yes you can!
Supplies for Homemade Candles in a Slow Cooker
It turns out that a crockpot can indeed be a useful tool for making your own candles because it provides a slower, steady heat that works well for melting wax without too much hands-on attention. And it’s easy to make several candles at once with this crockpot method because the wax melts directly in the container that will hold your finished candle.
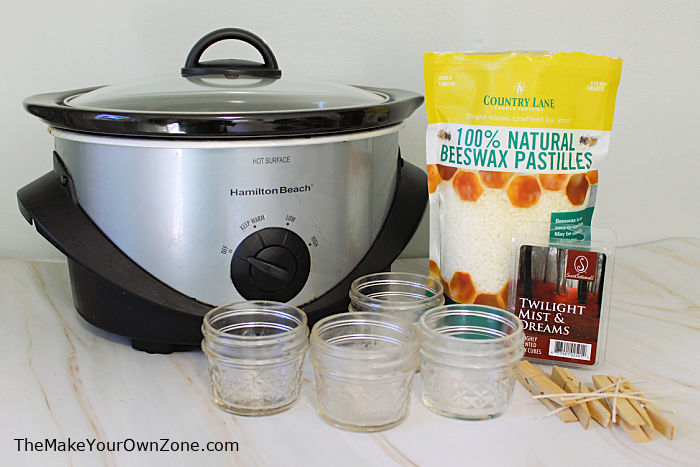
Here are the supplies needed for this candle project (and I was lucky to have everything on hand in my craft stash already!) Here’s what you’ll need:
- Glass Jars – I used a 4 pack of 4 oz mason jars
- Wax – I used Beeswax pastilles which are easy to spoon into the jars
- Scented wax cubes – These are optional, but the scented wax cubes made for electric wax warmers are an easy way to add color and fragrance
- Candle Wicks – I cut my 8″ wicks in half and didn’t use the metal tab
- Clothespins – I like to use wooden spring clothespins to hold the wick while the candle hardens (or an ink pen with a clip works too)
- Crockpot – I could fit all four of my jars into my 3 quart slow cooker
- Scissors – To trim the wicks when your candles are complete
How To Make Candles in the Crockpot – 6 Easy Steps
Once you have your supplies gathered, you can begin making your DIY candles in the slow cooker. Here are the steps I used:
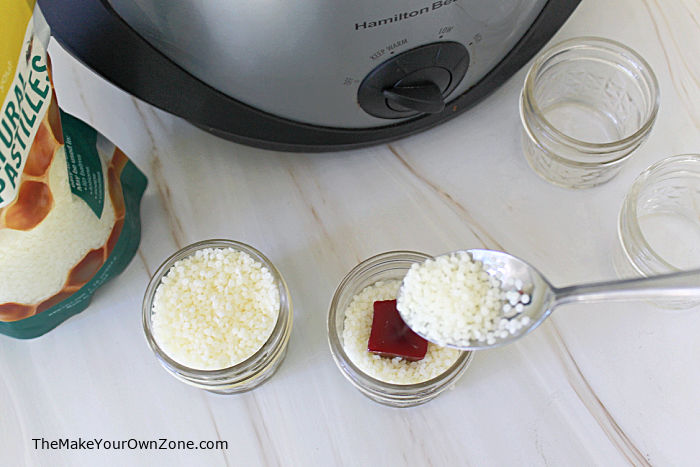
Step 1: Fill the jars with wax
To begin, fill each of your jars to the top with the beeswax pellets. I used about a 1/2 cup of pellets in each of my 4 oz jars. For an easy way to make colorful candles and have a bit of fragrance, you can add one scented wax cube to a jar too. The darker the color of your wax cube, the more color it will add. I did this for two of my candles by filling my jar half way with the beeswax, adding the cube, and then continuing to fill the jar with the rest of the beeswax.
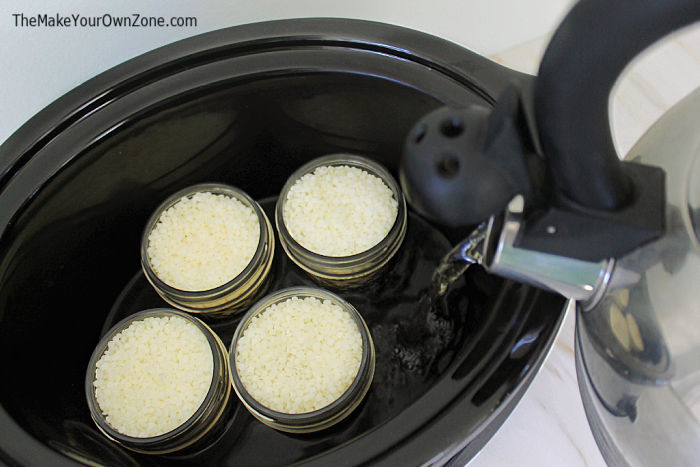
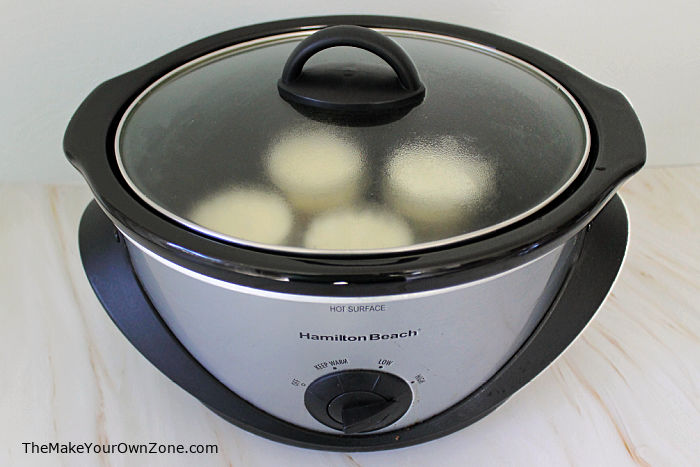
Step 2: Put the jars in the slow cooker with some boiling water
Place your wax filled jars into your slow cooker. Then add boiling water to the crockpot, so that the water comes about half way up the outside of the jars.
Step 3: Cover the crockpot and use the high setting to melt the wax
Once the jars and water are in the crockpot, put the lid on and set the heat to “High”. Let the jars heat in the crockpot until the wax is melted. This will take about an hour.
Step 4: Add more wax if needed
The wax level in the jar will be a little lower once it has melted. You can add a few more spoonfuls of wax to the jars while they are still in the crockpot, and it will take another 15 minutes or so for the additional wax to melt. I did this a couple of times to make the wax level a little higher in my jars.
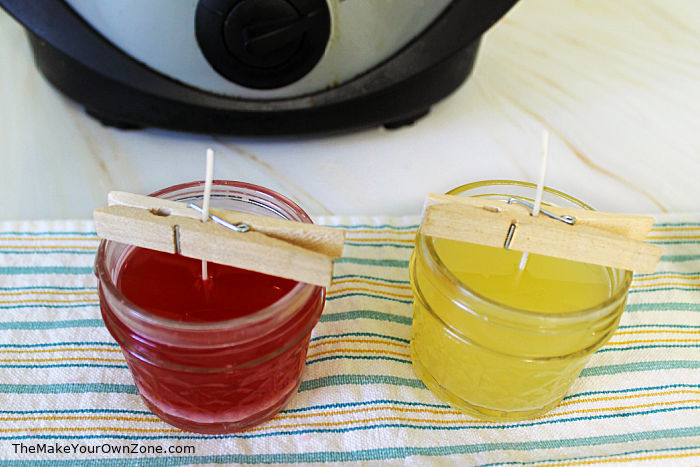
Step 5: Remove the jars of melted wax from crockpot and add wicks
When you are happy with the wax level, remove the jars from the crockpot and place them on a towel or hotpad. Add a wick to each candle. I used a 4″ wick for each of my 4 oz jar candles, and held the wick in place using a wooden clothespin.
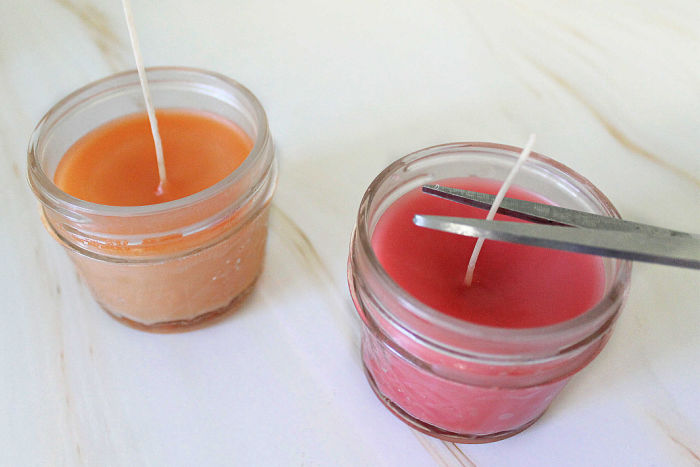
Step 6: Let the wax harden and then trim the wicks
After the candles are out of the crockpot, you just need to let the wax harden. You might find that the wax sinks a little bit in the middle of your candle. This always happens to me, and I’ve heard it can be because the wax hardens too quickly (this would make sense in my home that I keep rather cool!). I don’t find it to be pronounced enough to be a problem and don’t let it worry me. Finally, you will finish up by trimming down the wick to about a 1″ length.
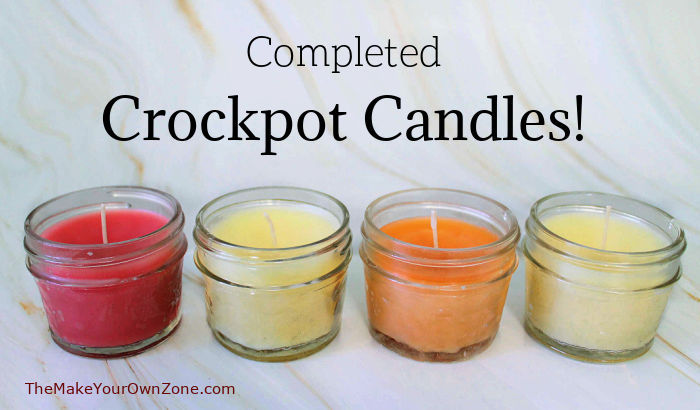
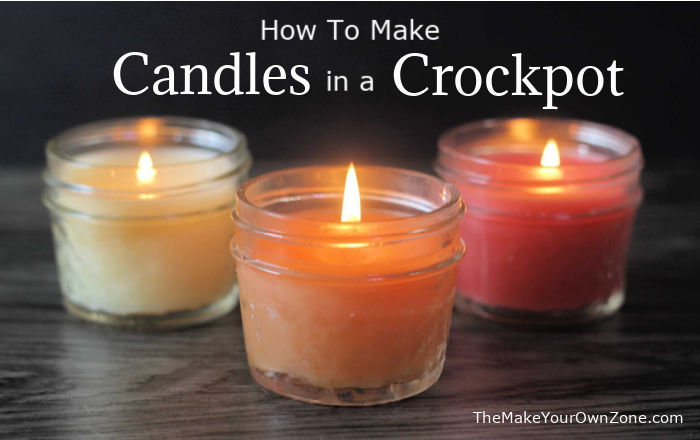
And now your candles made in the crockpot are complete! Here are my four finished candles, two of which had an added scented wax cube for color and fragrance and two that were made with just the beeswax.
More Variations for Slow Cooker Candles
As is often the case with homemade projects, there’s usually variations on the original that you can try and that’s also the case with slow cooker candles. Here are a few ideas:
Larger Candles – Even though I liked using the 4 oz jars, you could try making larger candles in bigger jars.
Natural Candles – Don’t add any scented wax cubes and just enjoy making all natural beeswax candles.
Natural Scents – Try adding essential oils for scent after the wax is melted. I tried mixing 40 drops of orange essential oil with 1 teaspoon of melted coconut oil and then adding it before the wax hardened. However this didn’t seem to add much scent so I can’t say for sure how much essential oil to add.
Frugal Candles – You could try a frugal version by chopping up old candles to use for the wax to melt in your jars.
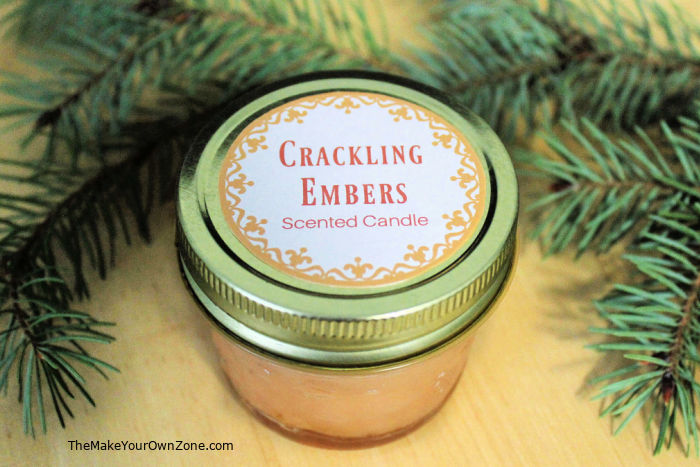
Use as Gifts with Decorative Lids – The 4 oz mason jars are usually sold with metal screw-on lids. Once your candle is finished, you could put on the lid, add a decorative label on top, and you’ve got a cute DIY gift. If you use a scented wax cube, you could label your candle with the fun names these cubes often have. One of my scented wax cubes was called Crackling Embers, which is kind of a fun name for a DIY scented candle!
Have Fun Making Your Own Candles In The Crockpot!
If you’ve never made your own candles before, this crockpot method is a simple way to give it a try. The slow cooker does a lot of the work for you! Having the candles in jars is a convenient way to display and light them too, adding the perfect little touch of coziness to your home.
More Easy DIY Crafts:
DIY Crockpot Candles
Equipment:
- Crockpot (also called Slow Cooker)
- Clothespins
- Scissors
Materials:
- 4 Glass 4 oz Mason Jars
- 3 cups Beeswax Pellets
- 4 Scented Wax Cubes (optional for color & fragrance)
- 4 Candle Wicks (I used a 4" piece per candle)
Instructions:
- Fill each of your jars to the top with the beeswax pellets. Begin with about 1/2 cup of pellets per 4 oz jar. For an easy way to add color and fragrance, you can add one scented wax cube to each jar too. The darker the color of your wax cube, the more color it will add. When using a scented cube, fill your jar half way with the beeswax, add the cube, and then continue to fill the jar with the rest of the beeswax.
- Place your wax filled jars into your slow cooker. Then add boiling water to the crockpot so that the water comes about half way up the outside of the jars.
- Once the jars and water are in the crockpot, put the lid on the crockpot and set the heat to "High". Let the jars heat in the crockpot until the wax is melted. This will take about an hour.
- The wax level in the jar will be a little lower once it has melted. You can add a few more spoonfuls of wax to the jars while they are still in the crockpot, and it will take another 15 minutes or so for the additional wax to melt. I did this a couple of times to make the wax level a little higher in my jars.
- When you are happy with the melted wax level, remove the jars from the crockpot and place them on a towel or hot pad.
- Add a wick to each candle. I used a 4"wick for each of my 4 oz jar candles, and held the wick in place using a wooden clothespin. (Ink pens with clips can work too if you don't have any clothespins)
- Let the jars sit until the wax has completely hardened. Once the wax has hardened, use a scissors to trim the wick down to about a 1" length.

I just made four candles with wax beads and added two wax cubes for color and scent. So easy doing it in the crockpot. I love it. Thank you for the directions
What a great tutorial, Bev. I’ve made many scrap candles over the years (linked below) and never considered using a slow cooker. I do like using jelly glasses and pint canning jars because they handle heat well.
A couple comments/questions for you: First, the dip in the middle is because the middle cools more slowly. I wonder if letting the candles cool very slowly by letting the wicked (one syllable, not two!) candles cool in the hot water, covered, and unplugged.
Second, a wick without a metal base will result in fewer burning hours, because when the wax gets liquid near the bottom of the jar, the wick tips over and drowns. I’ve found that I can reuse metal bases by using an awl or nail to reopen the crimp to get the old wick fragment out and put a new wick in. A squeeze with pliers or crimping tool restores the crimp. With a bit more fussing, I can make a base from a bit of “disposable” aluminum baking pan or tin can.
Thanks for those candle making tips Michal!