DIY Tile Coasters with Scrapbook Paper
This post may contain affiliate links. Please read my disclosure policy for more information.
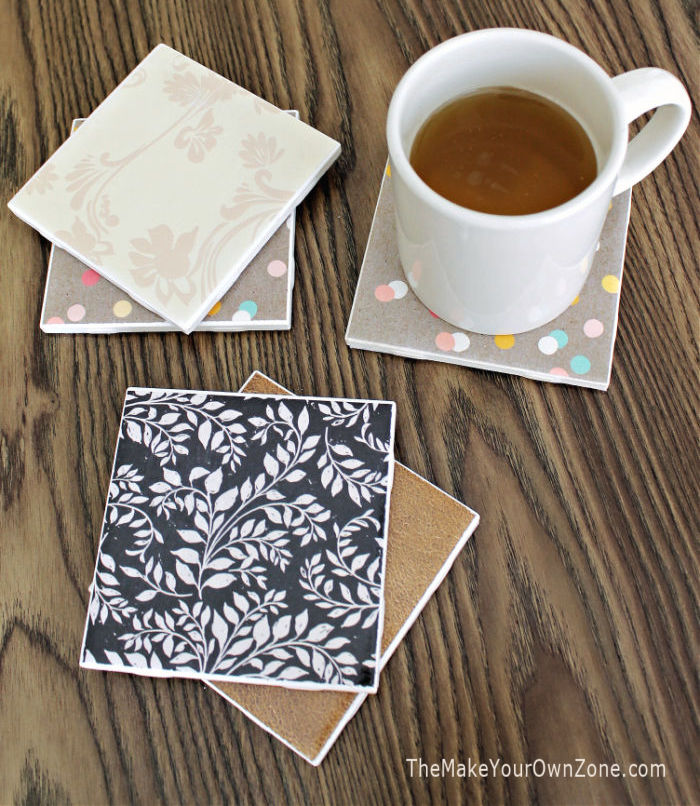
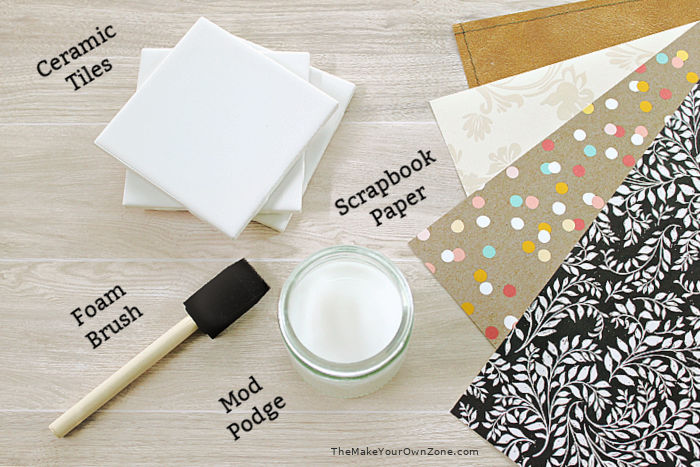
One of my favorite crafts is to make my own tile coasters. Not only are they pretty and practical, but it’s a frugal craft too. The supplies you’ll need are ceramic tiles, pieces of scrapbook paper, Mod Podge, and a small foam brush. To put on the finishing touches you’ll need a spray acrylic sealer and adhesive-backed felt. But all of these materials are easy on your wallet, especially if you use homemade Mod Podge like I do!
Materials Used to Make Homemade Tile Coasters
Here’s my list of materials for these DIY tile coasters with some price info too. The only item you’ll spend a little more on is the Acrylic sealer but I’ve been using my same can for several years so that’s something to keep in mind as well.
- 4″ Ceramic Tiles (13¢ each from Home Depot)
- Scrapbook Paper (30¢ each from Joann Clearance Sale)
- Mod Podge (I use homemade, approx. $1.00 per batch)
- Foam Brush (69¢ each from Michaels)
- Acrylic Sealer (approx. $7.00 but a can will last a long time)
- Adhesive-Backed Felt (99¢ at Hobby Lobby)
The materials shown above are for the first part of the process, so let’s take a closer look at the steps you’ll follow to get started.
How To Make Coasters Out Of Tiles
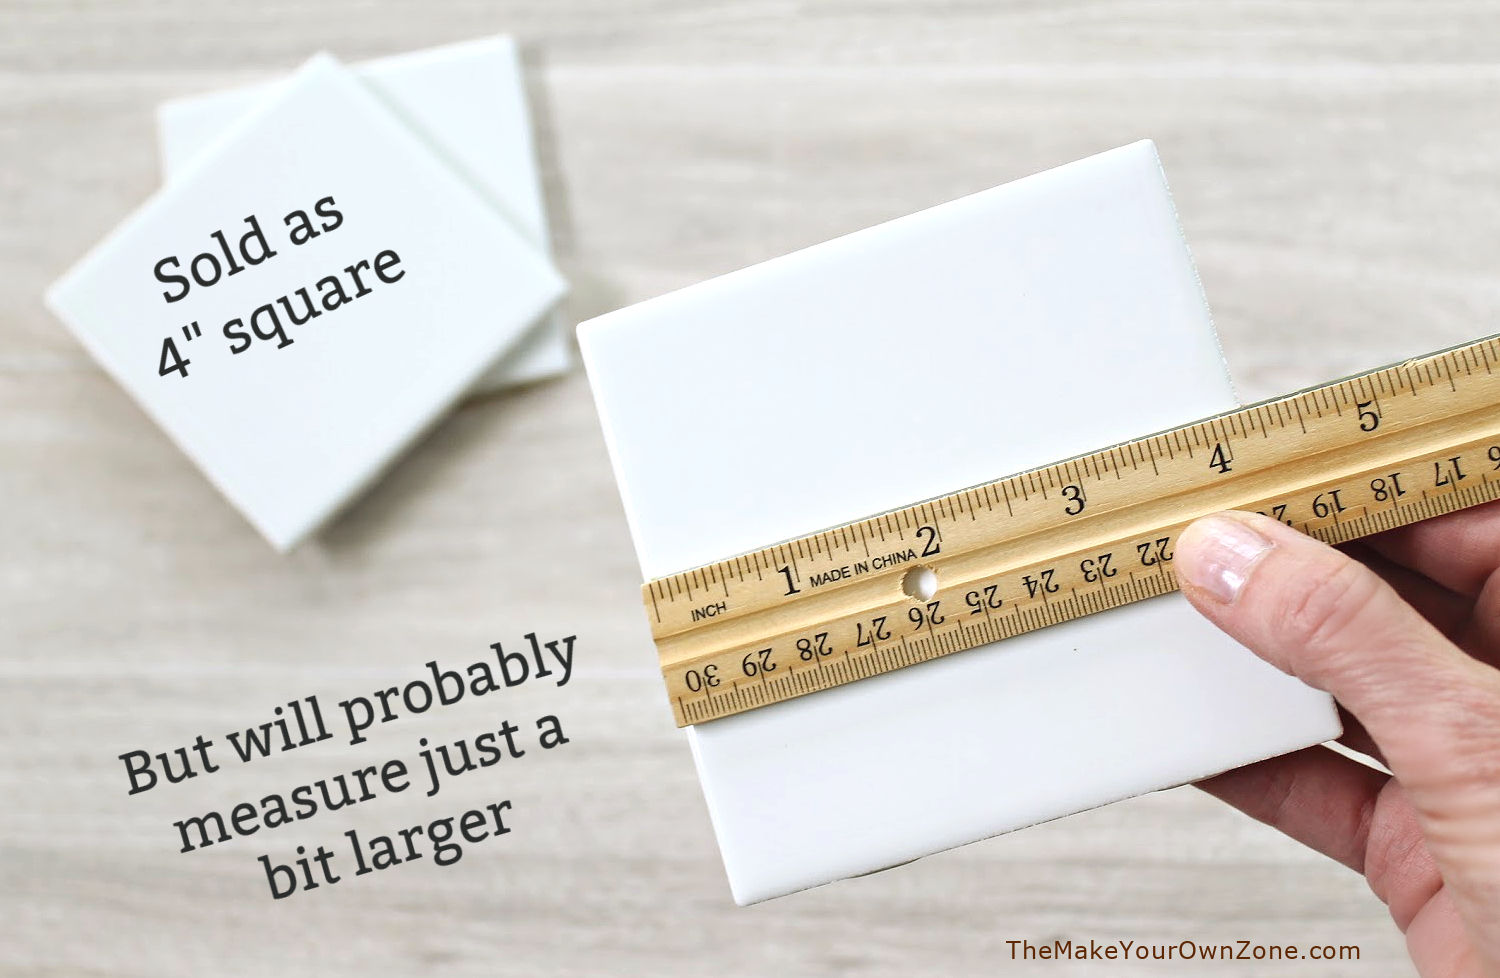
One beginning note is that you may find that even though the ceramic tiles you purchase are sold as 4″ tiles, they might measure just a bit larger. This is something to keep in mind as you do the first step of cutting the paper.
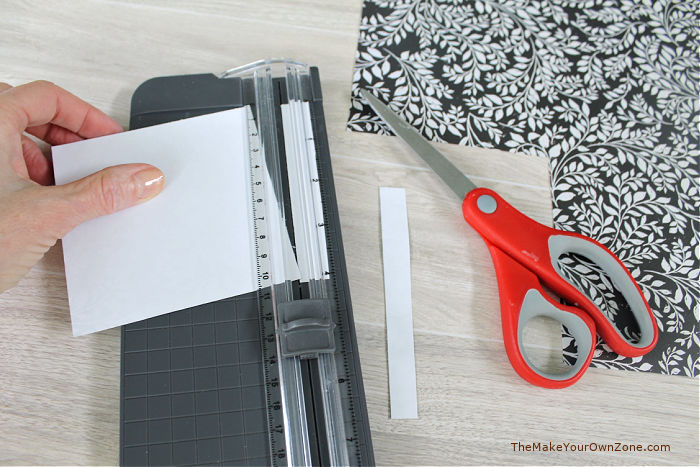
Step 1: Cut a Square of Scrapbook Paper
I’ve made myself a square template to use for my coasters that’s 4-1/8″ square. You could also trace around one of your tiles on the back side of your scrapbook paper. I usually trace around my template in the corner of a piece of scrapbook paper (so I know at least two edges are nice and straight!). Then I cut just a bit larger than the lines I’ve drawn, and do the final cuts on those lines using a paper trimmer. This gives me a nice clean edge on my cut lines.
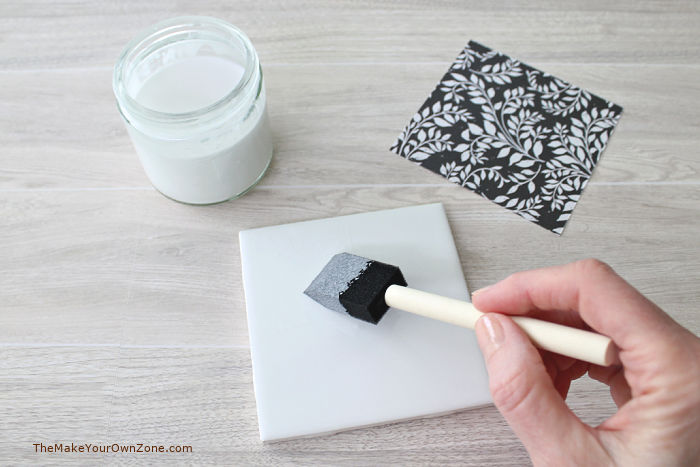
Step 2: Apply Mod Podge to the Ceramic Tile
Next you’ll use your foam brush to apply a coat of your Mod Podge to the ceramic tile. Make sure the Mod Podge is applied all the way to the edges.
Once again, you’ll see in the photo that I’m using my homemade Mod Podge that’s a simple mixture of equal parts white glue and water. I’m still using a batch I made several years ago that’s still going strong and only needs to be stirred up a bit when I use it again.
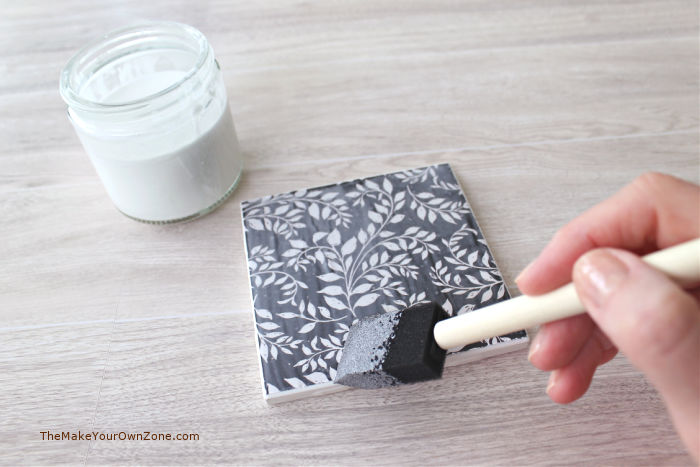
Step 3: Add the Scrapbook Paper and another coat of Mod Podge
Now you’ll place your square of scrapbook paper onto the tile that’s wet with Mod Podge. Make sure the paper is positioned in the center. Press down just a bit so it sticks to the tile, especially along the edges, smoothing it down as you go.
Then brush another layer of Mod Podge on top of the paper, being sure to brush all the way to the edges.
Note: If the paper bubbles up noticeably in any spots after this step, just lightly smooth them out with your fingers, pressing toward an edge of the tile.
Step 4: Let Dry
Now you’ll just need to let the Mod Podge on your tile coaster dry completely. A couple of hours is usually sufficient. Then we’ll move on to final steps – a protective spray coating for the top and a protective soft layer for the bottom.
The Finishing Materials For Your DIY Coasters
The last two steps are to put a protective spray finish on the top of your coasters, and then to put a protective layer of felt on the bottom rough side of your coasters.
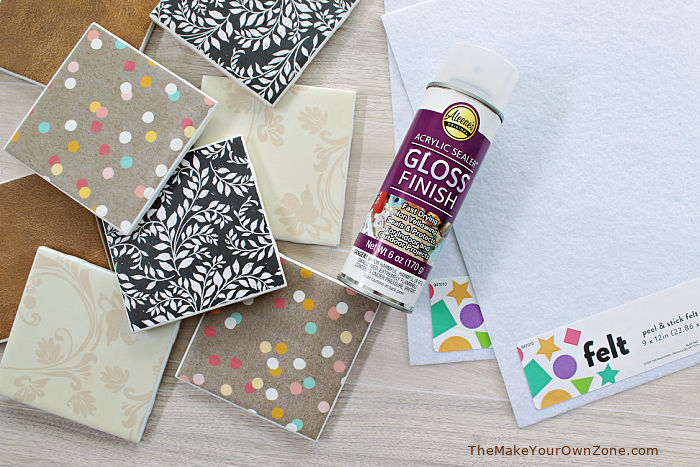
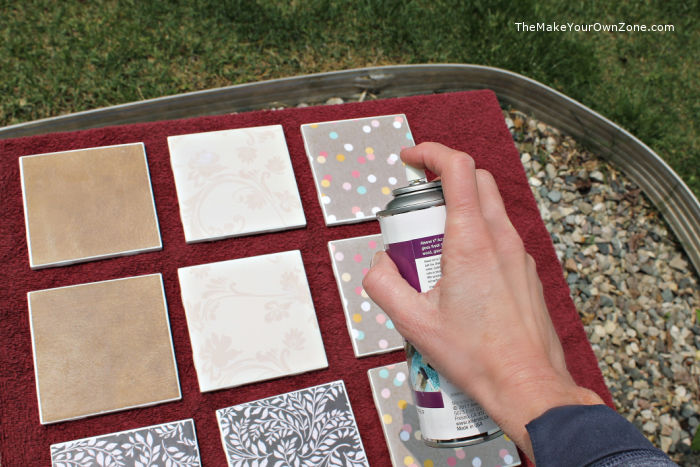
Step 5: Apply Acrylic Sealer
I always finish off my homemade tile coasters with a light spray coat of Aleene’s Acrylic Sealer Gloss Finish. I usually do this outside in the fresh air. The acrylic sealer adds a bit of shine to your coasters and will also protect the surface. Let the coasters set until the acrylic sealer has completely dried.
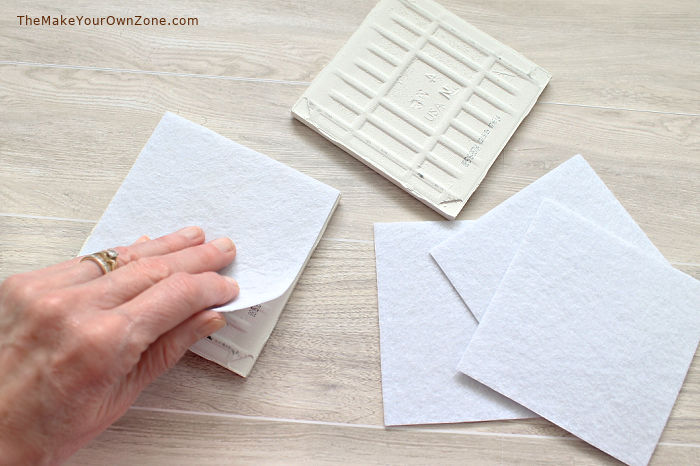
Step 6: Add a Protective Layer to the Underside
Now the only thing left to do is finish off the underside of your coasters. This side of the ceramic tiles has a rougher texture that you don’t want that to scratch your furniture. I always use Peel and Stick Felt Sheets for this that work perfectly. Just cut the size square you need, peel off the backing, and then stick it to the underside of your homemade tile coaster.
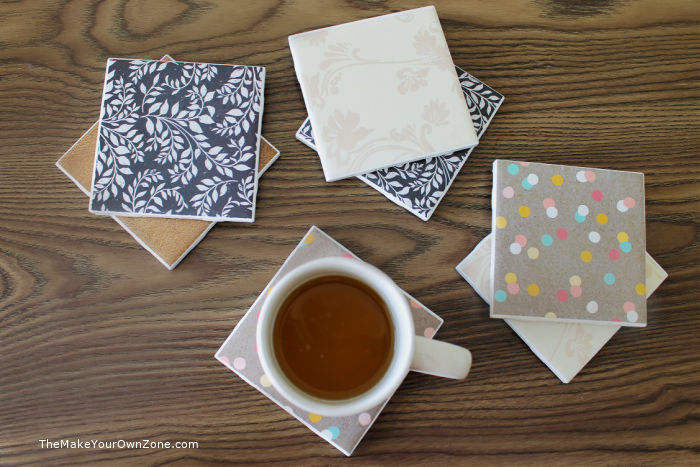
Your Tile Coasters Are Ready To Use!
After completing all the above steps, your tile coasters are ready to go. Set them around on your tables, or on your desk, or wherever you need a pretty coaster.
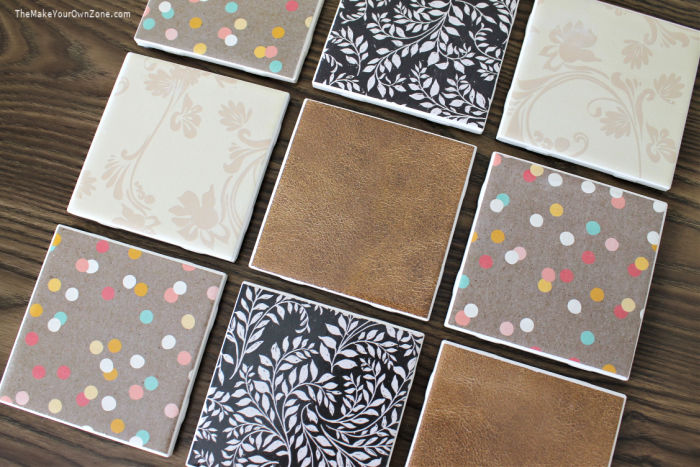
One of the things I love about this project is that you can use any assortment of colors or designs of scrapbook paper. You can go with your decor colors, fun bright colors, seasonal themes, or holiday designs. (I’ve even used photos to make coasters). My theme of papers this time around was “find some colors that all match on this clearance rack that’s already kind of picked over”. 🙂 And I think I did! This current batch uses brown tones to make a nice grouping of coasters for our living room.
And I’m sure there will be more homemade tile coasters in my future too. They’re fun to make, handy to have around, and are money savers too. It’s a craft project I always enjoy!
You might also like:
Homemade Tile Coasters Made With Scrapbook Paper
Equipment:
- 1 small foam brush
Materials:
- 4" white ceramic tiles (see note below)
- assorted scrapbook papers
- Mod Podge
- spray acrylic sealer
- peel & stick felt sheets
Instructions:
- Cut your scrapbook paper into squares to fit on the tiles. You can trace around one of your tiles to get the size square you need. I've made myself a template that's 4-2/8" square for this step. (see note below)
- Use your foam brush to apply a coat of your Mod Podge to the ceramic tile. Make sure the Mod Podge is applied all the way to the edges.
- Now you'll place your square of scrapbook paper onto the tile that's wet with Mod Podge. Make sure the paper is positioned in the center. Press down just a bit so it sticks to the tile, especially along the edges, and smoothing it down as you go.Note: If the paper bubbles up noticeably in any spots after this step, just lightly smooth them out with your fingers, pressing toward an edge of the tile
- Then brush on another layer of Mod Podge on top of the paper, being sure to brush all the way to the edges.
- Let the Mod Podge dry completely. This usually takes a couple of hours.
- After the coasters are dry, give them a light spray with the acrylic sealer. I usually do this outdoors in the fresh air. Let the sealer dry completely.
- Finish your coasters by adding felt to the bottom. Cut the peel & stick felt to the appropriate size and stick onto the bottom side of the coaster.
Notes:

Thank you for the update on Joann’s! I had no idea anything was in the works for a come-back! There isn’t much in way of craft stores where I live either, & to Joann’s, it was a good distance. Course it is a good distance to anything here where I live. I think there are many who were disappointed here as well about the closing of Joann’s. THANK YOU again for the update! 😉
Yes, I thought I would include that update in my newsletter because I was pretty sure other crafters would be missing Joann Fabric stores too! It looks like perhaps Michaels will now be carrying their Big Twist brand of yarn.