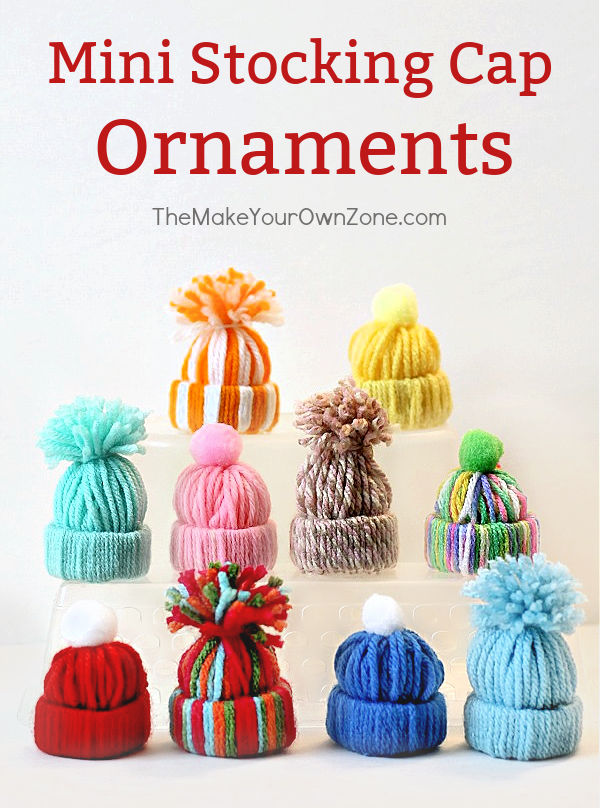
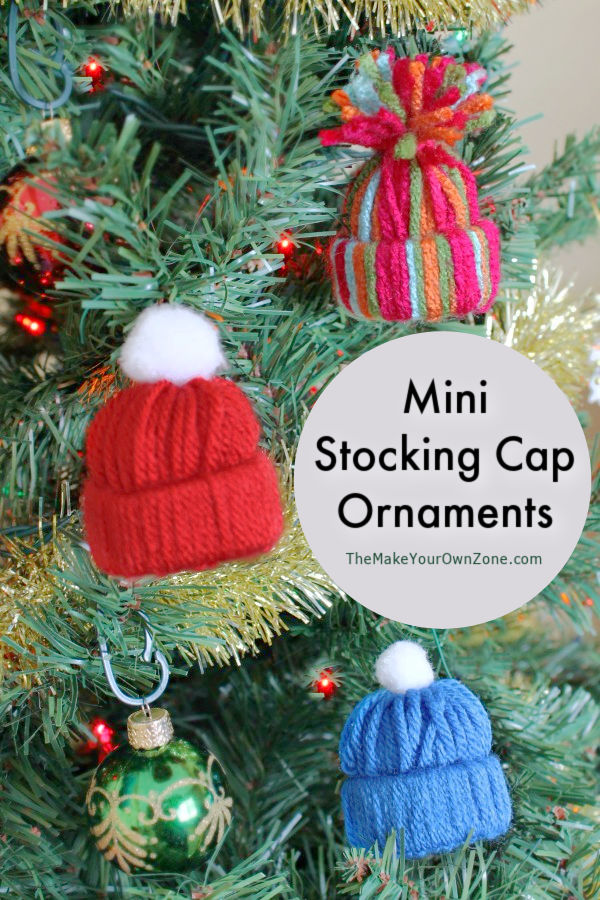
Easy Yarn Craft: Mini Stocking Cap Ornament
The final craft in my series of mini sized items to make for the holidays are these mini stocking hat ornaments made with yarn. They’re a simple and quick last minute project that anyone can make! Even kids can make these little hats for a fun holiday craft.
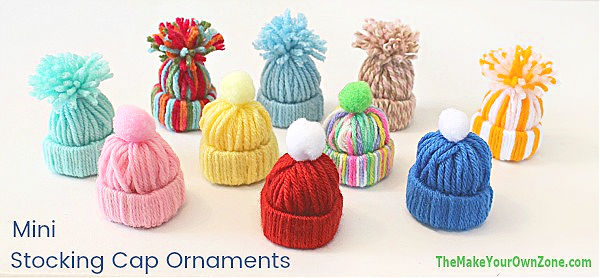
As a knitter I have lots of leftover yarn around the house and these little hat ornaments were a fun way to sort through my stash and put some of those bits and pieces to good use. Plain yarns, variegated yarns, tweedy yarns . . . they’re all good!
How To Make Mini Stocking Cap Yarn Ornaments
To make these little hat ornaments you will need the following supplies:
- A cardboard roll from toilet paper or paper toweling
- Yarn (medium 4 size works good) – about 14 yards for each hat
- Scissors
- Ruler
- Optional – 1″ Pom Poms and Glue Gun (for Style #2 hat)
1. For each hat, cut a 3/4″ ring from the cardboard roll.
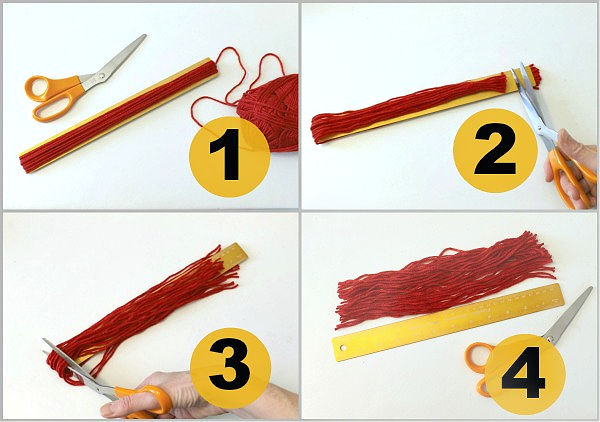
2. Cut the yarn into 12″ pieces. You will need about 40 pieces for each hat. I found the quickest way to do this was to wrap my yarn around a 12″ ruler 20 times. Then cut through the loops on each end of the ruler. Viola! You now have 40 pieces of 12″ yarn that didn’t take you forever to cut. 🙂
3. To assemble the hats you will be attaching all the pieces of yarn to the cardboard ring with a simple knot. To make the knot, fold the strand of yarn in half. Put the folded end through the cardboard ring. Then bring the two ends over top the of cardboard ring, through the looped end, and pull tight. (If you are a knitter, you will recognize this as how you make fringe on your scarves, afghans, etc.)
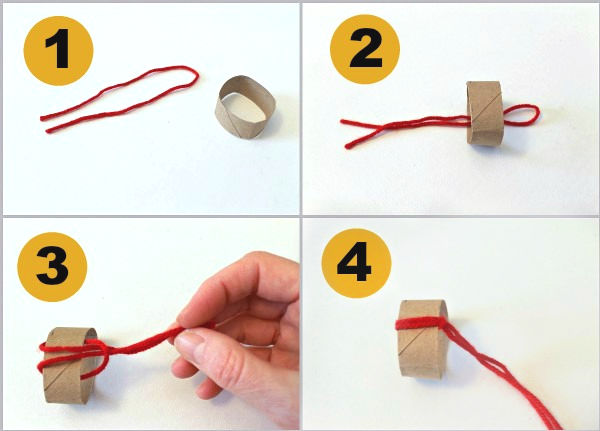
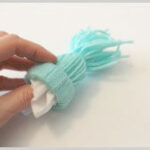
4. Repeat this step until you have covered all of the cardboard ring. Have the strands close together but don’t overlap them.
Then I have a couple different options for finishing the top of the hat:
Style #1
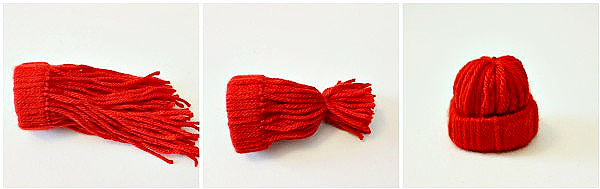
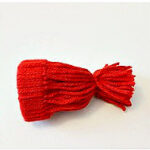
Take all the yarn ends and push them through the cardboard tube. Take another small length of yarn and tie all the ends together, about 1″ above the top of the cardboard ring. At this point I also like to take a small piece of tissue and stick it inside to help form the hat and make it sturdier.
Trim the yarn ends on the top of the hat to about a 1/2″ length to form a pom pom on top of the hat.

Style #2
For this style, you will tie all the yarn ends together BEFORE you push them through the cardboard ring. Tie them together about 1-1/2″ above the cardboard ring. Trim the yarn ends to about 1″ above where you tied them.
Then push them through the cardboard ring. The yarn ends will help fill in the body of the hat and make it sturdier (so no need for a piece of tissue as in Style #1).
Glue a 1″ fluffy pom pom to the top of the hat with just a tiny bit of hot glue from a glue gun.
To hang your ornament, you can pass an ornament hanger through a few of the strands of the yarn – or – you could also add a hanger to your mini hat by making one from a small piece of thread.
You can use plain or variegated yarn, you can make stripes, you can glue on matching color pom poms or a contrasting color pom pom, there are lots of options! And this craft can be super cheap too. I was able to use leftover yarn I already had, pom poms from the Dollar Store, and a paper toweling tube that I would have otherwise just tossed out. It’s a very frugal way to make your own ornaments!
Check out the other mini sized items in this series:
Mini Stocking Cap Ornmanets
Equipment:
- Scissors
- Ruler
Materials:
- Cardboard toilet paper roll
- Yarn – about 14 yards for each hat (I use Size 4 yarn weight)
- Pom Pom and glue gun (Optional)
Instructions:
- For each hat, cut a 3/4" ring from the cardboard toilet paper roll.
- Cut the yarn into 12" pieces. You will need about 40 pieces for each hat. I found the quickest way to do this was to wrap my yarn around a 12" ruler 20 times. Then cut through the loops on each end of the ruler.
- To assemble the hats you will be attaching all the pieces of yarn to the cardboard ring with a simple knot. To make the knot, fold the strand of yarn in half. Put the folded end through the cardboard ring. Then bring the two ends over top the of cardboard ring, through the looped end, and pull tight.
- Tie each piece of yarn onto the cardboard roll in this same way until you have covered all of the cardboard ring. Have the strands close together but don't overlap them.
Two style options for finishing the hats:
- Style 1: Take all the yarn ends and push them through the cardboard tube. Take another small length of yarn and tie all the ends together, about 1" above the top of the cardboard ring. At this point I also like to take a small piece of tissue and stick it inside to help form the hat and make it sturdier. Trim the yarn ends on the top of the hat to about a 1/2" length to form a pom pom on top of the hat.

- Style 2: Tie all the yarn ends together BEFORE you push them through the cardboard ring. Tie them together about 1-1/2" above the cardboard ring. Trim the yarn ends to about 1" above where you tied them.Then push them through the cardboard ring. The yarn ends will help fill in the body of the hat and make it sturdier (so no need for a piece of tissue as in Style #1). Glue a 1" fluffy pom pom to the top of the hat.
- To hang your ornament, you can pass an ornament hanger through a few of the strands of the yarn. You could also add a hanger to your mini hat by making one from a small piece of yarn, string, or ribbon.

When you use multiple colors of yarn, how do you keep the colors together to make uniform stripes after you pull the yarn through the ring?!
The colors will mostly stay together because they are tied to the cardboard ring in those color groups, but you might have to fiddle with them just a bit too after pushing them through the ring.
I love these little hats and I am going to try them all. I will post a picture if I succeed.
Of all the other posts I’ve read, yours is the most helpful and informative when it comes to making these cute little hats. You gave tips that were very much needed. I’m ready to start now. Thank you!!
I made these and a lil stuffed penguin. The beanies look so adorable on them! Thank you for the idea, these are so cute!
I just love these little hat’s. I will be making these for my friend’s xx
Yes, once you start making these it’s hard to stop. They are fun to make!