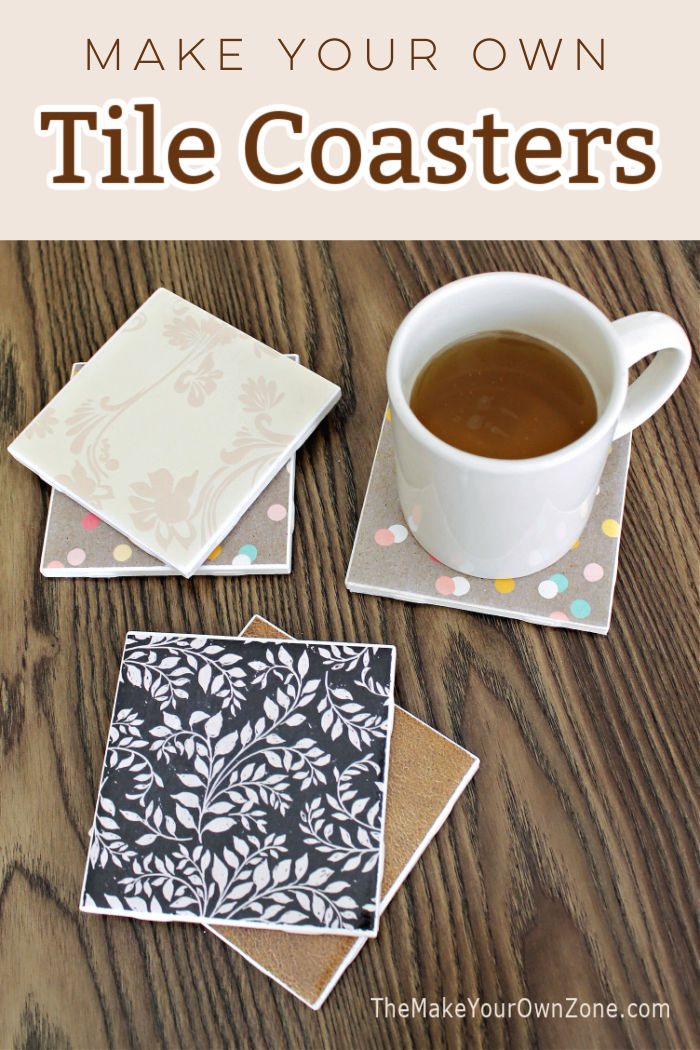
Homemade Tile Coasters Made With Scrapbook Paper
Make your own tile coasters using ordinary 4" ceramic tiles and pretty patterns of scrapbook paper.
Equipment:
- 1 small foam brush
Materials:
- 4" white ceramic tiles (see note below)
- assorted scrapbook papers
- Mod Podge
- spray acrylic sealer
- peel & stick felt sheets
Instructions:
- Cut your scrapbook paper into squares to fit on the tiles. You can trace around one of your tiles to get the size square you need. I've made myself a template that's 4-2/8" square for this step. (see note below)
- Use your foam brush to apply a coat of your Mod Podge to the ceramic tile. Make sure the Mod Podge is applied all the way to the edges.
- Now you'll place your square of scrapbook paper onto the tile that's wet with Mod Podge. Make sure the paper is positioned in the center. Press down just a bit so it sticks to the tile, especially along the edges, and smoothing it down as you go.Note: If the paper bubbles up noticeably in any spots after this step, just lightly smooth them out with your fingers, pressing toward an edge of the tile
- Then brush on another layer of Mod Podge on top of the paper, being sure to brush all the way to the edges.
- Let the Mod Podge dry completely. This usually takes a couple of hours.
- After the coasters are dry, give them a light spray with the acrylic sealer. I usually do this outdoors in the fresh air. Let the sealer dry completely.
- Finish your coasters by adding felt to the bottom. Cut the peel & stick felt to the appropriate size and stick onto the bottom side of the coaster.
Notes:
Even though the ceramic tiles are sold as 4", they are often just a little bit larger. This is why I cut my paper to a 4-1/8" square size. This usually still leaves just a small rim of the white tile showing around the edges too.
I've always done this project with my homemade mod podge that's a mixture of equal parts white glue and water. You can read more here: Make your own Mod Podge.