Baking Soda Ornaments {DIY White Clay}
This post may contain affiliate links. Please read my disclosure policy for more information.
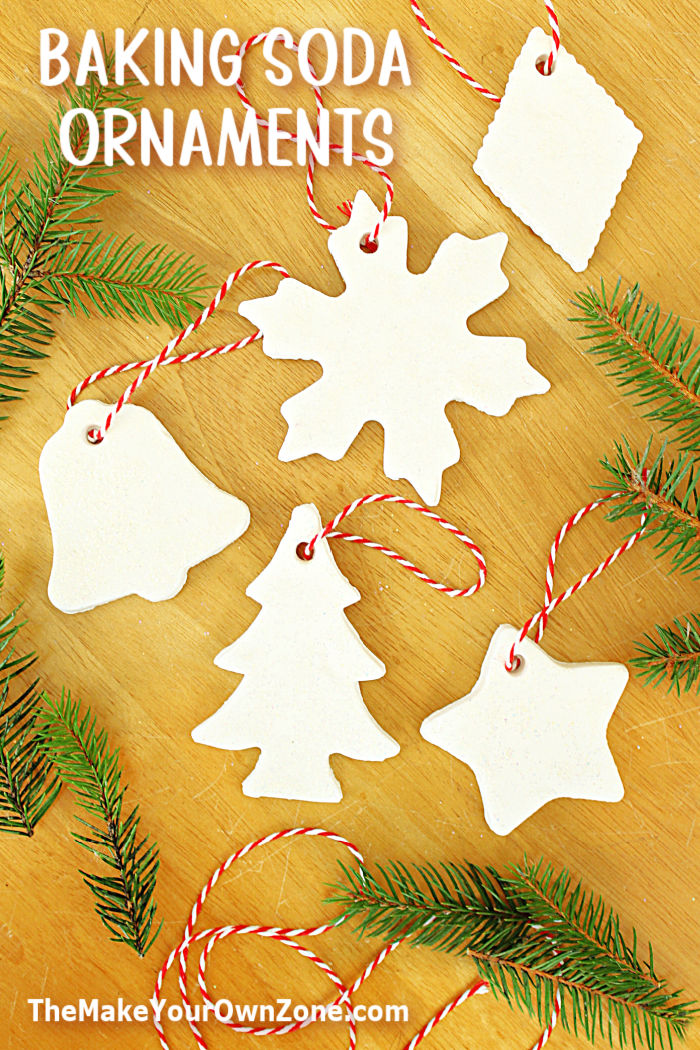
Looking for a frugal way to add a few more ornaments to the Christmas tree this year? You’ll be able to do just that by heading over to your pantry for some baking soda and cornstarch. Does that seem a little unexpected? It turns out that baking soda and cornstarch can indeed by used to make an easy DIY white clay, and when you use your Christmas cookie cutters to cut them into holiday shapes, you’ll end up with a fun way to make your own Christmas ornaments!
How To Make Christmas Ornaments with Cornstarch and Baking Soda
Here are the steps to make these baking soda and cornstarch ornaments. You might have everything you need in the house already!
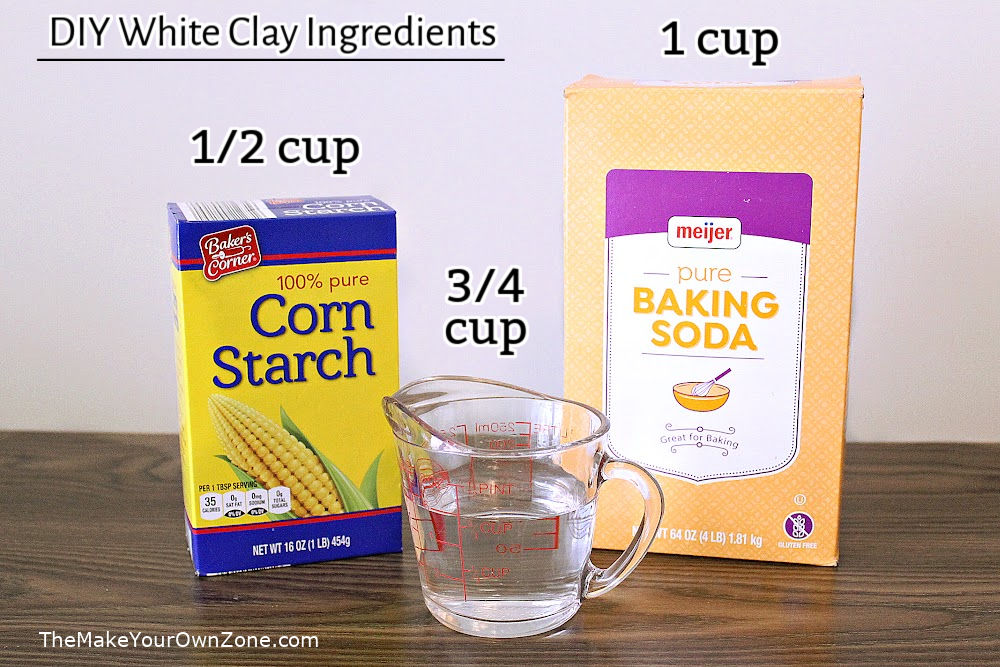
Step 1 – Measure ingredients: In a small saucepan, combine 1 cup baking soda, a 1/2 cup of cornstarch, and 3/4 cup of water. At this point the mixture will still be very watery.
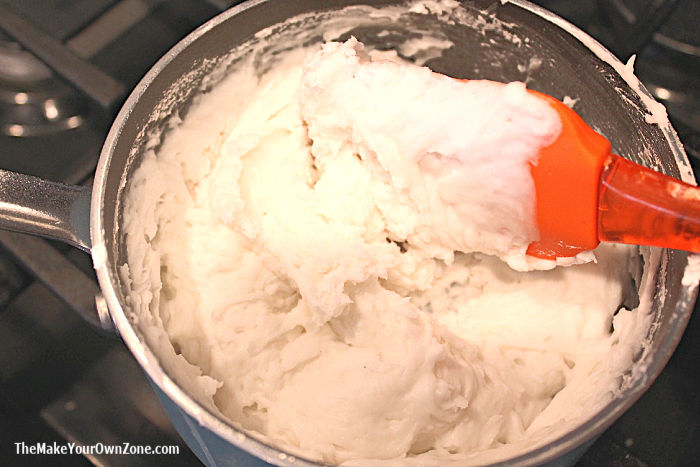
Step 2 – Heat ingredients on the stove: Place the pan with your ingredients on the stove over medium heat. Keep stirring the ingredients and as the mixture heats up and starts to bubble, the mixture will thicken up (this will take about 5 minutes). Stir until the mixture resembles mashed potatoes.
Step 3 – Let mixture cool. Lay out a piece of waxed paper or parchment paper. Transfer your clay mixture from your pan onto the paper and let it cool down for a few minutes.
Step 4 – Knead the clay. Once the mixture has cooled to a point where it is comfortable to handle, knead the dough into a smooth clay (so that it no longer looks like mashed potatoes!)
Step 5 – Roll out the clay to a 1/4″ thickness. Place your ball of clay back onto your waxed paper (or parchment paper), and using a rolling pin, roll the clay out to a thickness of at least 1/4″ thick. The clay must be at least this thick to make ornaments that are sturdy enough.
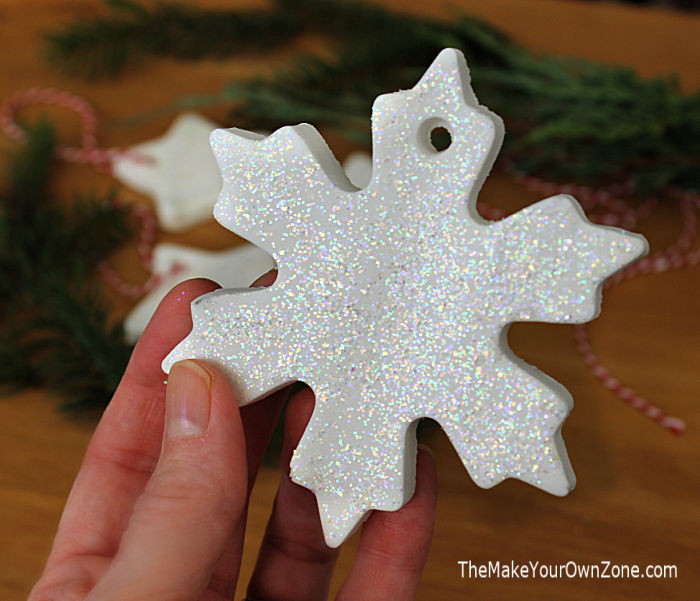
Note: Some people choose to use textured rolling pins or embossing stamps on their clay at this point to create designs. I did not have any of these tools and choose to decorate my ornaments with glitter paint instead (see step 9).
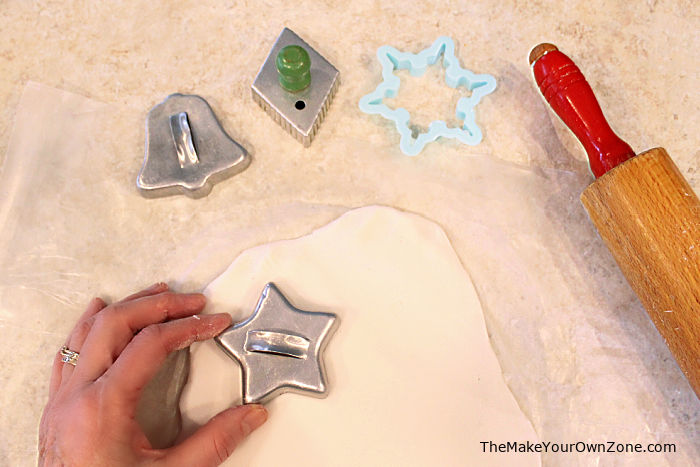
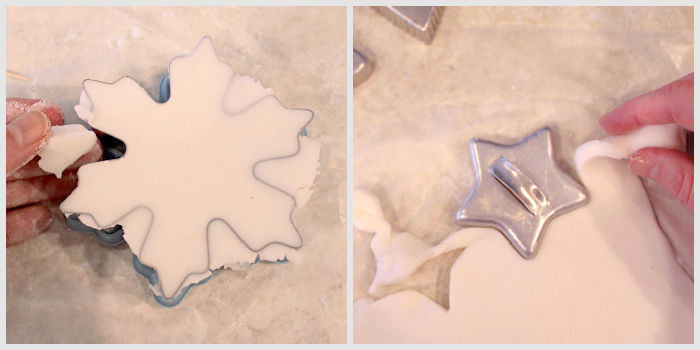
Step 6 – Use cookie cutters to make ornament shapes. Use cookie cutters to cut out shapes for your ornaments. I found that cutters with simple edges worked the best, and that it was easiest to pull the clay from around the cutter to remove the shape. For cookie cutters with more detailed edges (like my Wilton Snowflake Cookie Cutter), I needed to turn them over and clean away the extra clay from around the edges.
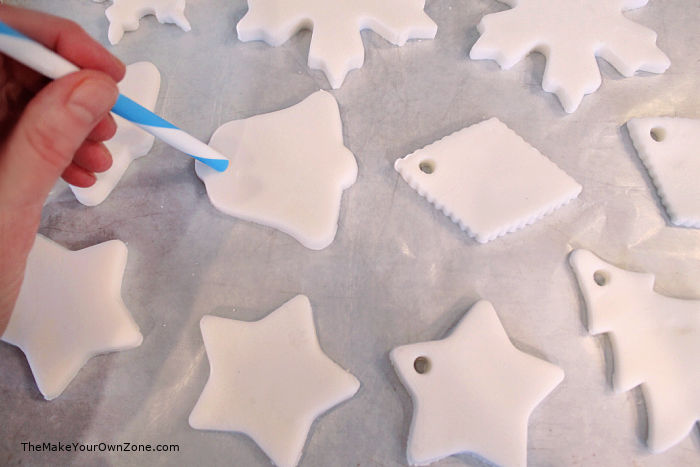
Step 7 – Use a straw to make a hole for hanging your ornaments. Place your ornaments on a cookie sheet lined with wax paper (or parchment paper). Then, using a straw, poke a hole in the top of each of your ornaments.
Step 8 – Let dry for 48 hours. Set your cookie sheet with the ornaments aside for two days (48 hours) so that the baking soda clay can dry completely. Two or three times each day, turn the ornaments over and move them around a bit so that they will dry evenly. I also put a fresh piece of wax paper under them on the second day too.
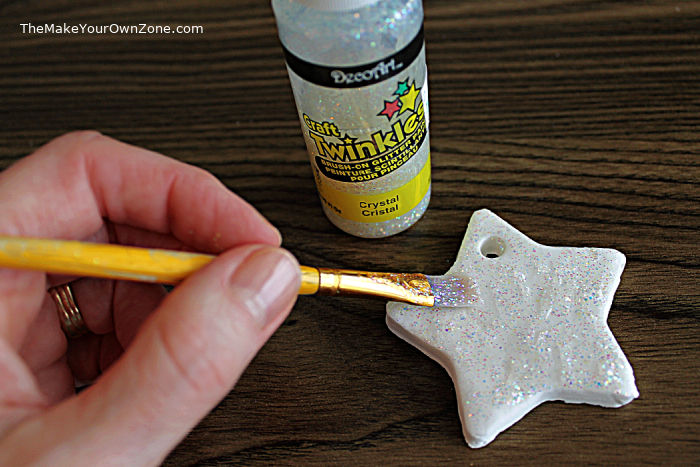
Step 9 – Add a coat of glitter paint. Once my ornaments had completely dried, I also added a coat of what I call “glitter paint” to add a little sparkle. I used the DecoArt Craft Twinkle Paint in the Crystal color (because that’s what I had in my craft supplies) but you can also get this paint in silver, gold, and other colors. You could also paint on any designs of your choice using other colors of acrylic or craft paints.
Step 10 – Add a string or ribbon for hanging. Once the paint has completely dried, you can add a string or ribbon or your choice for hanging the ornaments. Using red bakers twine for hanging homemade ornaments is always a pretty choice for Christmas.
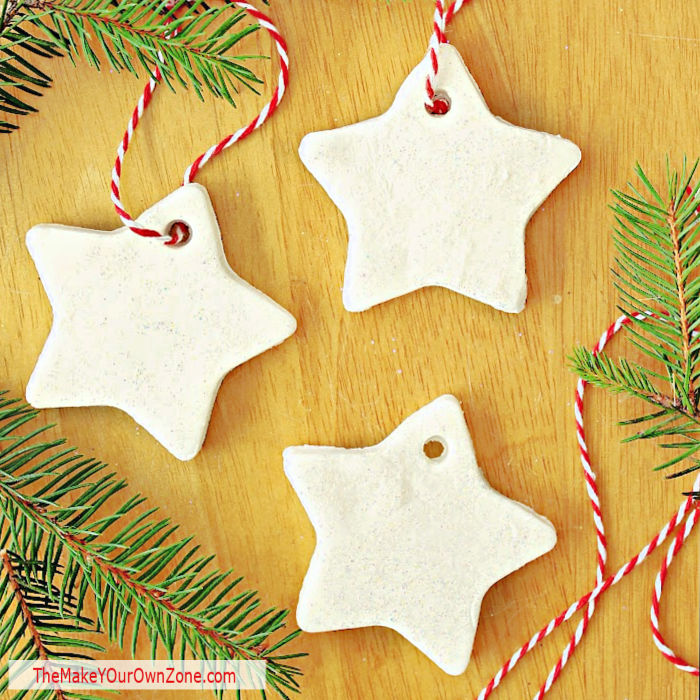
And even though in some of the pictures the coat of glitter paint doesn’t show up that well and these almost look like plain white ornaments, when they catch the light, they do indeed sparkle quite nicely and make a pretty addition to a holiday Christmas tree.
More Frugal Christmas Ideas:
DIY Baking Soda and Cornstarch Ornaments
Equipment:
- Saucepan & Stirring Utensil
- Wax Paper or Parchment Paper
- Rolling Pin
- Cookie Cutters
- Baking Sheet
- Drinking Straw (for cutting holes)
- Glitter paint & paintbrush (optional)
- String or Ribbon
Materials:
- 1 cup Baking Soda
- 1/2 cup Cornstarch
- 3/4 cup Water
Instructions:
- In a small saucepan, combine the baking soda, cornstarch, and water. At this point the mixture will still be very watery.
- Place the pan with your ingredients on the stove over medium heat. Keep stirring the ingredients and as the mixture heats up and starts to bubble, the mixture will thicken up (this will take about 5 minutes). Stir until the mixture resembles mashed potatoes.
- Lay out a piece of waxed paper or parchment paper. Transfer your clay mixture from your pan onto the paper and let it cool down for a few minutes.
- Once the mixture has cooled to a point where it is comfortable to handle, knead the dough into a smooth clay (so that it no longer looks like mashed potatoes!)
- Place your ball of clay back onto your waxed paper (or parchment paper), and using a rolling pin, roll the clay out to a thickness of at least 1/4" thick. The clay must be at least this thick to make ornaments that are sturdy enough.
- Use cookie cutters to cut out shapes for your ornaments. I found that cutters with simple edges worked the best, and that it was easiest to pull the clay from around the cutter to remove the shape. For cookie cutters with more detailed edges I needed to turn them over and clean away the extra clay from around the edges.
- Place your ornaments on a cookie sheet lined with wax paper (or parchment paper). Using the straw, poke a hole in the top of each of your ornaments.
- Set your cookie sheet with the ornaments aside for two days (48 hours) so that the baking soda clay can dry completely. Two or three times each day, turn the ornaments over and move them around a bit so that they will dry evenly. I also put a fresh piece of wax paper under them on the second day too.
- To make a hangers for your ornaments, cut 10" pieces of string or ribbon and insert it through the hole in the ornaments and tie a small knot.

Thank you for this recipe. Question. Can this recipe be colored to make a light gingerbread color clay. If so, how? Thank you in advance.
I remember seeing a recipe very much like this one (that used baking soda, cornstarch, and water) but that also added a 1/2 cup of instant coffee grounds to the mixture which colored it brown. That might be something to try!
Hi, I tried this and followed the recipe exactly. rolled out to 4ml on silicon mat and cut out. unfortunately they all cracked. what did I do wrong?
They might have been too thin. I note that a ml measurement is volume, so to convert a 1/4″ thickness to metric, the thickness would be more like 6 mm.
Last year I made salt dough ornaments and dried them in my dehydrator. Do you think these would dry okay in the dehydrator?
Yes, I think it would work to dry these ornaments more quickly using a dehydrator.
Hi Bev – can you use food coloring instead of having them all white? Would you add that with the rest of the ingredients or knead it in?
If you want to try food coloring, I would knead it in once the mixture has cooled a bit. You could even create a marbled effect to the dough if you don’t knead the color in completely. I hope it turns out well if you give it a try!