Make A Christmas Holiday Pillow Cover
The winter holiday season is that time of year when the normal things that decorate our house are often temporarily replaced by a variety of other items that take their place on our shelves, mantles, and tables. And perhaps even on your couch or chairs too if you add a few holiday pillows. But did you know you don’t have to necessarily buy special Christmas pillows to use for just for a few months of the year? Instead you can use pillows you already have and just make your own holiday pillow covers!

When it comes to making pillow covers, I like to use a method called an Envelope Pillow Cover. This type of pillow slipcover has a pocket opening (like an envelope) so that you can easily take the pillow in or out of the cover any time as needed. I’ve written about this method once before (read the original envelope pillow cover post here), and found it to be simple to do. A little sewing is needed, but it can be done without a specific pattern and just a couple of simple seams are used.
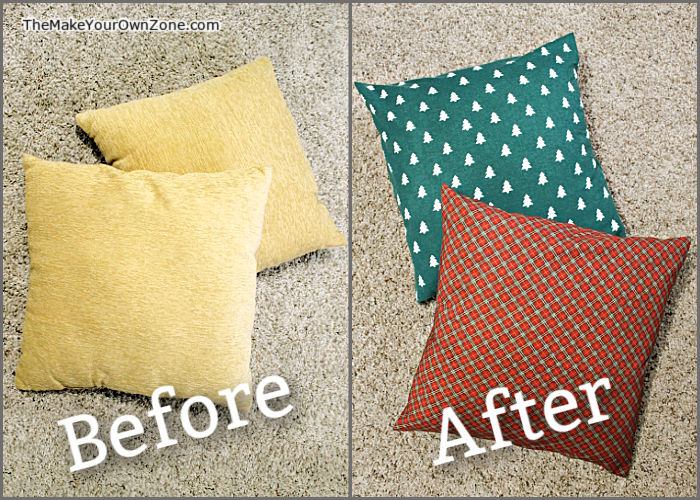
For this particular project I decided to use a couple of plain gold pillows and cover one in a red plaid, and the other in a green Christmas tree fabric to make them a little more festive during the winter holiday time of the year.
How To Sew A Holiday Pillow Cover
As mentioned above, these pillow covers can be made in any size for any square or rectangular pillow. That’s because you make a few simple measurement calculations to cut a piece of fabric 1″ wider and two and a half times longer than your pillow. Then you’ll make just a few folds and sew a couple of seams. Here’s a short video to show the folding process and all the steps are also written out completely below too.
Step 1 – Cut a piece of fabric 1″ wider and two and a half times longer than your pillow.
To begin, first measure the width of your pillow and add one more inch. Then measure the height of your pillow and and multiply by 2.5. The pillows I used for this tutorial were 18″ square, so I cut a piece of fabric 19″ x 45″. This measurement will also determine how much fabric you need to buy.
Here are a few example pillow sizes so you can see the math:
14″x14″ pillows – Cut a piece 15″x35″
16″x16″ pillows – Cut a piece 17″x40″
18″x18″ pillows – Cut a piece 19″x45″
20″x20″ pillows – Cut a piece 21″x50″
12″x20″ pillows – Cut a piece 13″x50″
Step 2 – Make the first two folds
Once you have your piece of fabric cut, you will need to do the following:
#1 – Lay the piece flat with the right side of the fabric facing up.
#2 – Then fold up from the bottom, about 1/3 of the fabric.
#3 – The fold the raw edge down again about 1/3.
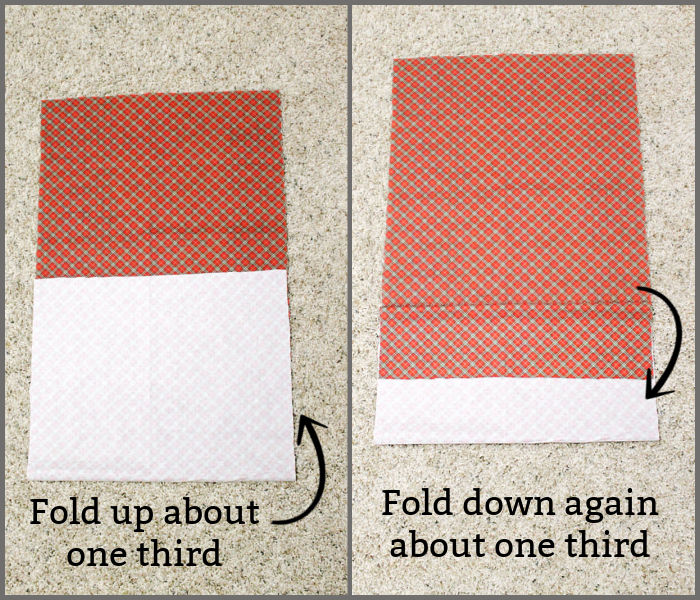
(Example: For my piece of fabric that was 19″x45″, I folded up about 15″ of the fabric, and then folded it back down again about 5″).
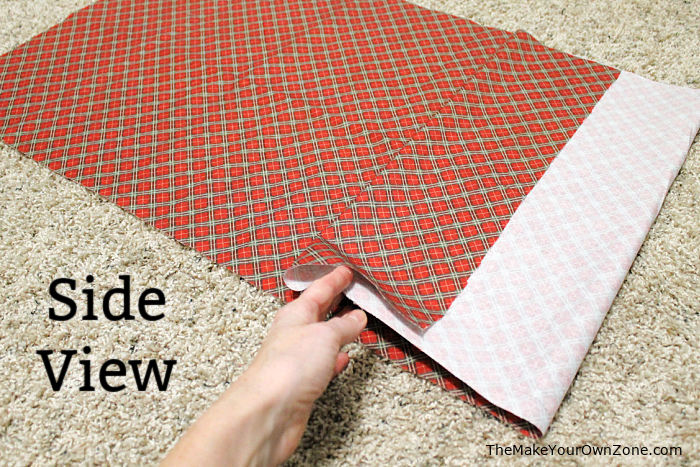
Here’s another view of how those first two folds will look:
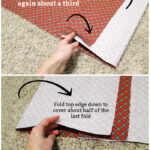
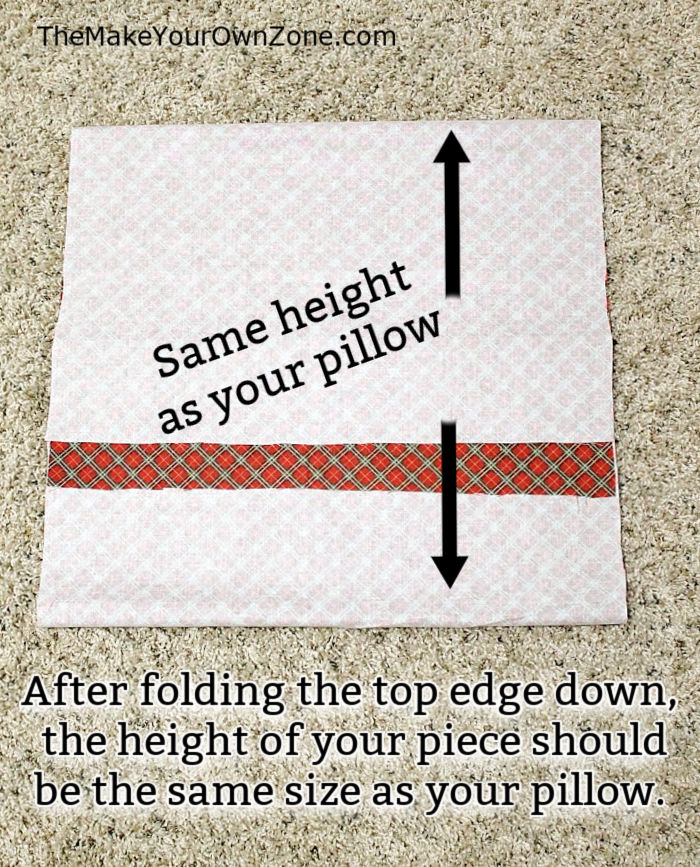
Step 3 – Make the final fold
Next, you’ll take the top edge of your fabric and fold it down so it covers about half of your last fold
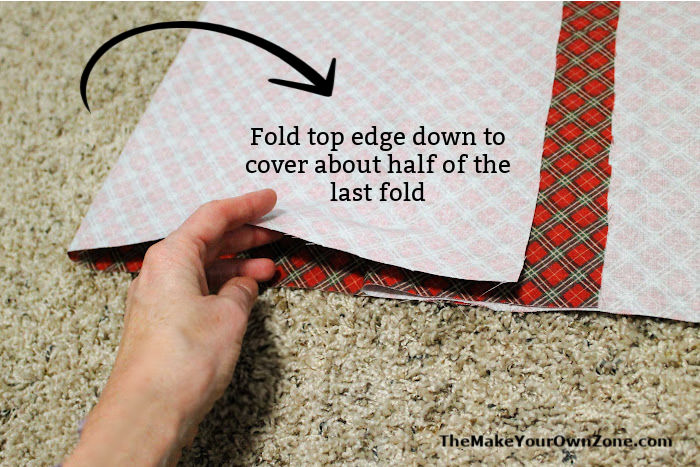
After making these folds, you should now have a piece that’s about the same height as your pillow (but still 1″ wider because we still have seams to sew).
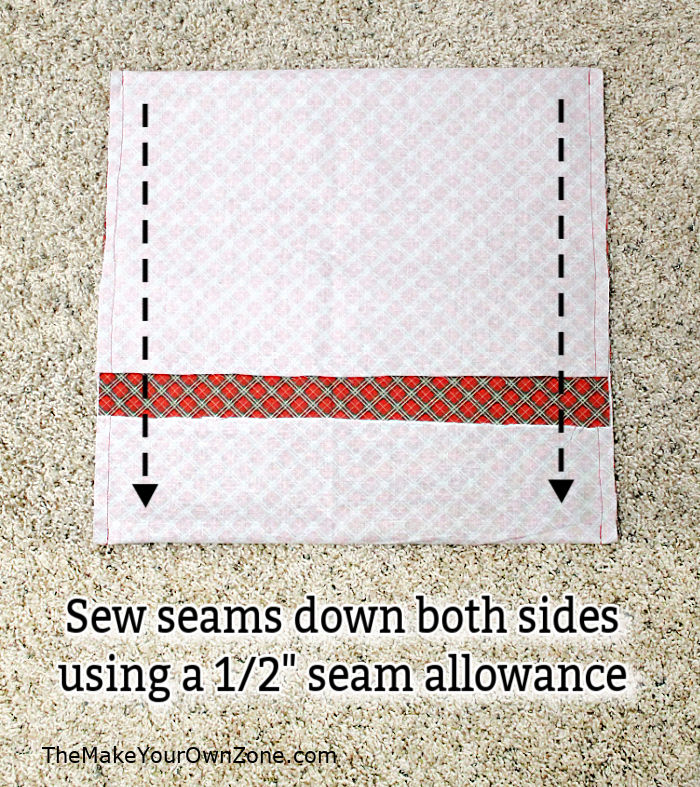
Step 4 – Pin the sides and sew 1/2″ seams
Now that all your folds are made, pin both of the side edges. Sew a seam down each of the sides using a 1/2″ seam allowance.
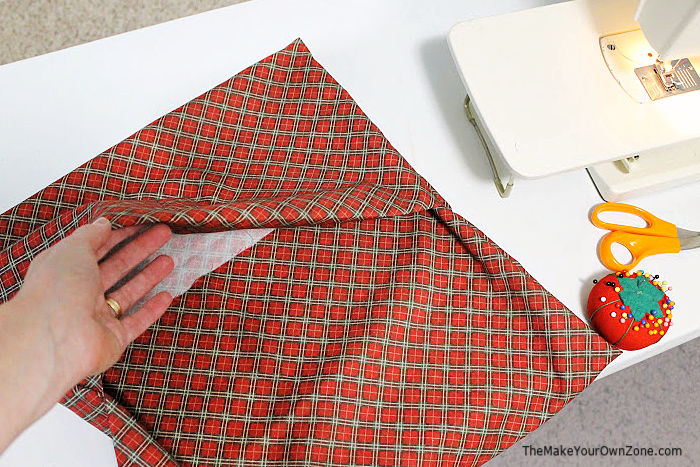
Step 3 – Turn right side out
Once your seams are sewn, you can turn your pillow cover right side out, being sure to get the corners crisply and completely turned (I always carefully put the tip of my scissors in the corners to get them turned crisply.
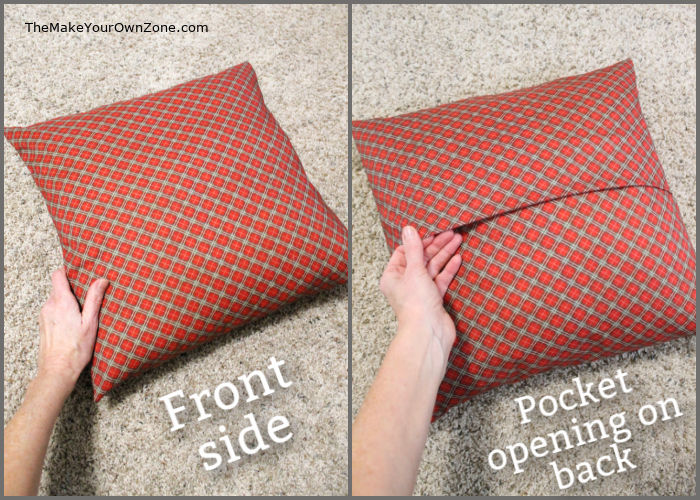
Once it’s turned right side out, you’ll see that you’ve created a perfect little opening on one side of the pillow cover, and that’s how you’ll be able to put your pillow in or take it back out whenever you want!
Step 4 – Insert your pillow into your new slip cover
Now all that’s left to do is to stuff your pillow into your new handy-dandy pillow cover. And just like that, you’ve created a new holiday pillow! The pocket opening will lay flat on the back side of the pillow and you’ll be able to take the cover off again any time you wish.
Pillow Covers For Any Time of Year Too!
Although in this particular tutorial I was making pillow covers for a specific holiday time of the year, you can use this method for any time you might want to recover a pillow. Here are a couple more examples of how I’ve used this very same method in the past with great results.
I first wrote about this method in 2011 when I helped my daughter (a newlywed at that time) fix up some old pillows she was still trying to put to good use. The pillows (which were from her husband’s pre-marriage bachelor pad) were greatly freshened up when we were done! On a couple of the pillows we decided to add decorative buttons to the pocket flap and display it on the front of the pillow.
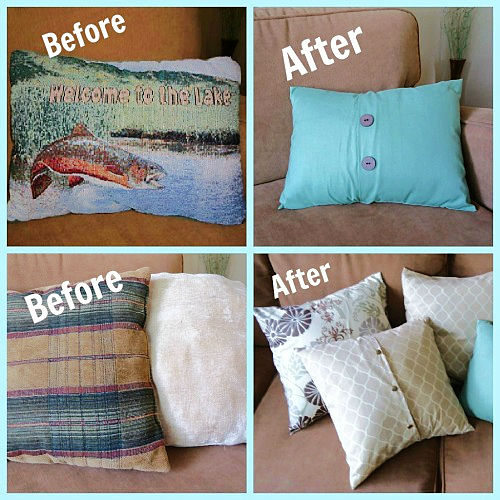
The next time I used this method was to put a couple of pillows that came with my couch to good use. I didn’t need them on my couch in my living room, but I decided they would work very nicely on our futon in the basement. So I covered them in some fun fabric to contrast with the black futon and we’ve been happily using them ever since.
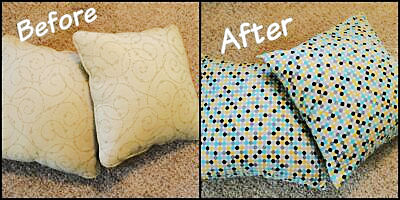
And that’s what I love about these envelope pillow covers! You can make them to fit any size pillow, you can take them on or off whenever you want, and they can be in any color or design because you made your own!
To Try Next:
How To Make A Holiday Pillow Cover
Materials:
- Material to cover your pillow
- Scissors
- Pins
- Sewing Machine
Instructions:
- Measure the width of your pillow and add one more inch. Then measure the height of your pillow and and multiply by 2.5. These two measurements will be the width and the length of the rectangle you will cut from your fabric.
- Lay your cut fabric piece flat with the right side of the fabric facing up.
- Fold about 1/3 of the piece up from the bottom. (for instance if your piece is 45" long, fold up about 15" of fabric)
- Then fold the raw edge down again about 1/3.
- The take the top edge and fold it down to cover about half of your last fold. (After making these folds, your piece should now be the same height as the height of the pillow you wish to cover).

- Pin the side edges, and then sew a seam down each side using a 1/2" seam allowance.
- Turn the pillow cover right side out, being sure to get the corners turned out completely.
- Insert your pillow into your new pillow cover.