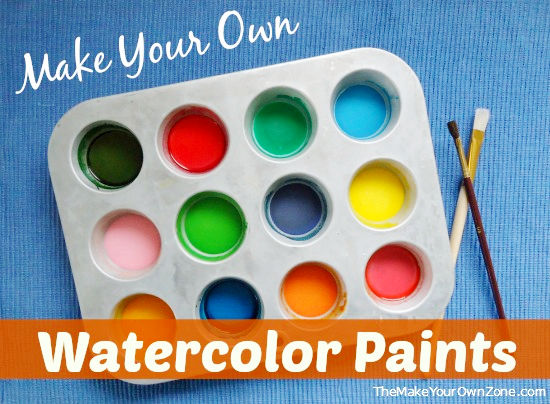
How To Make Homemade Watercolor Paints
This post may contain affiliate links. Please read my disclosure policy for more information.
The first time I made these DIY watercolor paints, it was one of those “just-for-fun ideas” to see if it would work. And guess what? It ended up being cheap therapy! Making homemade watercolor paints is fun for the little ones, sure, but I learned that grownups can find just as much relaxation and enjoyment from a little time spent painting and forgetting all your worries.
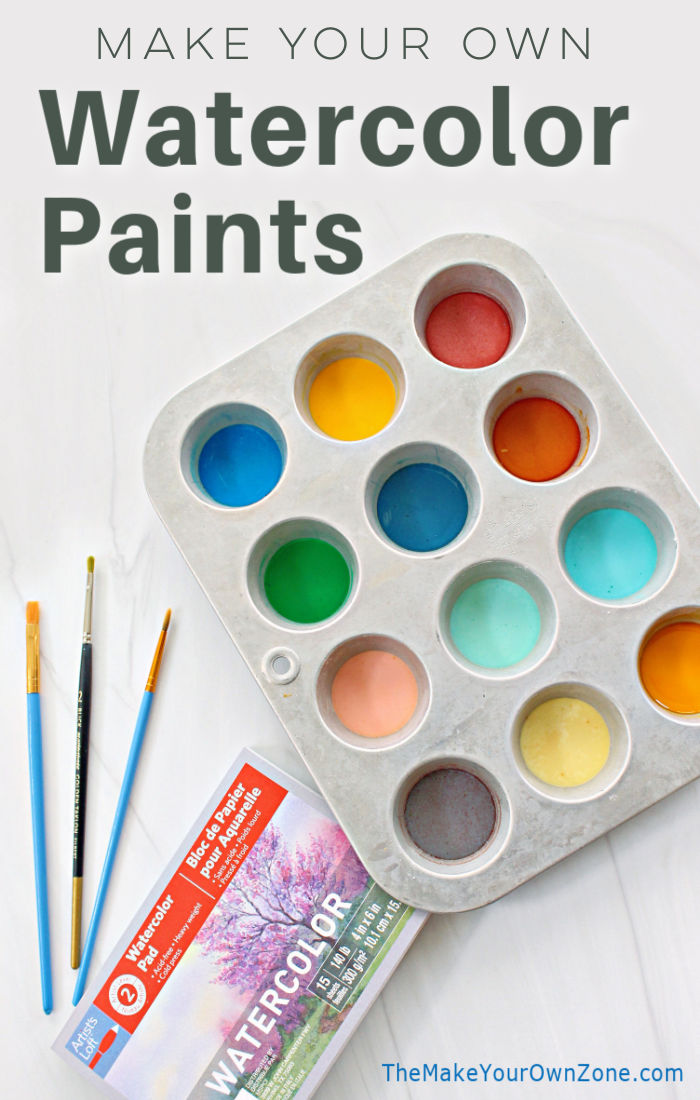
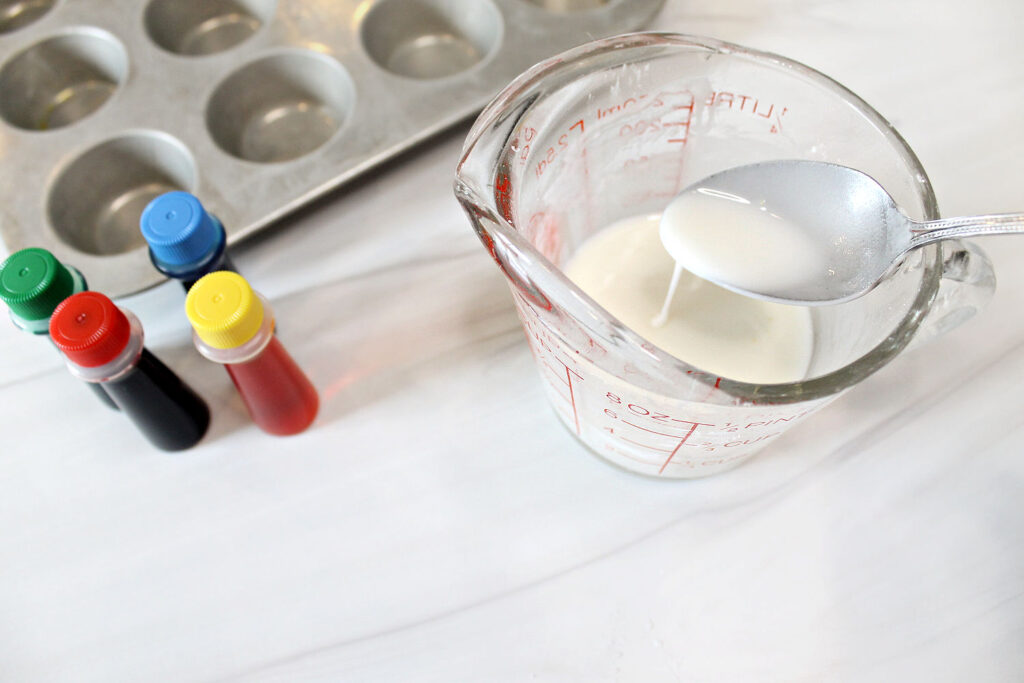
The ingredients for these DIY watercolor paints are ordinary and frugal items too. So not only will you have some cheap therapy from painting, you’ll have some cheap crafting time as well. You’ll need some baking soda, white vinegar, light corn syrup, corn starch, and food coloring. You’ll also need some kind of container for holding your finished paints. I found that a 12-cup mini muffin pan that I already had around the house worked perfectly!
How To Mix Your Own DIY Watercolor Paints
For the first step to make your own watercolor paints, I measure out 4 tablespoons of baking soda into my glass measuring up that has a spout (this makes the pouring the mixture into the muffin pan easier). Then add 2 tablespoons of vinegar to the baking soda.
You’ll need to let the baking soda and vinegar fizz up and then wait until the fizzing is mostly done before stirring them together. Then stir in a 1/2 teaspoon of light corn syrup and 2 tablespoons of corn starch. Your mixture should be about the consistency of Elmers glue.
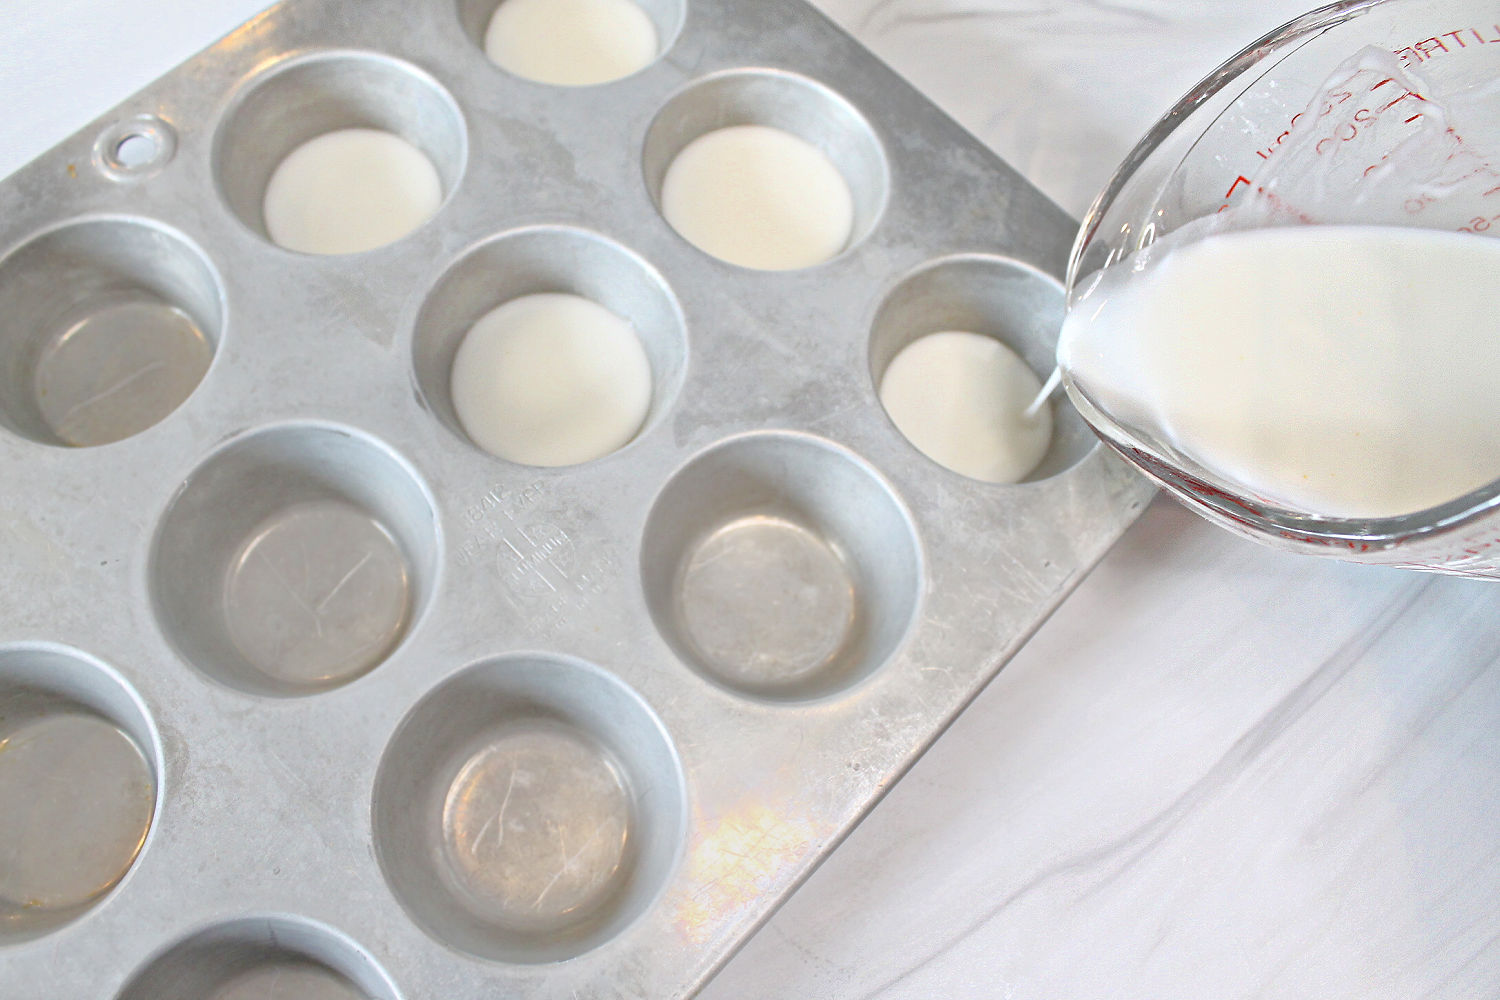
Pour some of the mixture into each opening in your mini muffin pan (or whatever other mold you might be using). I filled each compartment of my pan about a 1/4 to 1/2 full.
Adding Color to Your DIY Watercolor Paints
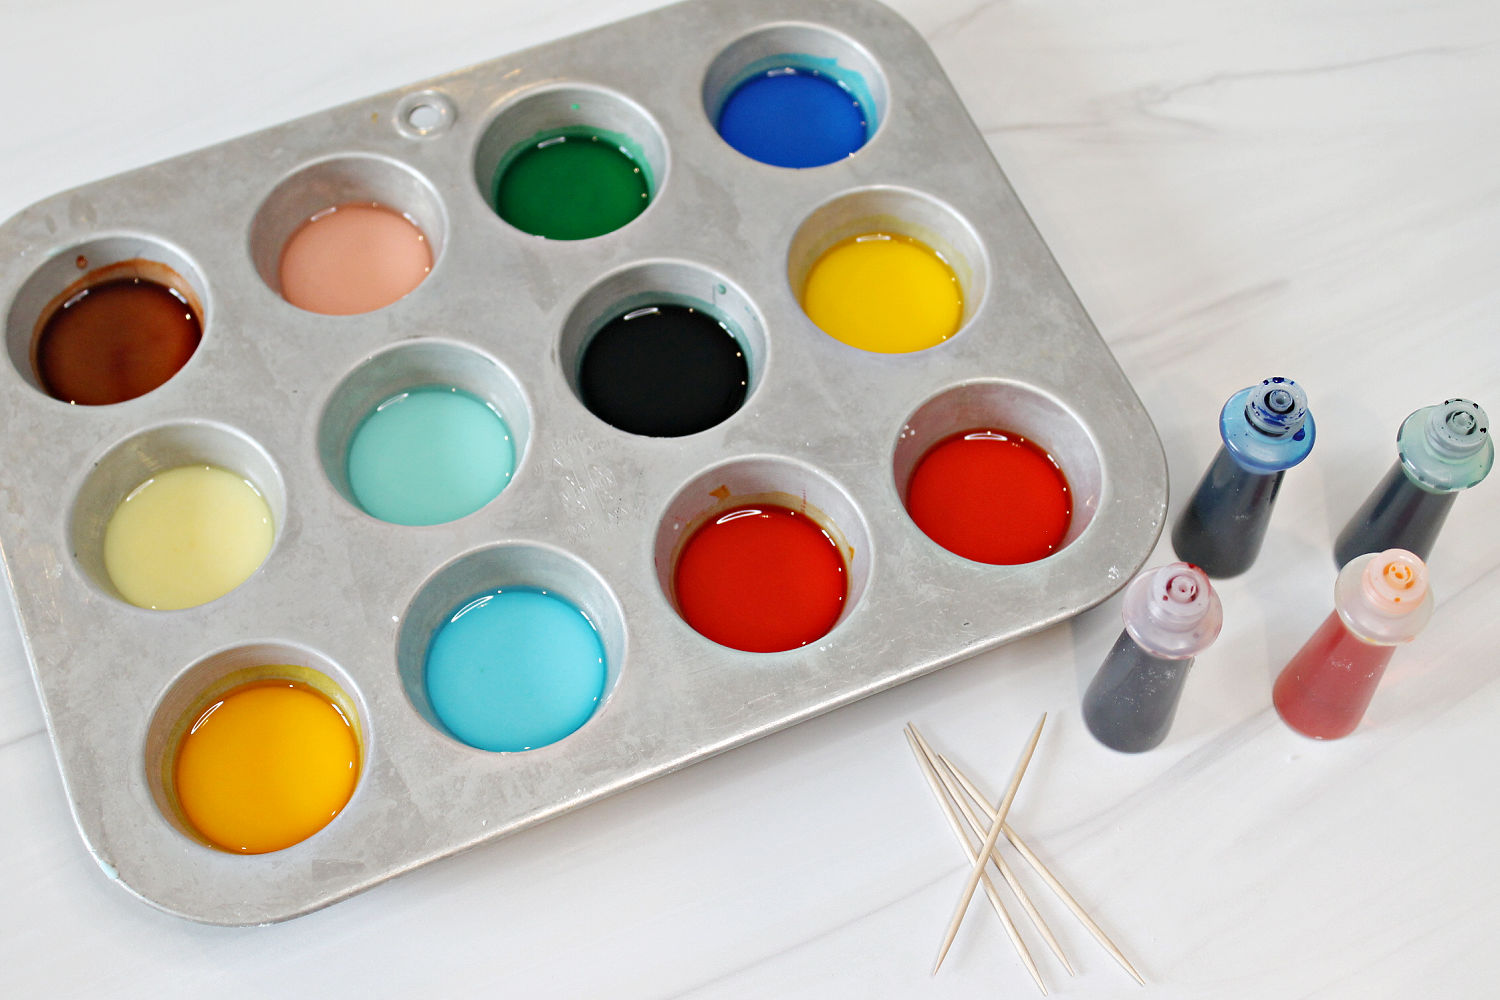
The next step is to add color to the plain white mixture in each compartment. I use ordinary liquid food coloring and I like to use toothpicks to stir the coloring around. It only takes a drop or two to color each compartment.
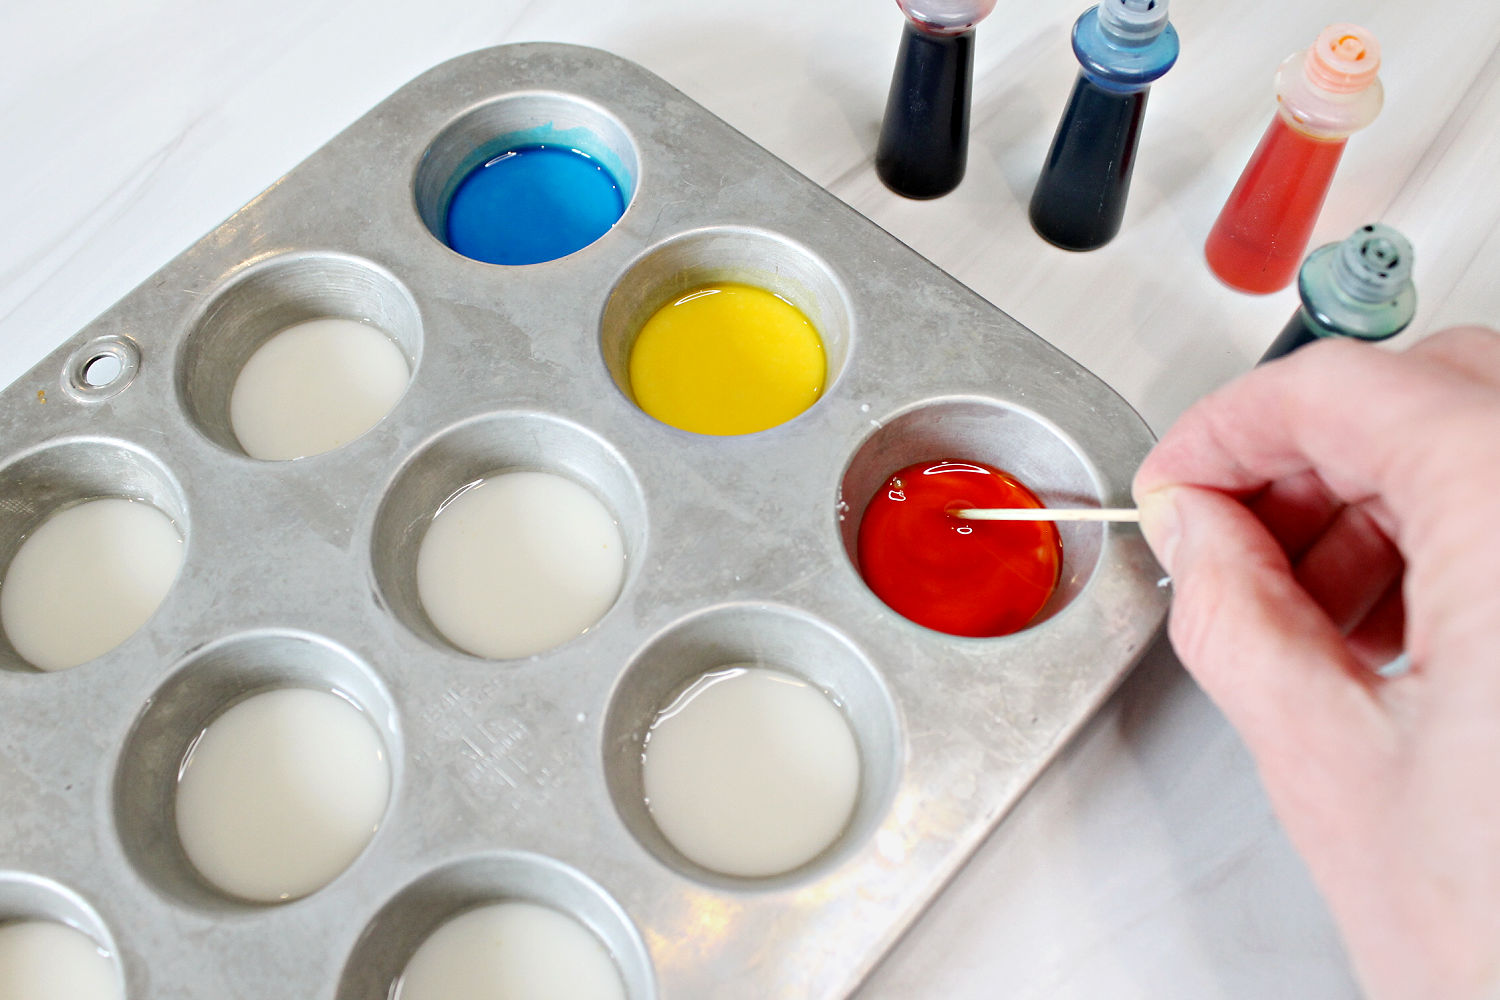
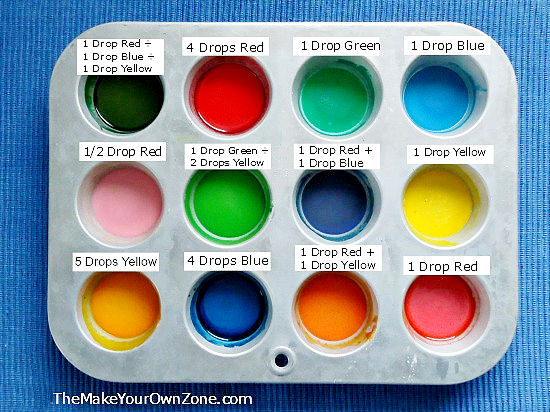
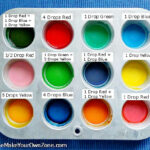
For my most recent batch I didn’t keep very specific track of how many drops I was adding to each compartment. But the first time I made my own watercolor paints I kept much better notes, and the photo below shows those details if you’d like some coloring ideas. For the lighter colors, I just drop some of the food coloring onto the toothpick and then stir it in. I’ve never tried the gel food coloring, but I think that could also work for this project.
Once all the color is added, you’ll need to let your homemade watercolor dry thoroughly. This will take about 36 to 48 hours.
Using Your Homemade Watercolor Paints
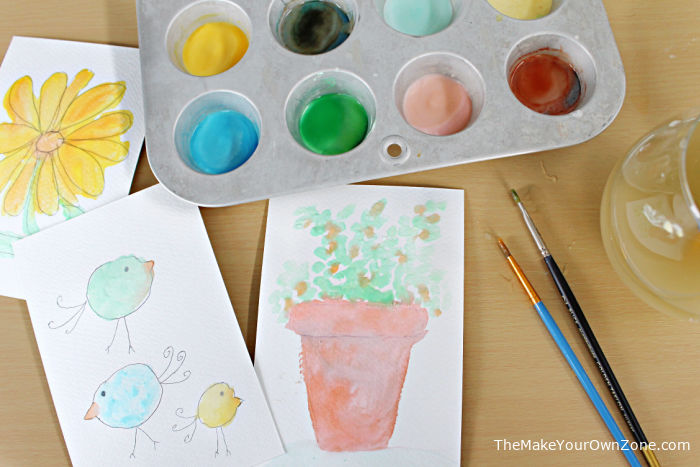
After you’ve been patient and let your homemade watercolors harden up for a day or two, you can then start enjoying yourself and begin painting. Just as with any other watercolor paint set, you’ll need some small paintbrushes, a cup of water (for wetting your brush with the color and for cleaning your brush between colors), and some paper. For my most recent painting (*ahem* therapy), I used a 4×6 pad of watercolor notecards so I could just putz around with some tiny paintings. I used an ink pen to draw some outlines too, and then filled them in with my watercolors.
Children instinctively seem to find the fun in playing with paints and colors, and these homemade watercolors are a great project if you have kids. But even if you’re all grownup (or trying to be all grownup anyway), I hope that these homemade watercolors can give you a little fun and relaxation and can be a frugal way to relax for a while and let your worries and stress melt away.
More DIY Craft Ideas:
Make Your Own Watercolor Paints
Equipment:
- 12-cup mini muffin pan (or other mold with small compartments)
- Toothpicks (or other very small stirring utensil)
- Measuring cup with pouring spout edge (or other spouted container)
Materials:
- 4 tablespoons baking soda
- 2 tablespoons white vinegar
- 1/2 teaspoon light corn syrup
- 2 tablespoons corn starch
- liquid food coloring
Instructions:
- Measure the baking soda into a measuring cup.
- Add the vinegar and let it fizz. Let it almost completely finish fizzing before stirring it into the baking soda.
- Add the corn syrup and the corn starch and stir to mix well. The mixture should now be about the consistency of Elmers glue.
- Pour some of the mixture into each compartment of your muffin pan, filling each compartment about a 1/4 to 1/2 full.
- Next you will add a few drops of food coloring to each compartment. One drop to three drops will probably be enough. Use a toothpick to stir the food coloring until the color is evenly distributed. Some color amount ideas are in the photo below.

- Now you will need to let your new watercolor set thoroughly dry and harden up. This will take 36 to 48 hours.
- To use: Dip a small brush in water and swirl it around on one of the sections to get the color on your brush. Dip your brush in water to rinse when you want to change colors.
Notes:

Bev, I have one question about your DIY watercolor set. Once you have painted your picture and want to place it in a frame to display your artwork, will the paint colors fade over time? Are the food colors light sensitive?
I am so glad that I found your Make Your Own Zone idea postings. What originally caught my eye was your DIY cleaning solution ideas. I have very sensitive skin and worry about all the harmful chemicals in the cleaners that we can purchase in stores today. That and I worry about the damage that is being done to our environment as well.
Thank you so much for sharing your knowledge and talents with all of your followers. I only wish I was as creative as you are! I hope you have a beautiful week! – Mary S.
I don’t think these paints will fade, however I have never kept any of my little paintings very long as I have used mine more for just a bit of relaxation or to let the kids have some fun.
I want to know because we don’t really keep it around the house, and I don’t want to make extra work for my mom. (I am only 12)
do you know any substitutes for the corn syrup?
You might be able to substitute vegetable glycerin for the corn syrup as it’s about the same consistency. Otherwise another liquid sweetener such as agave syrup might work.
This is very helpful. My kids would surely love this. Both using and making them 😊 may I know how long can the paints be stored? thank you!
I found these lasted for about the same length and in the same way as the store bought ones. After some use, they can get hollowed out and maybe a few tiny cracks can be seen when drying out again, but they can be used over and over for many months.
I think this would be fun to do in a plastic candy mold(probably not silicone because it’s too bendy/messy). Thanks for sharing!🤗❤️
This is extremely cool and worked very well for personal colors in my art class!
I’m so glad this recipe worked for your art class Emma – it is indeed a simple and cool little recipe!
Can I use regular ink instead of food coloring?
I’m not sure what type of ink you are thinking about Nina. One of the benefits of food coloring is that it is washable so you can easily clean out whatever container you put your homemade paints in once they are used up. So I would say you can use other inks or colorings, but just keep in mind if you will want to use the muffin tin or ice cube tray (or whatever other container) again in the future, some colorings might be more permanent than others.
Do you know how to add metallic or glitter to these paints?
This is so cool. I was looking at some DIY gift ideas and seeing what could be added into a little Altoids can. Someone put metal “button covers” inside one and filled with water color paints, but I wondered how to get water color paints the right color. THANKS! 🙂
I love the idea of a DIY mini watercolor paint set in a recycle Altoid container, and you could definitely use my recipe in that way too. Cute!
REH thank you. Cornstarch will keep Color from adsorbing into the paper.7-22-2015
Awesome idea!!!!!
Are they washable ?
I did not have to try to wash these out of anything so I can’t say for sure, but because food coloring is used for these watercolors, I would say Yes, because food coloring usually washes out of things OK.
Thank you! Buying supplies for my classes gets to be so expensive and I want my kids to experience art when I teach about the Renaissance. This allows me to bring the Renaissance to my students without bringing my budget into the red.
Thank you so much! Cant wait to try this recipe! I am going to try this soon but going to use natural dyes. And I guess this cleans out of the tins pretty easily right?
Yes, I was pleasantly surprised by how easily these paints cleaned out of the tins.
I keep seeing these instructions, I love that you tell us how many drops of color to get what you want. However, I am EXTREMELY allergic to corn protein and don’t have corn starch in my home. I’m also very reluctant to get any to or to handle making these for just this reason. I wish there were another way to do this.
Perhaps one of the other starches that are not corn-based would work. There is tapioca starch (here is the Amazon link: http://amzn.to/1zSezGZ) and there is potato starch (Amazon link: http://amzn.to/1stgY8n)
Thanks for the links! I’ve got to admit that I haven’t looked to hard for them, even though I knew they existed. These would be extremely helpful when the roomie wants to make a pie again – since our pies are so runny because of the no corn starch thing. I will say that I have used food color directly AS water colors back in my misspent youth to make those water “blot” type picture where you wet down the paper, apply color and let dry then draw in with ink or dry brush to make the picture.
This is just what I needed. I’ll make some up this weekend for my grandson.
I love your post, my daughter will love this paints too. Thanks so much 🙂
Thank you for sharing. Nice project for the next snow/ice day. 😉
This project would be ideal for the kids on a day when they can’t go outdoors. I think they would enjoy mixing up the colors.