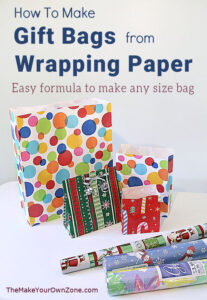
Gift Bags made using Gift Wrap Paper
Wishing you had a gift bag but you only have wrapping paper in the house? This simple strategy lets you turn gift wrap into a gift bag with just a few cuts, folds, and tape.
Equipment:
- Scissors
- Tape
Materials:
- Gift wrapping paper
- Small piece of cardboard (optional for bottom of bag)
Instructions:
- Begin by cutting a piece of gift wrap twice as wide as it is high. For example cut a piece 18" x 9".
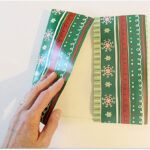
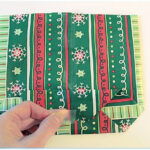
- Turn the paper over so the right side is facing down. Then fold both sides towards the middle and overlap them a bit. Tape the piece together in the middle where it is overlapping. Press down on the outside edges to crease them.
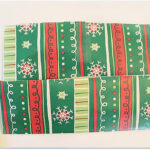
- Next you will fold up one third of the bottom. For the example of an 18" x 9" piece, you would fold up 3".
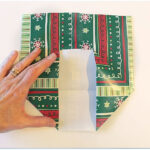
- Open up the bottom folded area as shown and crease the new folds. Add a little extra tape inside on the top half to secure the seam area.
- Then fold up from the bottom, and down from the top, meeting in the middle and overlapping a bit, and tape down. This is the bottom of your bag so tape everything down well.
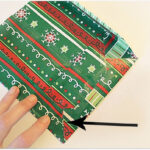
- Now you will fold in from the sides, I line things up in the bottom corners when I do this as shown by the arrow. This step is just to help make a few creases to create side gussets on the bag when you open it up.
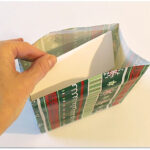
- Finally, open everything up. You will need to carefully make the side folds a little more crisp and get them going in the right direction. You may want to make some of the other folds more crisp too.
- If you would like a sturdier bottom for your gift bag, cut a piece of light cardboard to the appropriate size (index cards work well on smaller bags) and lay it in the bottom of the bag.