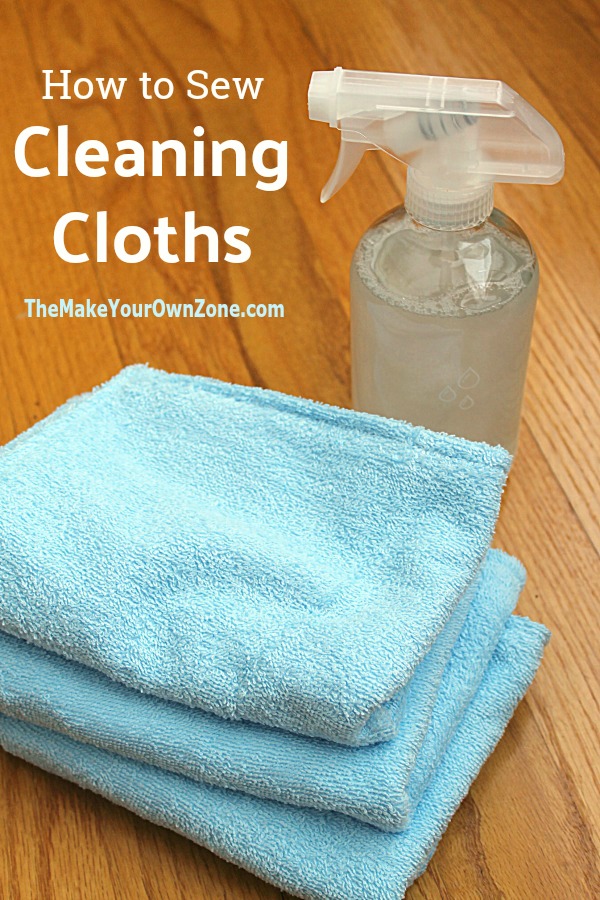
Homemade Cleaning Cloths
When it’s time to do the cleaning, what do you use to wipe your surfaces? Rags from old clothing? Microfiber cloths? Do you just grab the paper towels? There are lots of choices!
I’ve always believed that the best things to wipe surfaces with should also be the most absorbent things. Paper towels are OK for quick little cleanups, but I find them wasteful and not very sturdy for housecleaning. I’ve never been a real fan of microfiber either as all the ones I’ve tried seem to lose their absorbency rather quickly. Rags from old clothing and towels can work, but often times their material is getting worn out which can make them seem flimsy to me too.
My solution for the last few years was to use cloth diapers as my cleaning cloths. They’re a good size and quite absorbent too. But my current ones were starting to wear out and rather than purchase another pack of diapers I decided to see if I could just make my own cleaning cloths. It turned out to be pretty simple to do and I’ve been loving how they work too!
How To Sew Homemade Cleaning Cloths
To make my own cleaning cloths I bought myself a yard of terrycloth fabric and got out my trusty old sewing machine. And then throughout the process I kept repeating to myself – – “Don’t stress, you’re just making cleaning rags!” Yes, I’m not the world’s best seamstress, but I do OK. I don’t have any fancy tools (no rotary cutters or measuring mats or new digital machine features). I’m still using the sewing machine I bought almost 40 years ago!
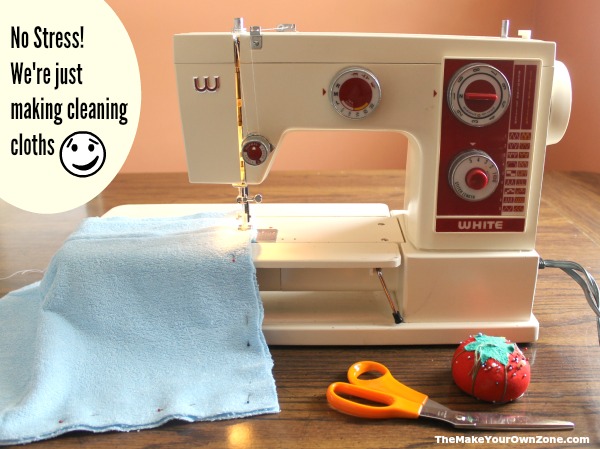
So if the idea of making your own homemade cleaning cloths sounds good to you, but you’re a little unsure of your sewing skills, I would encourage you to still give it a try. Things don’t have to be perfect for something you’re going to end up wiping the toilet with. Repeat after me . . . “We’re just making cleaning rags!” 🙂
Here are the basic steps to follow:
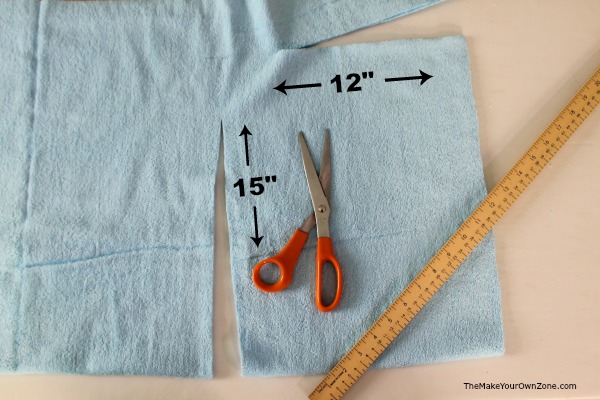
#1 – Cut your fabric
I folded my yard of terry cloth fabric in half. It can be hard sometimes to see if there is a right side or a wrong side to terrycloth, but if do see that, fold your fabric with the right sides together (wrong side facing out). I cut my cloths to a 15″ x 12″ size on the fold. This will give you two layers of fabric to sew together for your cloths.
Note: For one batch of cleaning cloths I pre-washed the terrycloth fabric, and for the next batch I did not pre-wash. The pre-washed fabric raveled like crazy in the wash, but I think the final sewn cloths stayed a little flatter after washing and drying them. The batch where I did not pre-wash the fabric, it seemed like the finished cloths came out of the washer and dryer just a wee bit lumpier. It really didn’t make a huge difference one way or the other so it’s up to you if you want to pre-wash your fabric before cutting.
#2 – Sew the edges together
With the piece you cut out still folded, sew around the cut edges using a 1/2″ seam. Leave a 5″ opening for turning the piece right side out. You may wish to also clip the corner edges for less bulk once you turn the piece right side out.

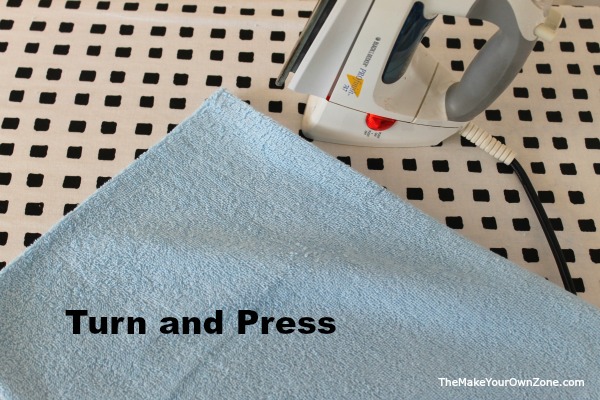
#3 – Turn right side out and press
Once the edges are sewn together, turn the piece right side out. Try to get the corners turned as completely as you can too. (I carefully use the pointed end of a closed scissors to try to get the corners as crisp as I can.) Then press the turned piece with your iron. Turn down the edges of the opening to the inside and press them down too so they are even with the sewn edge. (The opening will be sewn shut on the next step).
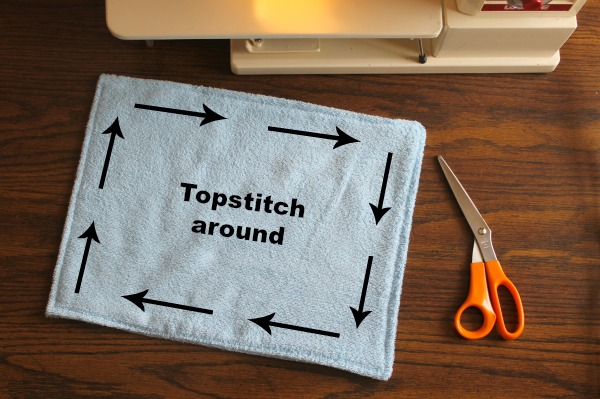
#4 – Topstitch around entire edge
Finally, topstitch around the entire edge of the piece using a 1/4″ seam (or the width of your presser foot). I always start at the point where the opening is so that I know those raw edges are turned to the inside and the topstitching has closed up the opening, and then I proceed around the cloth from there. And then your homemade cleaning cloth is complete!
And if at any point during that process you felt one of your seams was not quite straight, or your topstitching didn’t look exactly perfect as you went around one of the lumpy corners, then repeat after me: “No stress – I’m just making a cleaning cloth! I’m probably going to wipe my toilet with this!”
Why Should I Make My Own Cleaning Cloths?
So perhaps this may seem like extra effort when there’s always the option of just using old towels or other rags for cleaning. But for me, this little bit of work has been well worth it and here are some of the benefits I’ve noticed so far:
They’re Sturdy: Because these cleaning cloths have two layers of fabric they are a nice sturdy cloth that can keep getting the job done as you work your way through the housekeeping. And because you make them yourself, you can make them in any size you want. This gives you the option of having a nice large cloth which I’ve found is a happy little luxury during the housecleaning.
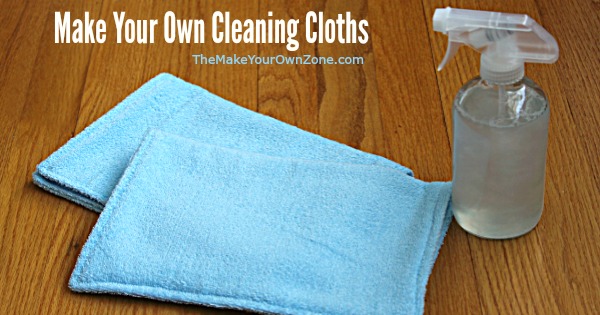
They’re Absorbent: Terrycloth is a very absorbent fabric (which is why we make bath towels out of terrycloth), and having two layers of terrycloth in these DIY cleaning cloths makes them thick and thirsty. After you spray a cleaner on a surface, these homemade cleaning cloths do a great job of totally getting the cleaner wiped away and the surface dry, which is key to having a nice clean surface with no streaking.
They’re Re-usable and Eco-Friendly: These homemade cloths are a great way to clean without using any disposables like paper toweling. They can go through the washer and dryer and can be used many, many times.
They’re Frugal: When you first look at the price of terrycloth in the store, you might not agree on this being a frugal option but hear me out. I was able to use a 40% off coupon at the craft store when I bought my fabric, and for the size cloths I made, was able to get three cloths from the yard I purchased. This then came out to about $1.83 per finished cleaning cloth. BUT, I will be using the cloths over and over and because they are quite thick and sturdy, I’m sure they will last for a long time giving me a lot of good cleaning for that amount of money spent.

I’ve really come to love my homemade cleaning cloths. I use them all the time now and they’ve been working great with my homemade cleaners. Once again by making my own, I was able to create just what I needed. I think if you give them a try, you’ll find that you love them too!

I use a lot of cleaning cloths and terry mop heads. I keep them in a separate container until there is a decent pile to wash. I wash them separately from other whites and never use fabric softener for them.
Thank you for sharing this great tutorial. I hire people to clean my home, but the stringy rags they were using were disintegrating. I used your tutorial to make cloths from some old flannel sheets. So much better!
I was surfing car detailing sites a while back and read this warning about microfiber towels. Washing to reuse is not a problem other than not using fabric softener to make/keep them “soft.” Fabric softener can actually impede absorbancy. Ever wonder why those softened bath towels don’t seem to wisk away moisture as well as they used to? A good example is those ultra softened towels in high end hotels They feel fluffy but you only feel damp dry when done.
The problem comes when drying microfiber towels for use on polished surfaces you don’t want to scratch. The cotton fibers in terry and diapers will eventually scratch you car’s finish. The fibers in microfiber towels won’t UNTIL you dry them at too high a temperature like those used for linens, cotton and permapress. It melts the flagging on the ends of the fibers and makes them hard. You may have noticed with repeated dryings your microfiber towel are less absorbent, feeling stiffer and “harder.” Dry them like lingerie or spandex athletic wear or let them air dry.
Hi,
I love your idea and philosophy. They are just cleaning cloths! I have not had to buy terry cloth as I have several towels that are either fraying at the edges or have holes in them. Never thought to double the cloth though until I saw your site.
Thanks so much.
Stay safe.:-)
Yes, you can definitely use older towels to make these cleaning cloths too, and sewing them into a double layer can help make them more durable.
I have been using old face washers for years, they are getting rather frayed around the edges now but after reading this it gave me the idea of trimming them down a little and sewing two together, therefore extending their life even more.
Thank you.
I think that’s definitely a way you could extend the life of those washcloths Patricia!
Have you a dish cloth knitted pattern
Yes I do! Here’s the link: https://www.themakeyourownzone.com/2-ways-to-knit-diagonal-dishcloths-holes-or-no-holes/
I love this idea! Honestly, I breathed a sigh of relief when I scrolled down to the picture of your sewing machine-it looks like mine. Sometimes, I get tired of reminding myself of my real needs/wants when I see snazzy machines when actually, my machine works just fine.
I have to remind myself of that sometimes too! My old sewing machine still works and I try to stay content. 🙂