Another Printable Planner Page Idea
A few weeks ago I received an email from someone who had found my free printable planner pages but was looking for a slightly different layout. This isn’t the first time I’ve received such an email request but this was the first time I had seen someone printing them the way she was.
She was printing them twice . . . once to just print the planner page, and then running them through the printer again to print a lightly colored photo, giving the effect of a faint design as the background of the planner page. At first I couldn’t quite figure it out from her description of the process so she emailed me a picture, and once I saw it I thought, “Well isn’t that clever and cool!”
So this week I’m sharing not only this new additional free planner page layout, but also a couple examples of how I gave this method a try. Perhaps you’ll be inspired to do a little experimenting with this fun technique too.
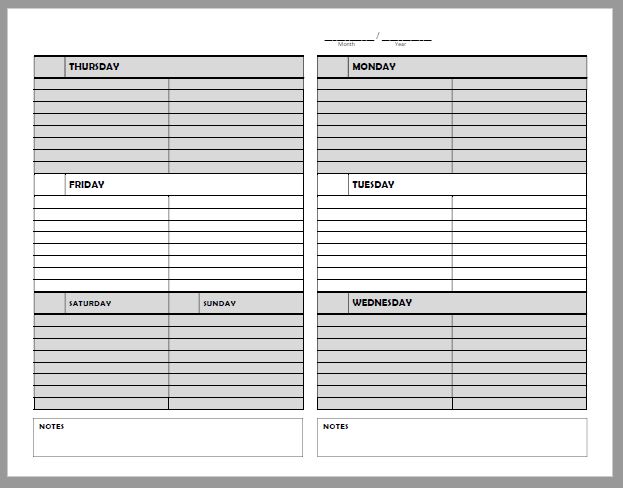
Once again, this free printable fits the Arc junior notebooks. The page is designed to be cut in half down the middle and then punched on the edges. This layout more closely resembles the planner pages that are sold for Arc notebooks. I left this printable completely undated so it can be used perpetually as needed by simply writing in the month, year, and dates in the blanks.
Free Printable here – – > Free Printable Planner Page
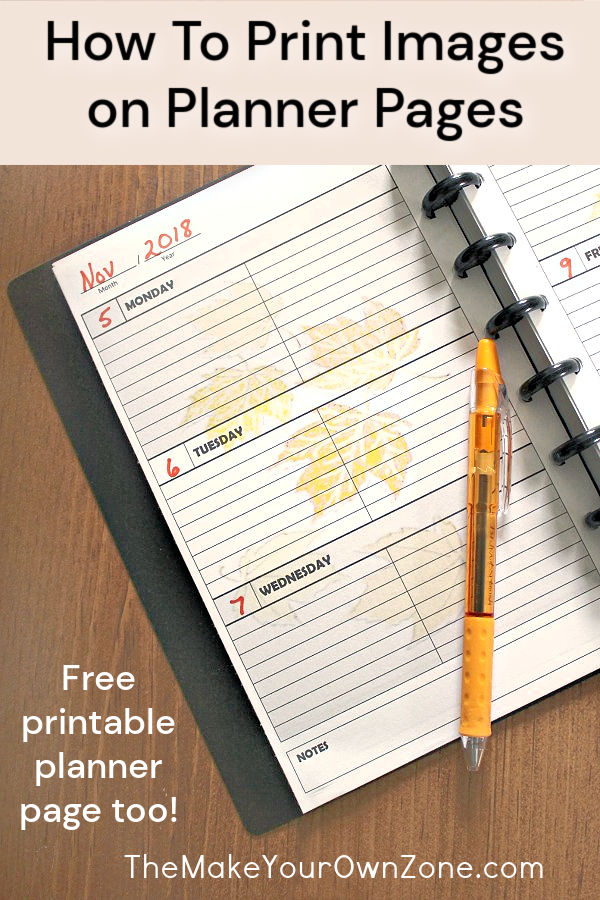
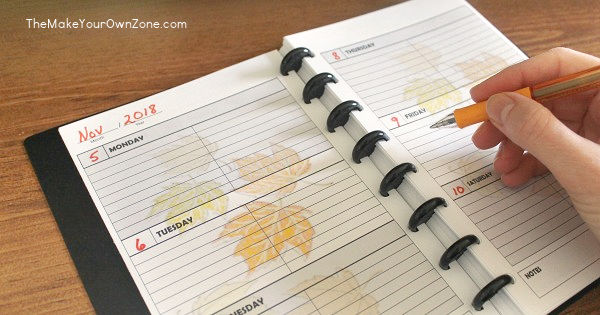
Here’s a photo of how my planner page looked after I ran it through the printer again with an image of some leaves printed on it too.
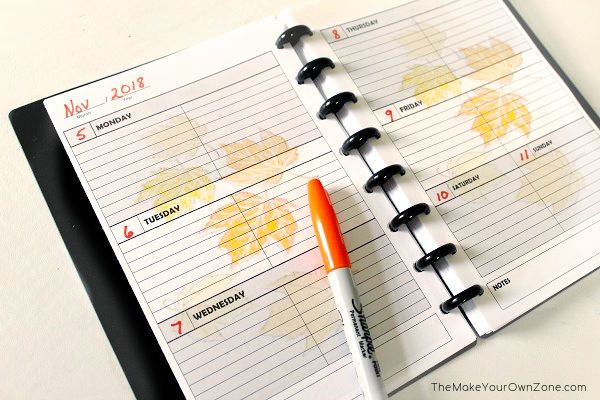
So this is indeed a fun way to add a little seasonal flair to your otherwise ordinary planner pages. You could use a favorite photo of family or pets too.
How to print an image on your planner pages
To prepare your own photo or image for this technique, you will first want to fade it out a little bit by increasing the exposure. You can use a free online photo editor like ippicy.com or ribbet.com to do this. A good starting point for the photo size is about 1000 x 1500.
The method I came up with for making a template for printing the photos was to create a Word document, in landscape mode, with two columns. I then inserted my faded image twice on the page (once in each column). You may need to drag the sides of the image in or out a little bit for the best fit within the column.
Then go ahead and print out your page with the images on it. Then insert that page right back into the printer again and print the planner page on it too. Ta-Da! You just made your own fancy personalized planner pages!
Here’s another one I printed with some snowflakes.
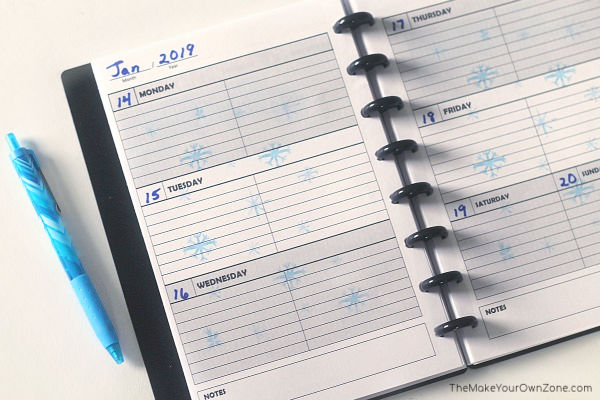
If you would like to test this out with either of my backgrounds, here is the pdf of the leaves and the pdf of the snowflakes. Here’s the pdf of the new free planner page again too: Free Printable Planner Page
(Remember to select “Actual Size” or “100%” when printing planner page pdf’s) Have fun!

Thanks for all the helpful tips and the printables. God bless you.
Many thanks for so many helpful, easy and beautiful pages. They will make my life more simple. God bless you.
Thank you so much for creating these pages and making it so easy! I have been searching for something just like this. I loved reading all of your make it yourself articles.
You may or may not know this trick, but I’ll share this anyway. In order to make a simple faded background in general, start as a word document. In the ‘page layout’ tab at the top or your word document, there is a ‘watermark’ button. When you click on that watermark button there will be an option at the bottom, it’s the first one listed: custom watermark. When you click that custom button you now have several options and one is to use a picture (my English composition teacher loved my ‘first draft’ watermark). I have created my own stationary for letter writing this way. Another quick tip is to check out your local community college. Mine has a print shop there that is very reasonably priced if you’d like to print a stack of whatever that won’t put wear and tear on home printer. Hole punching and plastic spiral binding amongst other options can be included for a nominal fee.
I think I’m missing a step because you are saying you are doing 2 images per page and then putting them back in your planner as 2 pages. But weren’t they already 2 pages? How did you print on 2 pages at once?
Nevermind, I just realized that you did this before you cut the pages.
So sweet and thoughtful of you! God bless you, dear one!
Thank you SO much for doing this! It is perfect, and I will enjoy using it very much 🙂
Glad to help Lynda! I hope you enjoy making your own planner pages!