DIY Notepads and Padding Compound
One of my favorite ways to have some small scratch paper around for notes or lists, is to cut a piece of 8.5×11 paper into four pieces (I cut the paper in half, and then cut in half again). I started using doing this at my job, and now love to do it at home too. But sometimes I have a few too many of these little sheets of paper laying around. What to do? It was time to figure out how to make homemade notepads to keep all those little sheets of paper nicely bound together!
If you want to make your own notepads, the first thing you’ll need to figure out is how you’re going to keep the pages stuck together. The answer is usually to buy padding compound, an adhesive used to make notepads. But you can also go the creative route and just make your own padding compound alternative instead! I went with this option (of course) because I already had all the supplies I needed in the house.
How To Make a Notepad out of 8½x11 Paper
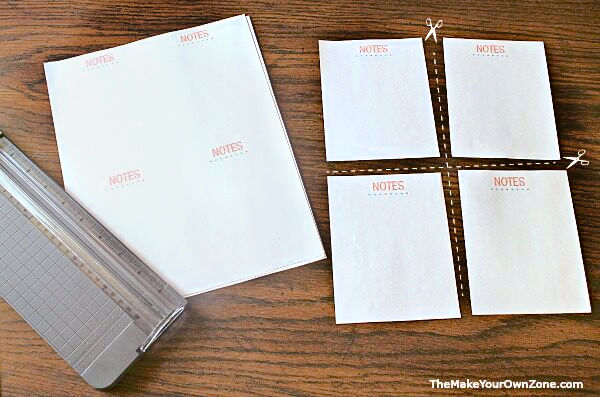
To make my homemade notepads, I used ordinary 8½” x 11″ paper that most of us have around the house for our computer printers. I first cut my paper into four pieces using my paper trimmer. (I also use this to cut my homemade planner pages and it works great!). I cut each page in half the long way and then cut them in half again across. This gives you four pieces of paper that are 4¼” x 5½”, the perfect size for a homemade notepad.
If you want to be a little fancier, you can print a design or some words on your paper before cutting it into four pieces.
I used 12 sheets of paper cut into four, so that each notepad had 48 pages in it. And although it’s not absolutely necessary, I discovered it’s nice to have a piece of cardstock at the back of the notepad too.
To prepare them for the DIY padding compound, line the sheets up together so that the top edge is as flat as you can get it. Put your piece of cardstock at the back.
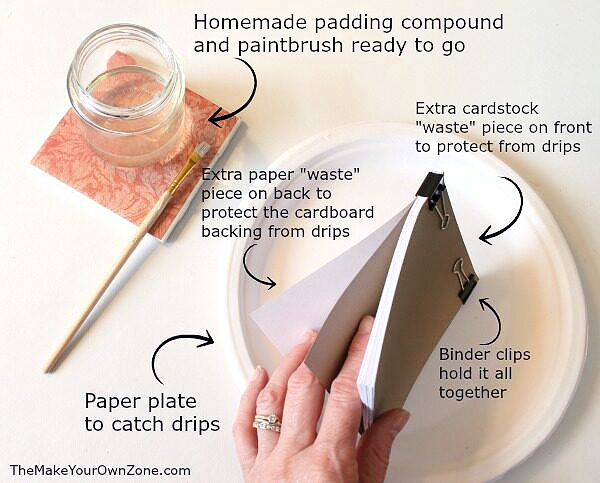
THEN, I found it’s also helpful to have a piece of “waste” paper at the front and back of the pad to catch the drips when you apply the DIY padding compound. I actually used a piece of cardstock for my waste paper on the front, and just a regular piece of paper for a waste sheet on the back.
Once it’s all assembled, hold everything together with binder clips near the top edge. The waste sheets also help absorb the marks of the binder clips on the pad.
DIY Notepad Binding With A Padding Compound Substitute
Once you have all your little sheets of paper ready to go, it’s time to make your homemade padding compound to hold everything together.

To make this you will need the following ingredients:
- 1/4 cup water (heated to boiling)
- 1 packet of unflavored gelatin (¼ oz or about 2 tsp)
- 2 teaspoons white vinegar
- 1 teaspoon glycerin
To begin, put the water in a glass measuring cup and heat in the microwave until boiling. Whisk in the unflavored gelatin until it’s dissolved. Then mix in the vinegar and the glycerin. At this point you may wish to transfer your mixture to another small glass jar.
Let your mixture cool and as it cools the mixture will continue to gel. It’s a little tricky finding the sweet spot where the mixture is cool enough for using, but not so cool that it’s already gelled. You will probably want to let it cool about 40 minutes or so before using. It needs to still be liquid, but beginning to slightly thicken.
Use a paint brush to apply a layer of the DIY padding compound to the top of your notepad. I did three coats, waiting about 10 to 15 minutes between each coat. I also cleaned my paintbrush during the waiting period between coats so it would not harden my brush. The mixture can also be reheated in the microwave again as needed for about 10 seconds if it’s getting too firm during this process.
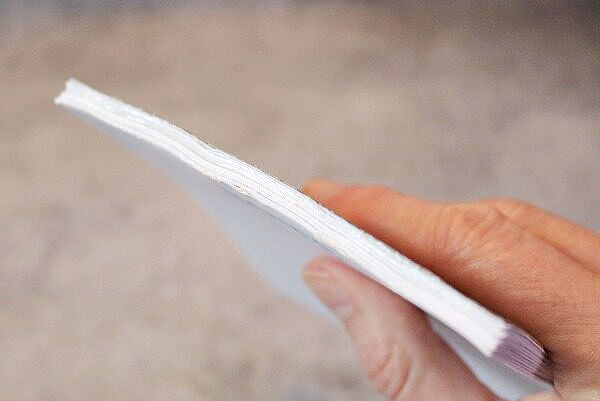
After the three coats, I let everything dry for about an hour, and then removed my binder clips and the waste papers at the front and the back. My DIY notepad was complete! The homemade padding compound was holding everything together, while still having the ability to tear off pages as needed.
Can I Re-Use My DIY Padding Compound?
After you use this homemade padding compound you will discover that it cools to be like very firm jello. However I made a second notepad the next day and was able to reheat the mixture in the microwave to be more liquid again and it still worked fine.
So I believe you could keep this mixture for several days, maybe even for several weeks, and it could be reused again simply by heating it in the microwave for 15 to 20 seconds.
Enjoy Your Homemade Notepads!
So now you can get your crafty groove on and make your own notepads! You could personalize these with a name on each page, put a little stamp or sticker in the bottom corner of each page, use colored paper, (maybe even use several colors of paper in one notepad), or perhaps add a strip of Washi tape at the top. You can use them yourself or give them as gifts. When you make your own, the possibilities are up to you!
DIY Notepads and Padding Compound
Equipment:
- Binder clips
- Small Paintbrush
Materials:
- Several 8.5″x11″ sheets of paper cut into four pieces (4.25″x5.5″)
- 1 Piece of cardstock for back (optional)
- 2 Pieces of waste paper for front & back (to catch drips)
- 1/4 cup Boiling water
- 1 packet Unflavored gelatin (1/4 oz or 2 tsp)
- 2 tsp White vinegar
- 1 tsp Glycerin
Instructions:
- Line your small sheets of paper up together so that the top edge is as flat as you can get it. Put your piece of cardstock at the back.
- Place a piece of "waste" paper at the front and back of the pad to catch the drips when you apply the DIY padding compound. Hold everything together with a couple of binder clips near the top.
- Heat the 1/4 cup of water to boiling in the microwave in a glass measuring cup.
- Whisk the gelatin into the heated water until it's dissolved. Then stir in the vinegar and the glycerin and mix everything together.
- Let the mixture cool before applying to the notepad. You want it to still be liquid but beginning to slightly thicken. Use a paintbrush to apply a layer of the homemade padding compound to the top edge of the notepad.
- Do three coats of the padding compound, waiting about 10 to 15 minutes between each coat. The padding compound mixture can be thinned again in the microwave if needed by heating for about 10 seconds.
- After the three coats, let everything dry for about an hour. You can then remove the binder clips and the waste sheets at the front and the back. Your homemade notepad is complete!
Notes:

has anyone ever tried using this recipie to make a watercolor block? currently i’m using hot glue but don’t care for the way it damages the edges
My padding compound won’t gel. It just stays liquid, even when it has cooled down completely. What am I doing wrong?
Perhaps you could try adding a little more gelatin if you are having a problem getting it to gel.
Too little gelatin.
How did you personalize your paper? I am having so much trouble formatting my paper into 4 quadrants with a name on the top center of each. UGH?
I believe this is the recipe I used for making my padding compound and it worked great. Just wanted to let you know that I stored mine in an air tight glass container and have used the same batch multiple times over the past year or two. Iv had no problems. I just stick it in the microwave for few seconds and it’s good to go. Good luck! Thanks for your post!
You can also use Elmer’s glue instead of padding compound. That works too.