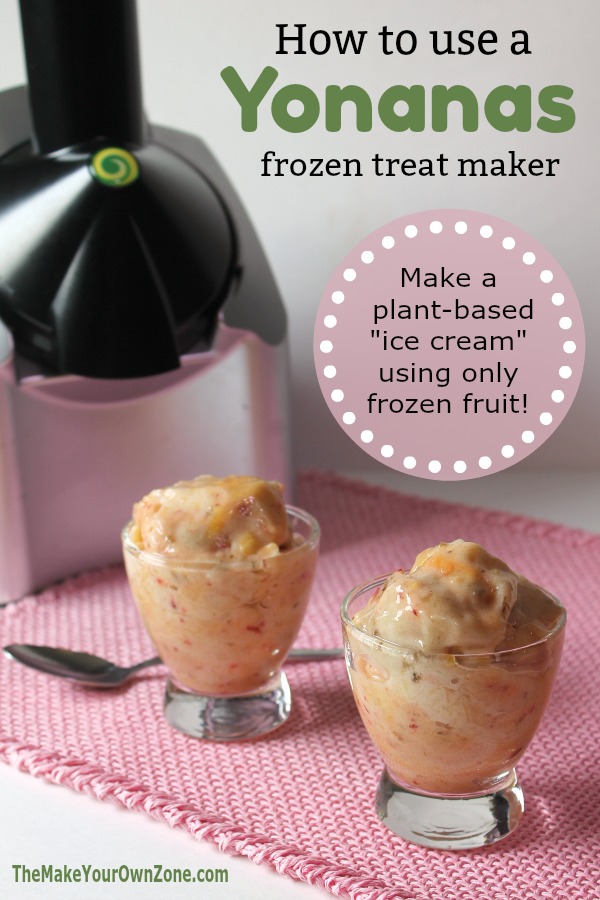
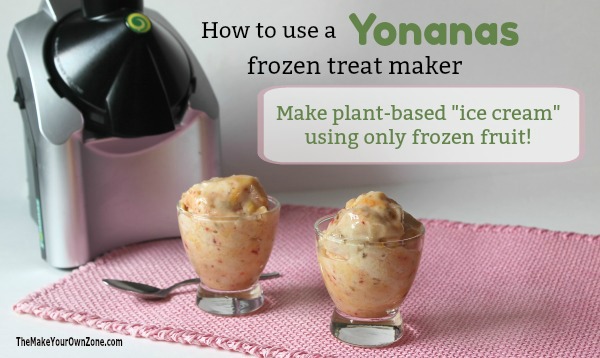
Using a Yonanas for Healthy DIY Ice Cream
Perhaps you’ve made your own ice cream in the past with a traditional ice cream maker. If you’ve done that, you know the ingredients are lots of milk or cream, and sugar. Unfortunately these are all ingredients we’re trying to have much less of at our house. But ice cream was a treat we really missed – which is why I’m so glad I found a solution with an interesting kitchen appliance called a Yonanas (which I read about in the Engine 2 Cookbook). I try not to accumulate too many kitchen gadgets but so far this one is really earning its keep!
What the Yonanas does is turn frozen fruit into a consistency of a soft serve ice cream. It works the best if the base of your mixture is frozen bananas with some other frozen fruits added in too for some more flavor.
So now we finally have a way to make our own “ice cream” using only fruit as an ingredient AND we get a final result where the consistency and texture are really indeed like a soft ice cream and much more to our liking than the texture of some of the other methods we had tried (like a granita for example). Another bonus is that it’s a great way to use up those bananas that are getting too ripe and spotty. WIN-WIN 🙂
The Yonanas is easy enough to use that even my small grandkids love to help use it, and they gobble the ice cream up too which I let them do without feeling guilty, because it’s only fruit!
Frozen Fruit and the Yonanas
The key to using the Yonanas is to use frozen fruit – BUT – it must be partially thawed. I goofed one time and forgot to let it thaw a little bit and it definitely does not work with fruit straight from the freezer. You just get little icy shards shooting out.
The recipe book that comes with the appliance suggests letting your fruit thaw for 7 to 10 minutes. I’ve found that just a little longer works best for me, about 12 to 15 minutes. I set my frozen fruit out on a dinner plate and then set the timer on my stove for 12 minutes so I have a reminder when I can go ahead and get started.
So just a wee bit of patience is involved, but it’s worth it!
I’ve actually been looking forward to some of my bananas getting too ripe now because then I can stash them in the freezer and always have a supply ready and waiting for when I want to make some of this frozen ice cream. The Yonanas recipe book suggests always using bananas that have become “cheetah spotted” as these are sweeter bananas which make for a better tasting ice cream.
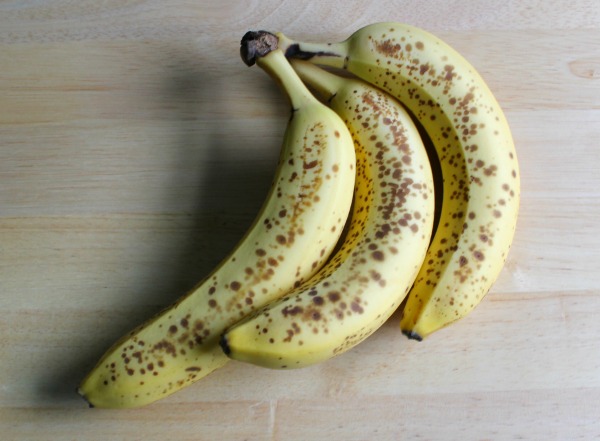
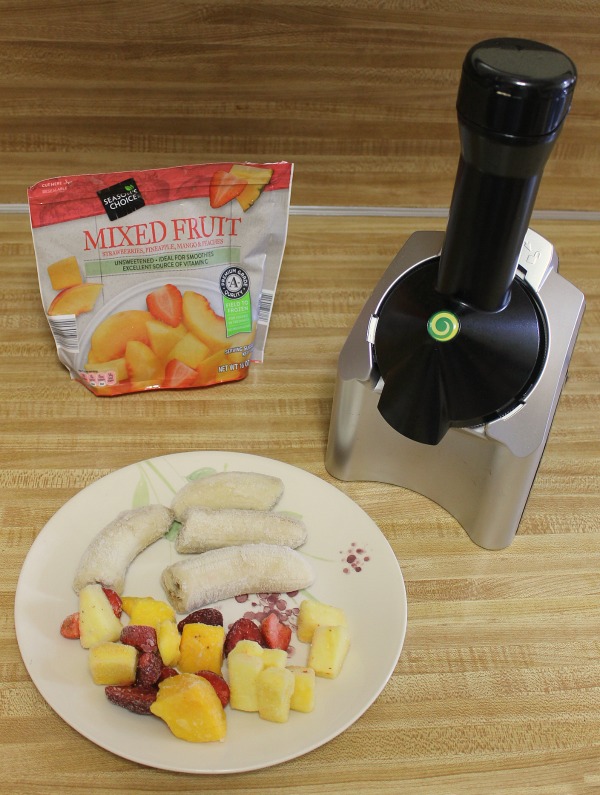
SO – when I have over-ripe bananas, I peel them, break them in half, and pop them in a ziploc bag I keep in the freezer. I’ve also been buying bags of frozen fruit at the store (mixed berries, peaches, mango, etc.) that I can keep on hand to use as extra ingredients for my Yonanas mixtures.
I usually use two frozen bananas, and probably about a 1/2 cup to 1 cup of other frozen fruit (although I don’t measure). This makes a nice amount for two to share.
Although a recipe book comes with the appliance, no recipes are really needed. Any combo of frozen fruit will work, although the frozen bananas make an excellent base for these mixtures.
How To Use A Yonanas Frozen Treat Maker
Once you have your frozen fruit slightly thawed, it’s ready to be put through the appliance.
(Note: I was not paid to write about the Yonanas. I have just found it super helpful and thought others might find it useful to know about this gadget too. The Amazon link below is my affiliate link and I may earn a small commission).
To begin, turn on the Yonanas Ice Cream Maker, and then just feed the frozen fruit through the chute, pressing down on the plunger as you go. (as mentioned earlier, this is an easy and fun job for kids to do too). If using different types of fruit, alternate between using them just to help even out the mixture a little bit.
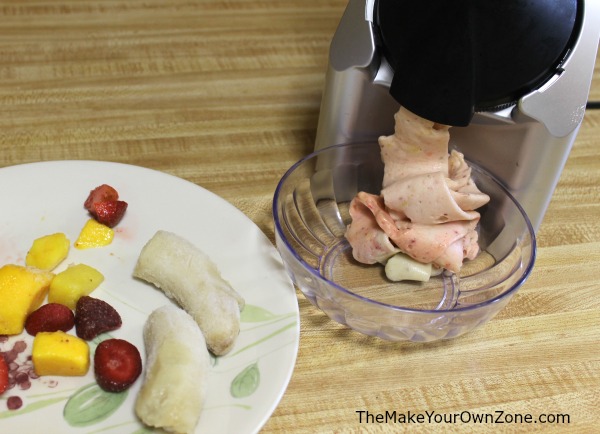
The frozen fruit gets passed through the spinning blades on the cone shaped part of the machine, and when it comes out the the other end of the chute it will be a soft creamy consistency. Yum!
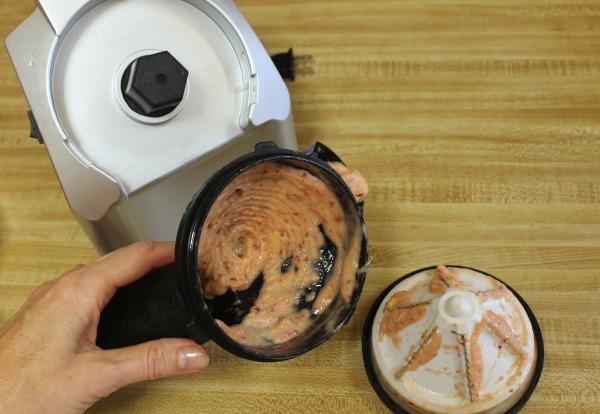
Cleaning your Yonanas machine is pretty simple too as there are only a few pieces to take apart. And when you take them apart, you will find some more creamy fruit in there to scoop off and add to your bowl. It’s too good to just wash it down the sink.
A New Way To Make Your Own Ice Cream
Even though these mixtures are not really ice cream it’s very easy to refer to them that way as they are soft, frozen, and sweet and the bananas lend a “creaminess” to the mixture that makes the whole thing work. If not using bananas, you still end up with tasty frozen mixtures and all of the results from any fruit used are frugal homemade versions of much pricier sorbets at the store.
You can check it out on Amazon here – – > Yonanas Frozen Treat Maker
I purchased mine at Bed, Bath & Beyond (and used a coupon too). They currently cost about $40. I felt it was money well spent as it gives us a healthy alternative that satisfies us when we get an ice cream craving (which happens fairly often . . . )
Perhaps it will be a perfect solution for you too!

…so I hate bananas. Like, really really hate them. But Iove soft serve. I just got a yonanas machine and had the idea to try making regular ice cream with it, so I scouted the internet looking for a precedent…to my surprise I found none. The closest I found was someone in the Amazon Q&A suggesting putting yogurt or nut milk into an ice cube tray to freeze then using in addition to the fruit. I can’t imagine that NOone has attempted just good old fashioned vanilla, non-banana soft serve in one of these….right? So I’ve mixed basic vanilla ice cream ingredients – heavy cream, ½ & ½, sugar, vanilla, that’s it – and am freezing as we speak…I’ll update on whether or not it was an epic fail!
(I’m not seriously the only one who’s tried this, am I?)
I guess because most people buy the Yonanas as an alternative to dairy ice cream, no one felt compelled to try that. It will be interesting to see if that works for you!
hey, was wondering if you ever tried that? I purchased a knockoff one of these. I immediately was searching and have been searching on and off, about 2 weeks. I finally come across this!! Thanks for putting what I wanted to say!! God bless 🙌 🙏
Can frozen milk or frozen cream or frozen yogurt be added if someone wants a little dairy in their frozen dessert?
Yes, you could probably add frozen cream or yogurt, however I don’t think you would need to let them set out for 10 minutes first (as you do for the frozen fruit) because frozen dairy is usually somewhat soft already.
I also used mine without thawing the fruit sufficiently the first time. You really do get shards instead of a mixture that you can stir to blend into creamy goodness. I’ve got some bananas freezing now and can’t wait to try it again with frozen fresh strawberries. I also froze a couple tablespoons of fat free cool whip to add to it for some extra creaminess. I love that cool whip only has four grams of sugar per 1/4 cup. I also froze some vanilla sugar free yogurt that I will use to make my own fro-yo when I don’t have bananas. The unit is SO easy to use and clean and I’m really looking forward to a summer of home made “ice cream” treats without all the additives or grocery store prices. Thanks for the tips!