Make Your Own Heating Pads and Ice Packs
You can ease your aches and pains with this simple method to make your own heating pads and ice packs. A ziploc bag filled with rice comes to the rescue when you need heat, and a ziploc bag popped in the freezer filled with a water and alcohol mixture saves the day when you need an ice pack.
I received a rice filled flannel heating pad as a gift several years ago. It works great! But to make one of those you need a sewing machine and basic sewing skills. I wondered if I could come up with a way to duplicate that by using a piece of flannel and fabric glue to create a sleeve to hold a filled ziploc bag. Here’s what I came up with and it works perfectly!
First, let’s look at the fillers.
Heating Pad
Quart size Ziploc Freezer Bag
3 to 4 cups of regular rice (not instant)
The Ziploc brand bag I used is microwavable. If using a different brand, make sure it is microwavable. Fill the ziploc bag with the rice. You want the bag to be about half to three quarters full. Place the bag on a microwave safe plate and put in the microwave. Leave the bag open a bit to vent. Heat for 1 to 2 minutes. Be careful when removing from microwave – it will be hot. Zip the bag up completely. You can wrap this in a towel to use, or you can try making the fabric sleeve in the instructions below.
Ice Pack
Quart size Ziploc Freezer Bag.
1-1/2 cups Water
1/2 cup Rubbing Alcohol
Put the rubbing alcohol and the water in the ziploc bag and seal. Put in the freezer. Within a few hours you should have a nice slushy mixture. (This is a 1 part alcohol to 3 parts water mixture.) Wrap in a towel or use a fabric sleeve as in the instructions below.
Fabric Sleeve
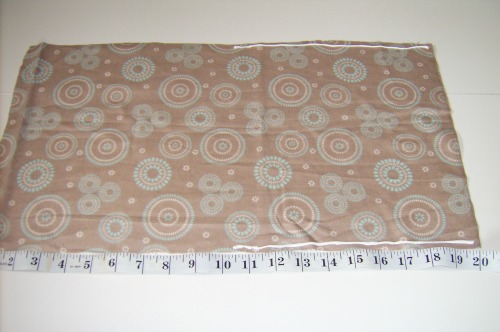
11″ x 20″ Piece of flannel or other soft material
Fabric Glue – I used a brand called Unique Stitch
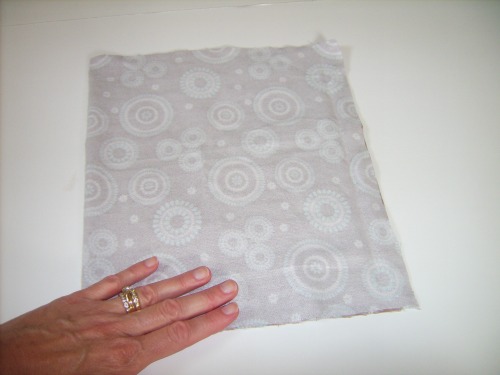
1. Lay the piece of material right side up on your work surface. Run a line of the fabric glue along each of the long edges of the material stopping at the midway point. Use your finger to spread the glue out to the edges.
2. Fold your piece of material in half (right sides will be together) and press down along the glued areas to seal. Let set for about an hour until the glue is dry.
3. Turn right side out. This is your “sleeve”.
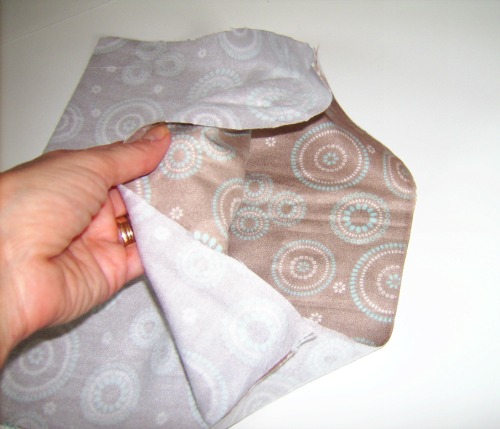
4. Run a line of the fabric glue around the top unfinished edge and fold over to hem.
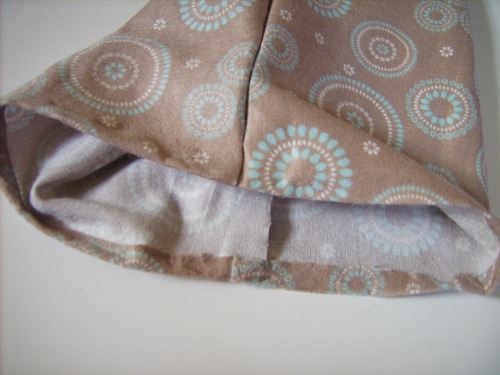
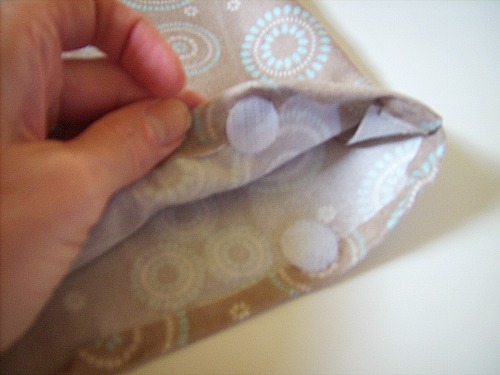
5. I also glued some velcro circles to the top edge so there is a way to keep the sleeve shut.
6. For a heating pad, insert your ziploc bag filled with rice that has been heated in the microwave. For an ice pack insert your ziploc bag that has been frozen with the alcohol and water mixture.

Now you have a cover that can be used for both situations – when you need a cold pack perhaps for an injury, or for when you need a hot pack for sore muscles. Making your own almost always gives you more options!

A detailed guide to do it yourself.
Thanks for sharing.
You can put ingredients for ice pack in a seal a meal bag and freeze. No leaks. Take the air out till bag looks air free but not all crunched up. And because of no air stays cool longer.
Fill a sock with rice, tie a knot in the end, heat and use immediately. Wonderful!
I hold my ice pack in a pillowcase. I also keep several sizes around. Vet tape works great holding them in place
Kristy – If you are seeing condensation, I would leave the ziploc bag open a little bit in the microwave to allow steam to escape. If you do have some condensation, you could wipe it off a little bit with a kitchen towel and then close the bag up again. I don't think the condensation is enough to cause any mold.
Kristy – If you are seeing condensation, I would leave the ziploc bag open a little bit in the microwave to allow steam to escape. If you do have some condensation, you could wipe it off a little bit with a kitchen towel and then close the bag up again. I don't think the condensation is enough to cause any mold.
Curious as to why you can’t use instant rice. 😕
Because instant rice cooks so quickly (in only a few minutes), the worry is that those two or three minutes in the microwave might have the same effect and the warmth might make the instant rice mushy and partially cooked.
If I microwave it closed and it gets full of condensation, is that bad? I don't want to to mould…
If I microwave it closed and it gets full of condensation, is that bad? I don't want to to mould…
You can also put rice into a tube sock and tie it shut. 1 minute, 1 dollar, no sewing.
THANKS so much for the alcohol:water recipe, I'm expecting baby #3 any day, and have been looking for an ice pack alternative!!
I got some lavendar oil and I place a soaked napkin into the rice a couple days before I make my mine and they smells wonderful!