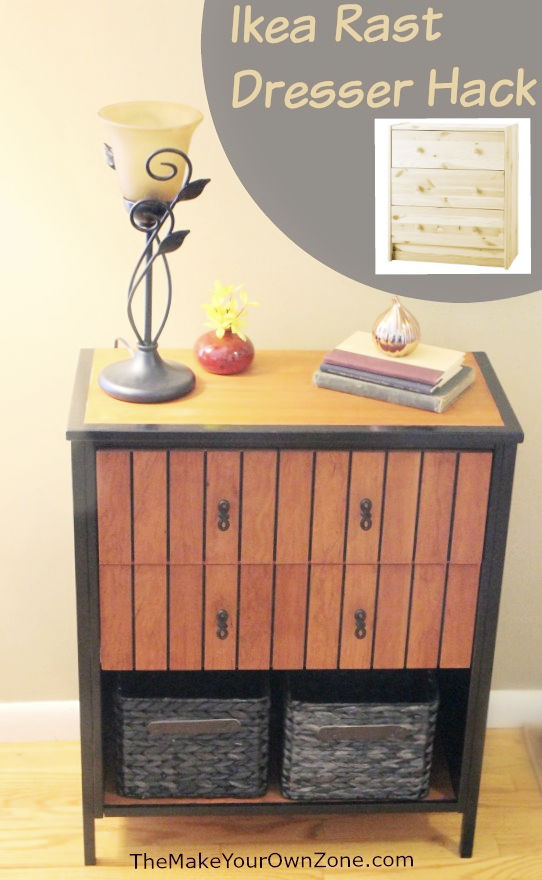
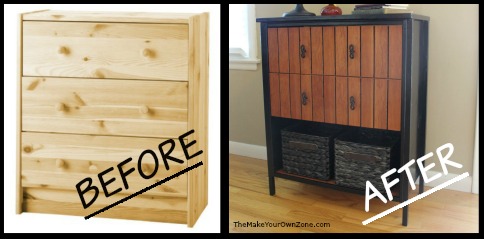
Ikea Rast Dresser Hack
For some time now I’ve been wanting a small table of some sort to set beside my front door to make that area of my home look a bit more like a foyer. Occasionally I would look around the stores when I was out and about but still hadn’t come across the right thing at the right price.
So when a blogging opportunity came along to do a makeover (hack) of a plain Ikea dresser and turn it into something a little different, I thought, “Here’s a way to just make my own foyer table!”
Getting Started on the Ikea Dresser Makeover
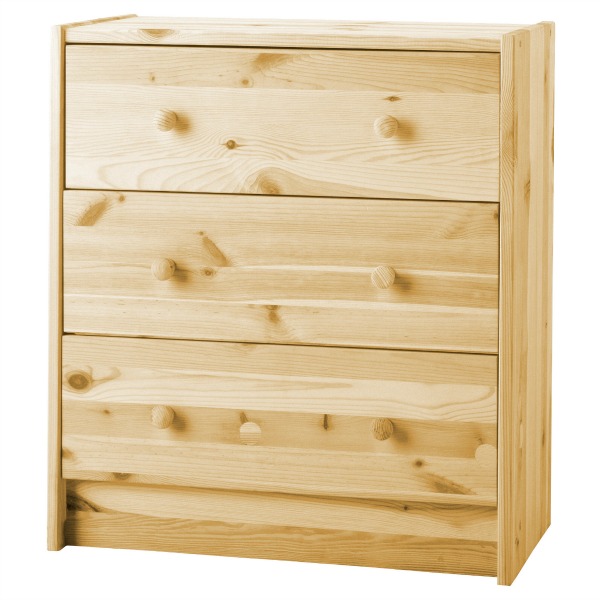
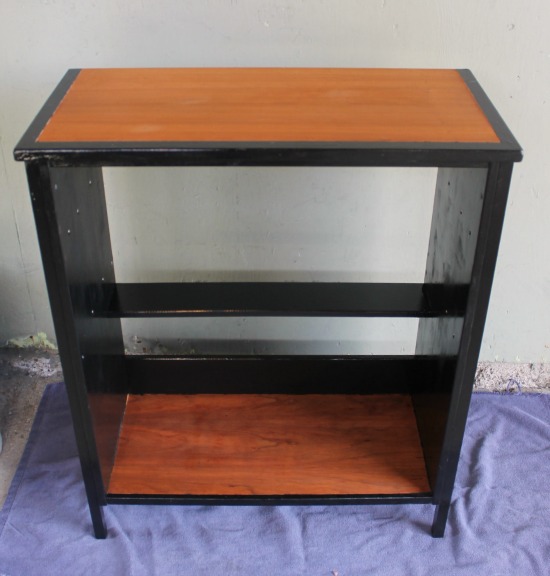
This project began with an unfinished Ikea Rast 3-Drawer dresser like the one below. My goal for this makeover was to create a piece that would complement the TV stand in our living room that has wood slats on the front and black trim.
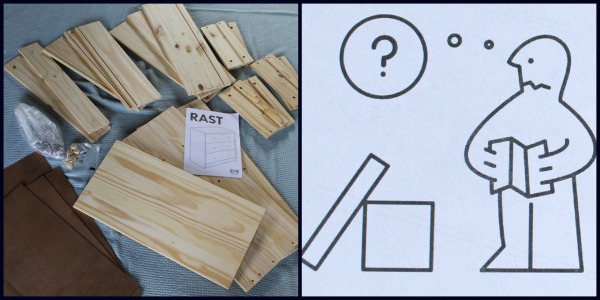
The place to begin, of course, is by laying out all your pieces and start assembling. I’m happy to say that it was pretty simple to put together, even though I momentarily felt like this picture on the instructions.
I didn’t completely assemble the dresser because I wanted to make a few changes.
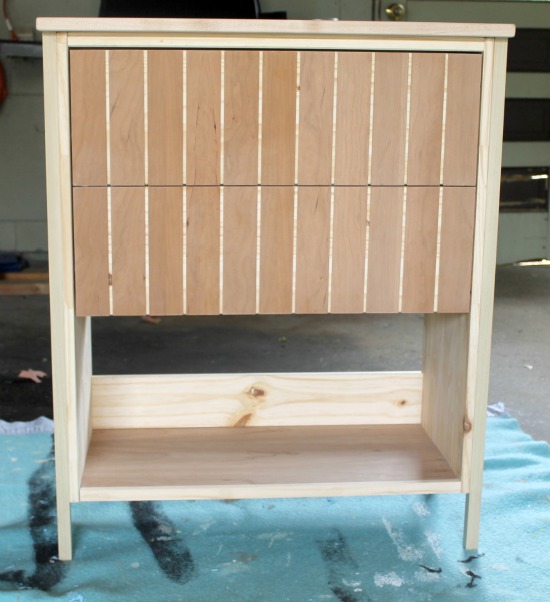
To make my dresser look more like a foyer table, I decided to eliminate the bottom drawer of the dresser, create a shelf on the bottom instead, add then add a top and legs to make it look more like a table.
I enlisted the help of a carpenter friend who I knew could help me saw some pieces of wood to the sizes I needed, and it turned out he had extra wood laying around that fit my needs perfectly. He cut a bottom shelf (23-1/4″ x 11″ x 3/4″) and a top slightly larger (24-1/4″x 11-3/4″ x 3/4″) , both from cherry wood, and attached them with wood glue. A decorative trim piece was put around the edge of the top and bottom shelf too.
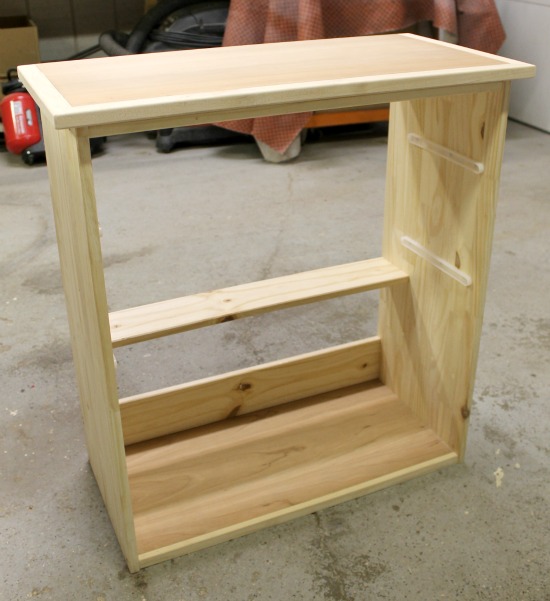
He also cut some legs from poplar wood (I bought a 1″x3″x3′ piece from Menards). These were cut 3/4″ square and were 31″ long and attached with wood glue to each of the outside edges of the dresser. They extended 3-1/2″ beyond the bottom of the dresser which created the look of table legs that I wanted.
The dresser was looking more like a foyer table already!
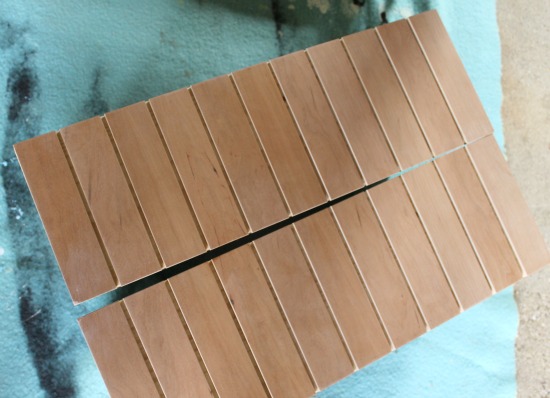
Finally, the drawers were dressed up to look like they had the same type of slats as our TV stand. Pieces of plywood were cut into strips 1-7/8″ wide and then placed 1/4″ apart on the drawers. They were laid out and nailed (with very small finishing nails) onto both drawers at the same time and THEN cut apart (between the two drawers). This assured that the slats on both drawers would line up.
I now had all the pieces in place and could begin painting and staining.
Let’s Make It Beautiful!
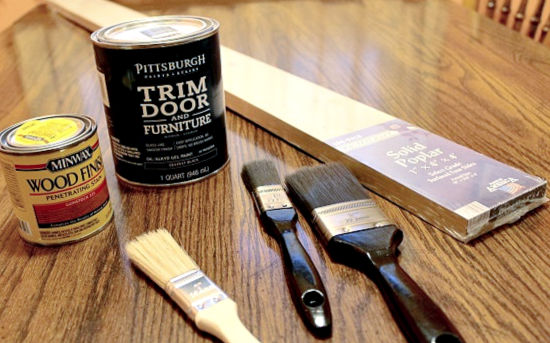
To finish my project, I used Pittsburgh Paints Trim Door & Furniture paint in Deepest Black to paint my dresser/table. This is a new gel paint product that doesn’t drip, a nice feature when you are painting something fussy like a dresser. For the staining, I used a color called Gunstock made by Minwax. The paint, stain, and brushes (along with the big ole piece of poplar wood!) were all bought at Menards.
The top piece and the bottom shelf were stained. All the other areas were painted black, including the trim around the top and the bottom shelf.
When it came to finishing the drawers, I ended up getting one of my tiny craft paintbrushes and very carefully painted between each of the slats with some black craft paint. I had thought about painting the drawers black first, but then decided not too. Live and learn on that one.
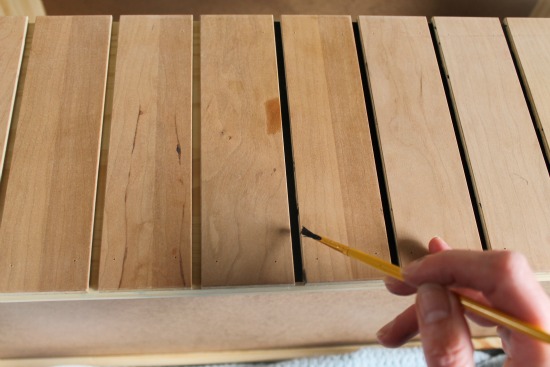
Once the spaces between all the slats were painted black (and then they looked much more like slats!) I was able to stain the rest of the drawers using the Gunstock stain.
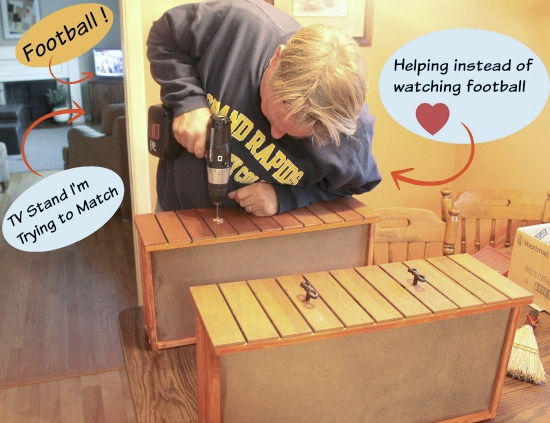
To finish up, I added drawer pulls from Hickory Hardware using their French Twist model in the Black Iron finish (update 2026 – this style might no longer be available). This also kept the same theme going that I was trying to match from our TV stand. Hubby helped me drill a couple new holes on the front of each drawer to attach the new knobs. He even temporarily quit watching an important football game (Michigan State @ Michigan!) to come and help. Thank you!
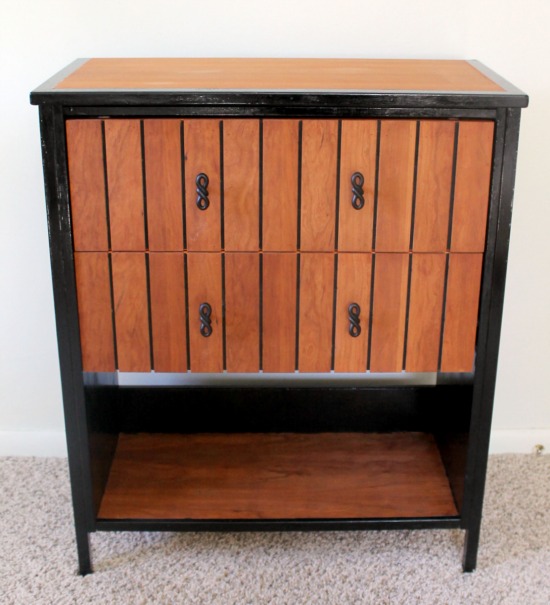
And here’s the final piece once all the painting and staining was done, and the drawer knobs were in place.
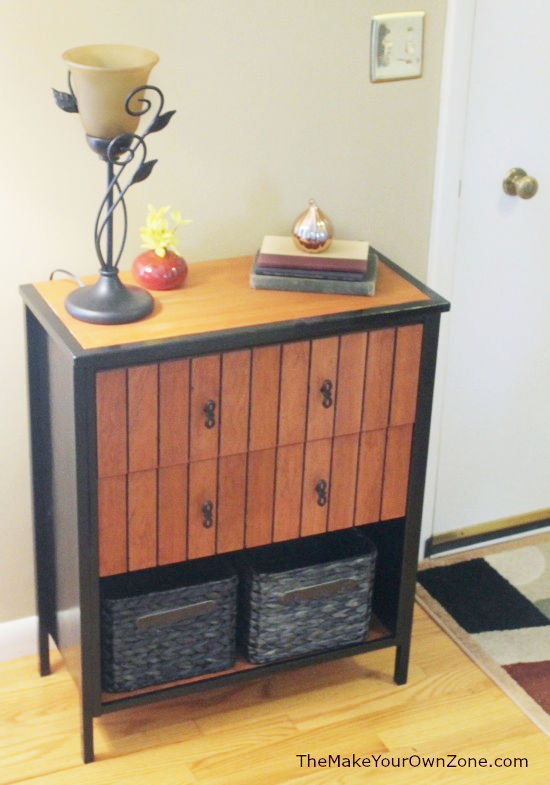
My Handy New Table
So I finally have my foyer table! Here’s the Ikea Rast Dresser all dressed up and in its final place as a foyer table by the front door.
I hope you found this project inspiring! I always think it’s fun to see Before/After transformations and I love all the different ideas people can come up with.
You can see more Ikea Rast Dresser Hacks on the Hickory Hardware Facebook page. Feel free to vote for me! 🙂 ** Click Here To Vote ** Voting no longer open
Disclosure: As part of participating in this makeover project, I was provided with the Ikea Rast Dresser and Menards gift cards to purchase supplies for this project. Thank you to Pittsburgh Paints and Hickory Hardware for the opportunity to participate in this fun challenge!

Bev,
You did a beautiful job on your Ikea project.
Happy Creating,
Karen Marie
Very Very Nice. Great imagination. Great idea for repurposing small chest.
Thanks Kathy! We’ve been enjoying our new “table” very much. 🙂