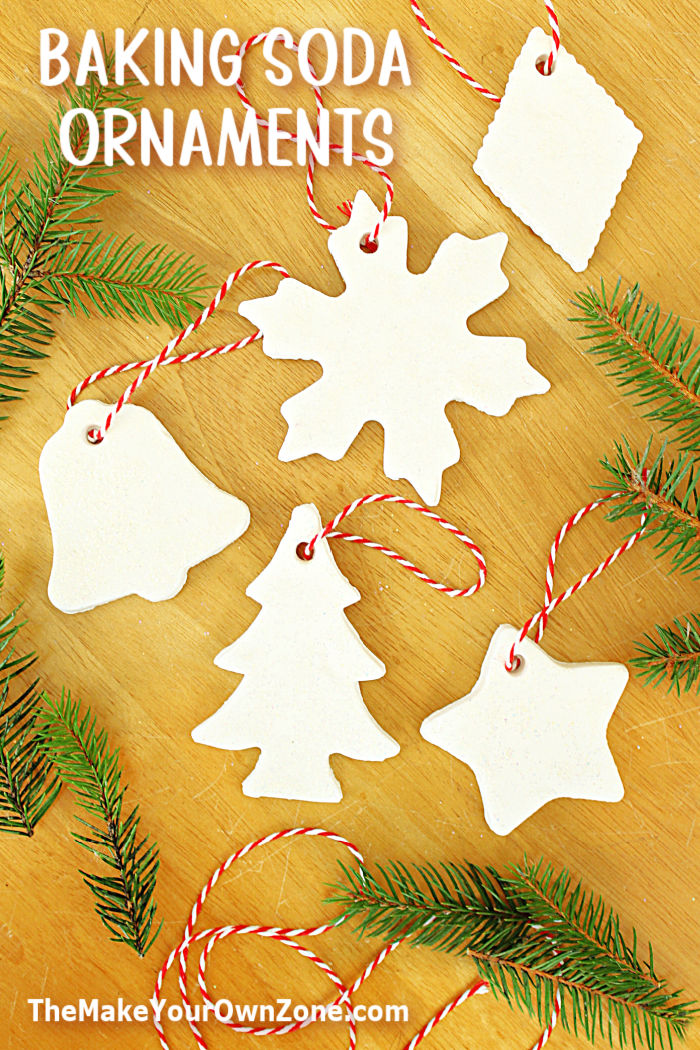
DIY Baking Soda and Cornstarch Ornaments
These frugal ornaments are made using a simple homemade white clay made by mixing baking soda, cornstarch, and water. Use your holiday cookie cutters to cut your clay into festive ornament shapes. Depending on the size of your cookie cutters, you should be able to make about 12 ornaments with this recipe.
Yield: 12 ornaments
Equipment:
- Saucepan & Stirring Utensil
- Wax Paper or Parchment Paper
- Rolling Pin
- Cookie Cutters
- Baking Sheet
- Drinking Straw (for cutting holes)
- Glitter paint & paintbrush (optional)
- String or Ribbon
Materials:
- 1 cup Baking Soda
- 1/2 cup Cornstarch
- 3/4 cup Water
Instructions:
- In a small saucepan, combine the baking soda, cornstarch, and water. At this point the mixture will still be very watery.
- Place the pan with your ingredients on the stove over medium heat. Keep stirring the ingredients and as the mixture heats up and starts to bubble, the mixture will thicken up (this will take about 5 minutes). Stir until the mixture resembles mashed potatoes.
- Lay out a piece of waxed paper or parchment paper. Transfer your clay mixture from your pan onto the paper and let it cool down for a few minutes.
- Once the mixture has cooled to a point where it is comfortable to handle, knead the dough into a smooth clay (so that it no longer looks like mashed potatoes!)
- Place your ball of clay back onto your waxed paper (or parchment paper), and using a rolling pin, roll the clay out to a thickness of at least 1/4" thick. The clay must be at least this thick to make ornaments that are sturdy enough.
- Use cookie cutters to cut out shapes for your ornaments. I found that cutters with simple edges worked the best, and that it was easiest to pull the clay from around the cutter to remove the shape. For cookie cutters with more detailed edges I needed to turn them over and clean away the extra clay from around the edges.
- Place your ornaments on a cookie sheet lined with wax paper (or parchment paper). Using the straw, poke a hole in the top of each of your ornaments.
- Set your cookie sheet with the ornaments aside for two days (48 hours) so that the baking soda clay can dry completely. Two or three times each day, turn the ornaments over and move them around a bit so that they will dry evenly. I also put a fresh piece of wax paper under them on the second day too.
- To make a hangers for your ornaments, cut 10" pieces of string or ribbon and insert it through the hole in the ornaments and tie a small knot.