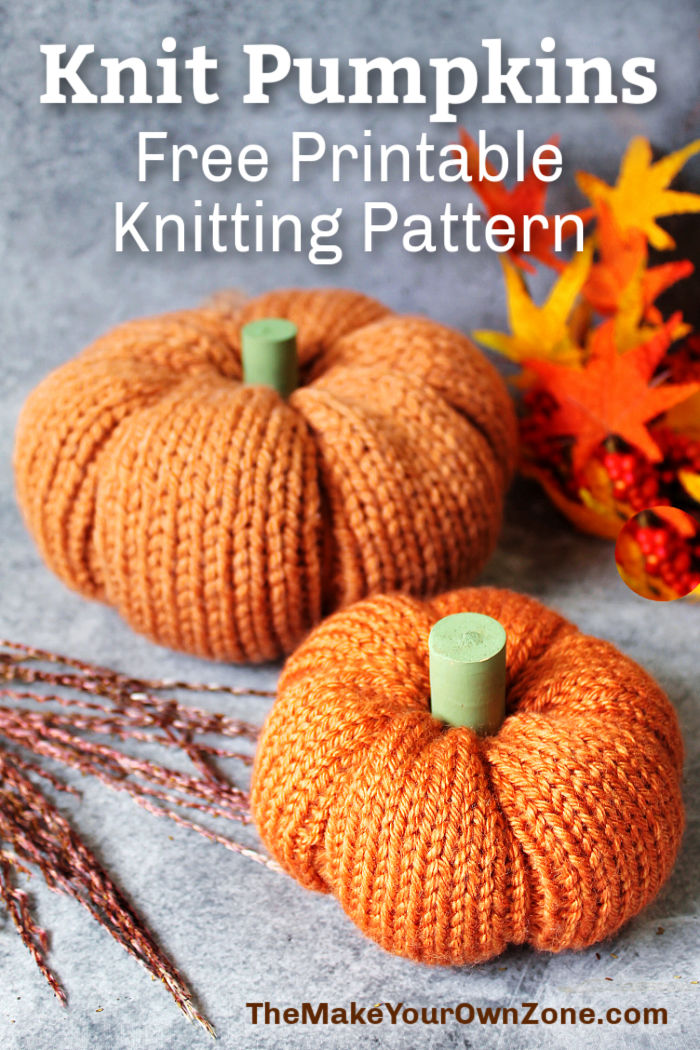
Mini Pumpkin Knitting Pattern
These cute little knit pumpkins work up quickly and are a fun way to use up your leftover yarns too. If you would like to make a small pumpkin about 5" in diameter, use size 6 circular needles and medium weight (size 4) yarn. To make a larger pumpkin about 7" in diameter, you can use this same pattern however use US size 10 circular needles with bulky weight (size 5) yarn. Knitting Abbreviations: K = Knit Kfb = Knit into the front and back of a stitch to increaseP = PurlK2tog = Knit two stitches together to decrease
Yield: 1 Knit Pumpkin
Equipment:
- 16" US Size 6 (4 mm) Circular Needles
- Blunt Large Eye Needle
- Craft Glue or Glue Gun
Materials:
- 1.5 ounces Medium weight (size 4) Yarn
- Polyester Fiberfill Stuffing
For Pumpkin Stem:
- Cork from a bottle of wine
- Small amount of Paint & Paintbrush
For A Larger Pumpkin:
- Use 16" US size 10 (6 mm) circular needles with bulky (size 5) yarn
Instructions:
Knitting Instructions:
- Cast on 36 stitches using the long tail cast on and using enough yarn to have a tail of approximately 12" left after casting on. (This long tail will be used to sew the bottom of the pumpkin later on).
- Place a marker and join yarn to begin knitting in the round, being careful not to twist the stitches.
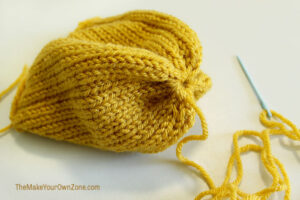
- Row 1: Knit aroundRow 2: *K1, Kfb* around (54 sts)Row 3 (Pattern row): *K8, P1* aroundRepeat Row 3 for a total of 30 pattern row rounds or until piece measures approximately 5-1/2" from the beginning. (If using the larger needles and bulky yarn, piece should measure approximately 7-1/2").Next Row: *K1, K2tog* around (36 sts)Next row: Knit around. At end of round, remove marker. Cut yarn, leaving a very long tail of about 50".
Pumpkin Assembly Instructions:
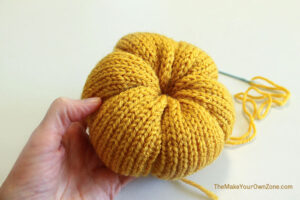
- Thread yarn tail onto a blunt, large-eye needle, and thread through the stitches on the needle, removing them from the needle as you go. Pull to gather the stitches and close the opening, but do not tie off yet at this point.
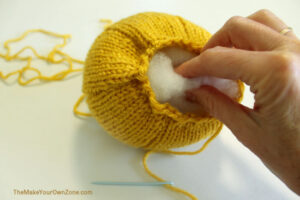
- Now thread the cast-on tail onto a needle, and weave it through the stitches on the bottom edge of your pumpkin so you can begin to gather this opening together, leaving it open a little bit for stuffing. Add the stuffing to your pumpkin. In an upcoming step you will be drawing the yarn through the middle of the pumpkin, so I usually use my fingers to clear a path through the stuffing in the middle of the pumpkin to make that step easier.
- Pull to close the bottom opening, but do not tie off.
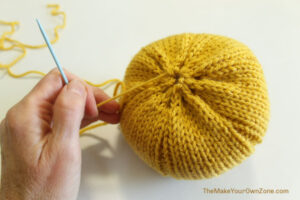
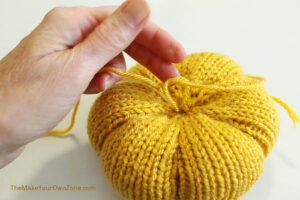
- Next, thread your needle back onto the long tail at the top of the pumpkin. Take the needle down through middle of the pumpkin and out the bottom. Bring the yarn to the top again, lining it up with one of the purl stitch ridges. Take the needle down through the middle of the pumpkin again and out the bottom, pulling it to tighten and create a ridge.

- Continue to pull the yarn through the pumpkin in this fashion, lining up the yarn along the purl stitch ridges, until you have completed all six ridges.
- The final time you bring your yarn down through the middle of the pumpkin and out the bottom to complete the last ridge, pull it tight and then tie the two yarn tails together and cut the yarn to complete the pumpkin.
Pumpkin Stem Instructions:
- Paint a wine cork in a color that you would like for a pumpkin stem. It may take two coats of paint to cover any words or designs on the cork.
- Use a bit of craft glue or a glue gun to fasten the wine cork to the indented area in the middle of the top of your knit pumpkin. You can tie some yarn in a contrasting color around the wine cork stem if you wish as well.
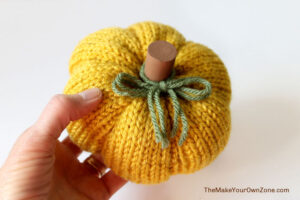
- Note: If you do not have any wine corks, you can also trim cinnamon sticks down to size and glue them to the top for a pumpkin stem.