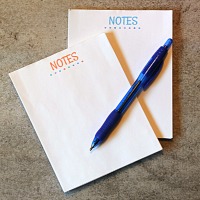
DIY Notepads and Padding Compound
Create your own notepads with this homemade padding compound to hold everything together. Perfect to give as gifts too!
Ingredients:
- Several 8.5"x11" sheets of paper cut into four pieces (4.25"x5.5")
- 1 Piece of cardstock for back (optional)
- 2 Pieces of waste paper for front & back (to catch drips)
- 1/4 cup Boiling Water
- 1 Packet Unflavored Gelatin (1/4 oz or 2 tsp)
- 2 tsp White Vinegar
- 1 tsp Glycerin
Additional Tools:
- Binder Clips
- Small craft paintbrush
Instructions:
- Line your small sheets of paper up together so that the top edge is as flat as you can get it. Put your piece of cardstock at the back.
- Place a piece of "waste" paper at the front and back of the pad to catch the drips when you apply the DIY padding compound. This will help catch the drips when the padding compound is applied. Hold everything together with a couple of binder clips near the top.
- Heat the 1/4 cup of water to boiling in the microwave in a glass measuring cup.
- Whisk the gelatin into the heated water until it's dissolved. Then stir in the vinegar and the glycerin and mix everything well together.
- Let the mixture cool before applying to the notepad. You want it to still be liquid but beginning to slightly thicken. Use a paintbrush to apply a layer of the homemade padding compound to the top edge of the notepad.
- Do three coats of the padding compound, waiting about 10 to 15 minutes between each coat. The padding compound mixture can be thinned again in the microwave if needed by heating for about 10 seconds.
- After the three coats, let everything dry for about an hour. You can then remove the binder clips and the waste sheets at the front and the back. Your homemade notepad is complete!
Notes:
I like to use a piece of cardstock for the waste paper at the front of the notepad as it's a little thicker and does a good job of protecting the first page of paper in the homemade notepad from drips and the impressions of the binder clips.