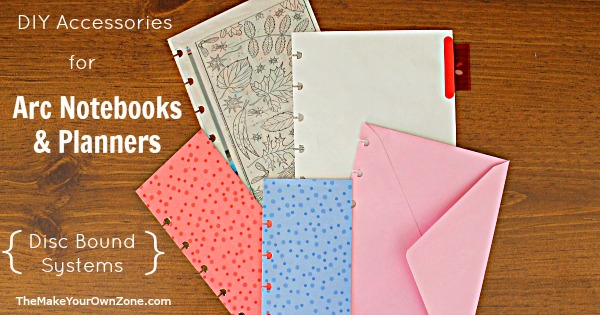
Ideas for DIY Arc Planner Accessories

A few weeks ago I shared my homemade planner pages that I’m printing and putting in my Arc notebook. I’ve been working on getting my planner all set up for the coming year and I think this type of disc bound system is going to work great. Yes, I’m excited to give it a try!
The disc notebook systems come with other accessories like zipper pockets, index dividers, and rulers and I’ve been wondering if I’ll need any of these things too. Of course I’m the sort of person that doesn’t even think about buying those supplies until I first ponder the question – Do you suppose I can just make my own?
When it comes to these disc bound systems it really boils down to the fact that you need those special little holes on the side if something’s going to go in your notebook. That means if you can punch it, you’re good to go. I mentioned in my previous post about my Arc notebook supplies that the cheapskate in me prevailed and I bought the more reasonably priced small paper punch intended for just one piece of paper. If I had paid more and bought the 8 sheet capacity punch, there would be even more things I could punch and put in my notebook!
Nevertheless, I’ve got a few ideas for us frugal folks to make DIY planner supplies, even if we only have a tiny punch.
Let’s take a look:
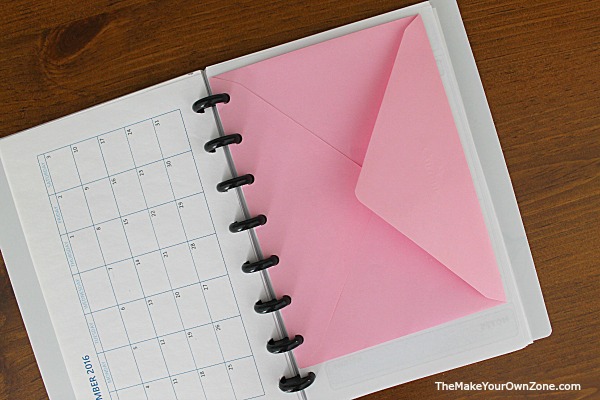
1. Greeting Card Envelope = DIY Pocket Divider
If you have an extra greeting card envelope around the house, you can punch it and put it in your notebook as a divider page and as a way to hold smaller pieces of paper together (receipts or business cards for example). Other size envelopes could possibly be cut down to size for this purpose too however if you cut the envelope, you will have to tape any side edges shut again where you cut it.
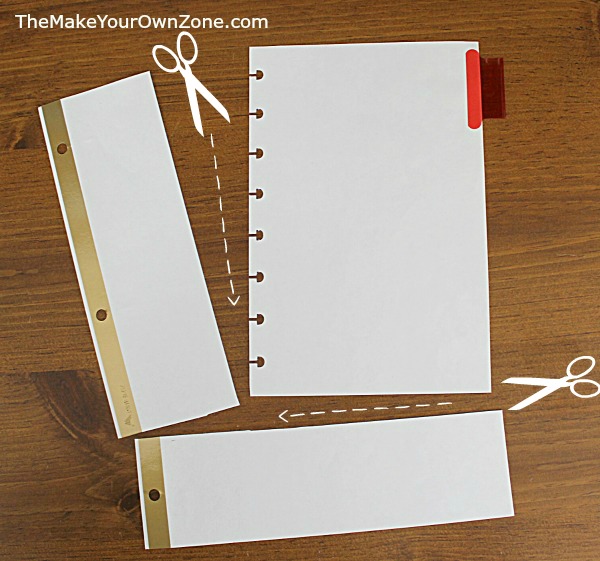
2. Index Guides = Index Guides
Nothing tricky here. All I did for this one was use a leftover letter size index guide I had around the house, trimmed off the edges to make it the “junior” size I needed, and punched it. Pretty easy!
3. Cardstock + Scrapbook Paper = DIY Bookmark
Rather than buy one of those ruler/bookmark/page guide thingies, I used some cardstock I had (an index card would work too), covered it with scrapbook paper using Zip Dry paper glue, and then cut it down to what I thought was a nice bookmark size (3″ x 6″) leaving some of the top portion unpunched so it would stick out above my notebook like a bookmark. They may not be quite as sturdy as the store bought option, but they’re certainly frugal and easy to make should I need to make another one as the year goes along. I made a couple in different colors and I’ll think they’ll work out just fine for me.

4. Coloring page = DIY Boredom Buster
And finally, you can punch a coloring page if you wish and pop it in your planner for a little DIY activity to kill time while you’re waiting or if you need to give the kiddos something to do. I cut out the little coloring page that’s always in my local newspaper, glued it to some cardstock, and popped it in my planner. Of course any printable coloring page online could work too, or cut one from a coloring book, or you can even make your own coloring pages. Just trim it to the size you need and punch it.
So those are a few of the frugal homemade alternatives I’ve thought up as I get my planner ready for the upcoming year. If you’re a person using a disc bound system too, I would encourage you to take a look around your house first and see if there’s something you can trim to size, punch, and then insert in your notebook that could solve your problem. You might be surprised at the DIY solutions you can come up with!

Thank you Beverly for putting together such a wonderful site filled with planner resources. I am in the process of researching how to make my own planner and lean towards using the Arc heavy duty hole punch so I can make my own covers and/or punch through more than 1 sheet of paper, cardstock, laminate sheets, and more.
The larger punches can be very helpful, especially if you have heavier things to punch or many pages to punch. I continue to be a frugal gal who just punches one page at a time with my little punch! lol
Very nice ideas and thanks for the free pages.
Great ideas!!!! Love the plastic bookmarks!!!
I am making my own disc planner and have some questions. Perhaps you would have some answers for me.
Packing tape or self laminate will make that book mark much more sturdy :), or regular laminate if you have a laminator.
Some really cool ideas. Thanks!
For a zipped pouch (for pens or small items), use a zip lock sandwich bag. Put some fancy duct tape (they make some really pretty ones and you can always use duct tape!) along the edge for reinforcement and punch that edge. Washi tape works too, but duct tape lasts longer and is a little sturdier.
That’s an excellent idea Ann!
I used an arc planner for many years. I loved it. But now I use my IPad as my planner. However I still use my Arc Planner as my travel planner. In the front there’s a list of emergency info, confirmations, and itinerary. Then there’s a section for my daily journal entries of our trips memories. In another section I keep track of our expenses. The plastic folders are where I keep receipts, tickets, brochures, etc.
Love that idea Victoria, and that’s what I like most about Arc planners. They are so customizable for different situations (like travel).
How would I print up these for a mini happy planner?
and can you PLEASE do a tutorial on how to make,size and print out covers for a Mini.. PLEASE 🙁
The Mini Happy Planners are smaller than the Arc Junior notebooks, which makes it more challenging to create something yourself because you can’t just cut a regular 8.5×11 piece of copy paper in half and get the right size. This is why I much prefer the Arc juniors because it’s much easier for me to make my own printables for that size. So I don’t currently have plans to make printables for the Happy Planners, sorry 🙁
Thank you so much for sharing this. My grand daughter just left for college and her planner doesn’t leave enough room for her complete schedule. Now I can make one for her that will give her what she needs.
That’s what I like about my homemade planner pages too – plenty of room to write in whatever you need!