Make Your Own Greeting Card Envelope
One of the interesting things that’s happened to me as I’ve become a well seasoned homemaker is that I’ve built up little supplies of things around the house to solve last minute problems.
I wrote once before about my button box that contains a pretty wild assortment of every kind of button that I’ve accumulated over time. But let me tell you that button box has come in handy so many times for fixing shirts, shorts, and what have you on the spur of the moment.

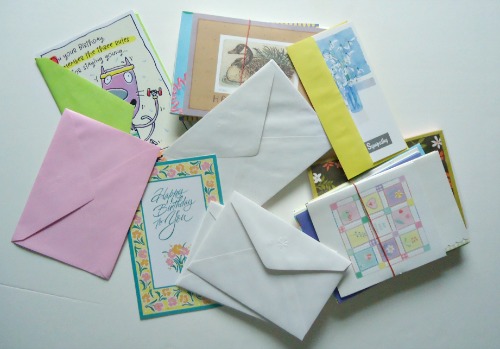
Another supply stash that I’ve built up over the years is my greeting card stash, and I’m not even sure how that happened. Did I buy cards and never give them? Did I get some cards free somewhere? Or at a garage sale? Hmmm, I can’t really remember. All I know is that having a nice little supply of greeting cards can sure be helpful in a pinch.
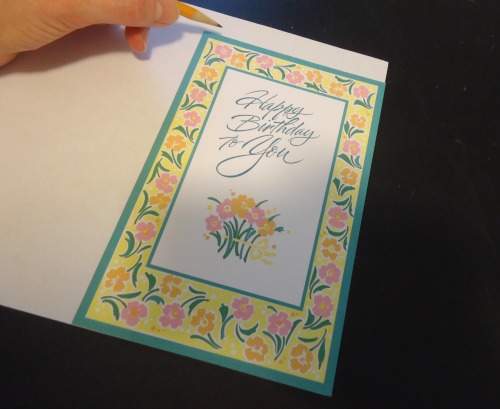
And just this week I was in a pinch. A few hours before we were to leave for a birthday party, it dawned on me I hadn’t ever picked up a card to go with our gift. Time to check the greeting card stash! Yes! I have a birthday card here that will work!!
Oh, but wait. Seriously?? I have the card and not one single envelope here that it will fit into? What the heck happened to the envelope that came with this card?
Well, I think I remember what happened. Hungry Son was standing in the kitchen a few months ago, all decked out in the suit and tie and ready to go to a wedding. He was signing the card that he was going to give and then – uh oh – he realized he had forgotten to grab the envelope in the store that goes with the card when he bought it.
“Mom – do you have an envelope around here that might fit this card?” Off to the card stash we went. And apparently we found one, and it must have been the one that went with the birthday card I now wanted to use.
I can’t be too hard on Hungry Son though for failing on the grabbing of the envelope with the card purchase at the store. I remember also standing in the kitchen, all decked out in my dress and heels and ready to head off to a wedding, and discovering at the last minute that I must have grabbed an envelope at the store that didn’t actually go with the card I bought! The envelope was just a tiny bit too small.
Does anyone else struggle with cards like we do at our house? *sheesh*
I ended up carefully cutting a little bit off the bottom of the card (while using some colorful words) so that I could make it fit. It was not a fun moment.
So back to the problem at hand. What do you do if you have the perfect greeting card in the house but no envelope? Or the wrong size envelope? Or you screwed up writing on the envelope and need another one?
You can make your own!
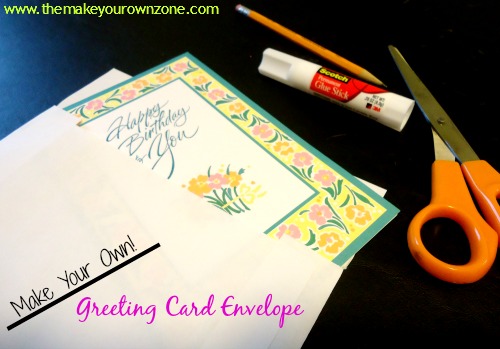
I was able to solve my problem with two pieces of regular 8-1/2 x 11 copy paper (like you would use in a computer printer), a scissors and a glue stick. A ruler and pencil come in handy too, but if you’re really in a pinch you can solve your problem without them.
Here’s how to do it:
How To Make A Greeting Card Envelope
You Will Need:
-
2 pieces of 8-1/2″ x 11″ paper
-
Glue Stick
-
Scissors
-
Pencil and Ruler will also help
I followed these instructions at the WikiHow website which has great step-by-step pictures and instructions.
I’ll also include the instructions here, and I managed to snap a few photos too even though I was in a rush to solve my birthday card problem.
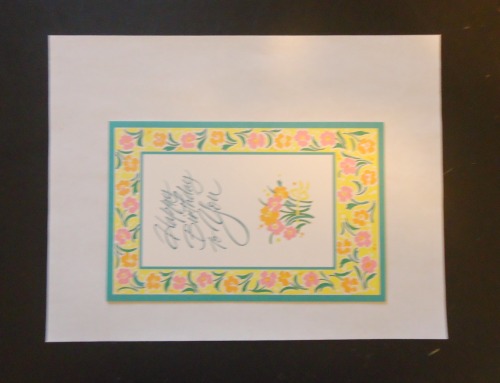
1. Lay your card horizontally on your piece of 8.5″ x 11″ paper, centering it, but placing it a little low. (This is so you can have a larger flap at the top). I used a ruler to make sure I had an equal distance to the edge of the paper on each side.
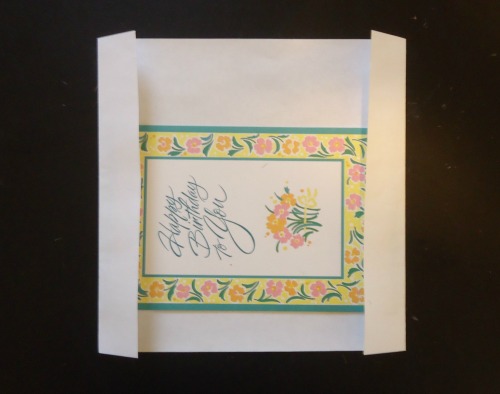
2. Fold the sides of the paper in. Make sure to leave a little room so that the envelope will be a little larger than the card.
3. Then fold the top and bottom too, making sure once again to leave a little bit of wiggle room.

4. Remove the card and flatten the paper out a bit.
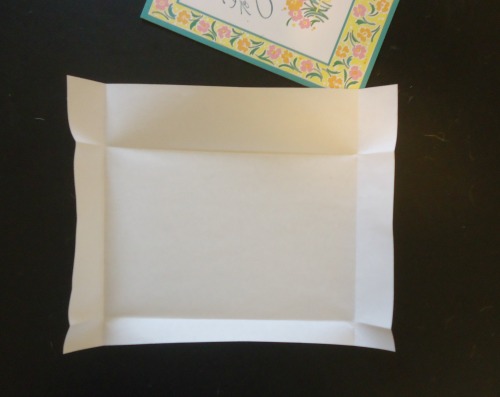
5. Snip off the corners along your fold lines. I found it helped to cut just a tiny bit outside the fold lines.
6. Lay the card back in to make sure you’re happy with your folds and the size. Remove your card for the next steps of gluing the envelope together.

7. Fold in the sides and then put a little glue on the bottom of each side. Fold up the bottom and press down to glue it to the sides.
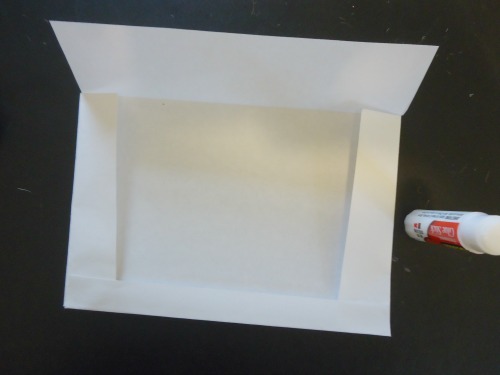
8. Next, from your second piece of paper, you will cut a rectangle slightly smaller than the envelope for the back piece. I found the simplest way to do this was to just use the greeting card itself as a template! Because you leave a little wiggle room when making your folds, the card ends up being the perfect size to trace around for a back piece because it’s just a bit smaller than the finished envelope will be. I also placed the card in the corner of my paper so I only had two edges to cut.
9. Spread a little glue along the sides and bottom of your envelope and place the back piece on, pressing down to glue it in place.
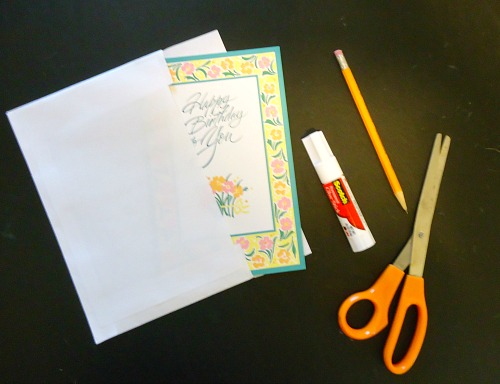
10. Your homemade envelope is finished! After you insert the card, you can use your glue stick on the top flap to seal the envelope shut.
A few more notes:
-
Plain copy paper works for this project, but it’s a little thin and you might be able to see the card a bit through the paper.
-
Colored paper or a heavier paper (like resume paper) would be great choices too. Scrapbook paper might also work if you cut it into a 8.5″ x 11″ rectangle before starting.
-
Although the WikiHow project used liquid Elmers glue for this project (they called it “rubber glue”), I think a glue stick is the better choice.
-
You could also trim the top flap to a point if you want a traditional envelope look.
-
This is a great way to make envelopes for homemade cards too!

This was very helpful, very nice instructions. I had a bunch of greeting cards without an envelope and I don’t have a son who used mine.
For step 8, the back rectangle, you could use a picture from a magazine. The color and design would help conceal the card front.
Yes, you could definitely use any combination of papers available to you to create colorful envelopes 🙂