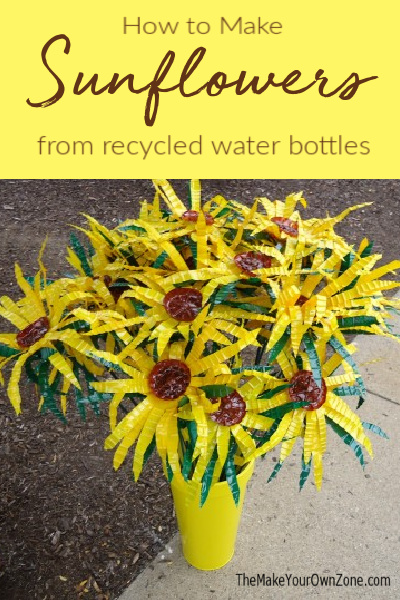
Making Sunflowers from Water Bottles
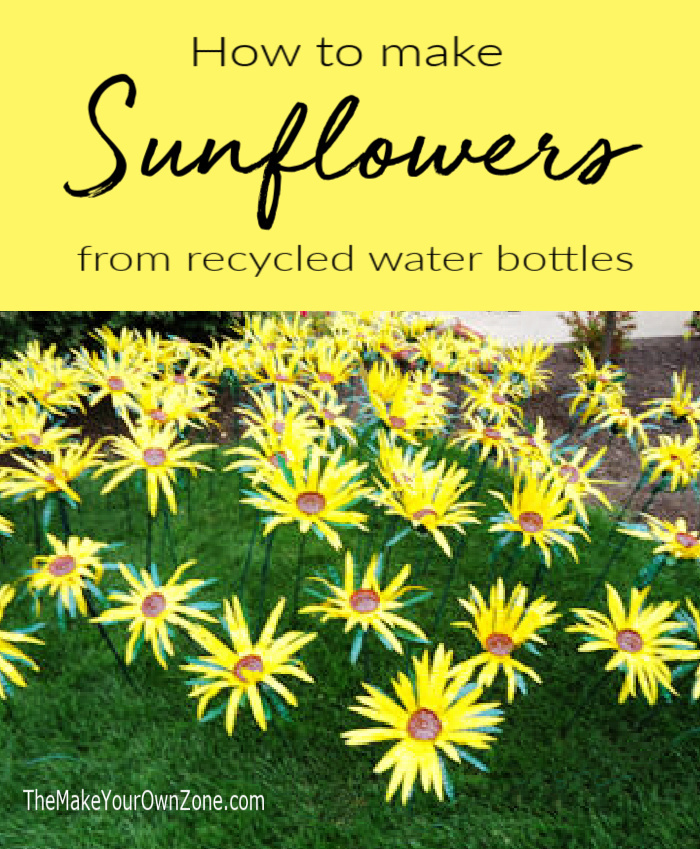
In a recent post I shared my visit to Artprize, a fun event in my hometown where all kinds of art is displayed. One of the entries was titled Thousand Suns and was a field of sunflowers all created from water bottles!
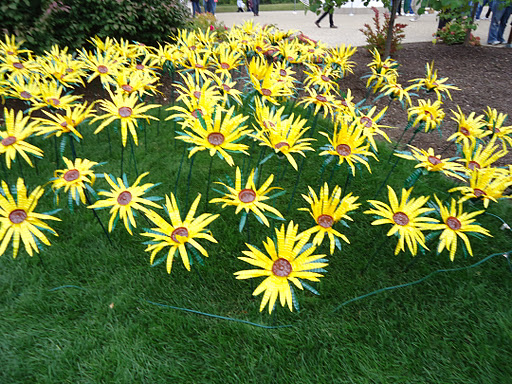
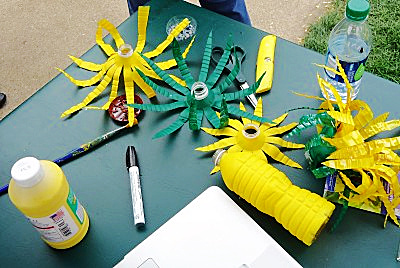
I chatted with a helpful person at their display and they were very open about sharing how they made their sunflowers and how other people could recreate them too. Looking at the table where they were making a sunflower inspired me to try to make my own water bottle sunflowers too.
So I’ll share here how I tried to recreate this cute little craft. I do want to emphasize that this is not my original idea, and I am simply using the inspiration of Libby Hodges, the artist whose entry I so admired at Artprize. Some of her finished sunflowers all gathered together in a vase were inspiring to me too!
Turning My Water Bottles Into Sunflowers
At first was a little frustrated that my sunflower didn’t seem as “floppy” as I thought it should be. After I cut my bottles they wanted to pop right back into the shape of the bottle. I crumpled them and roughed them up a little bit which helped. They also didn’t seem to be nesting together quite as easily as I remembered being shown when I was at Artprize.
But when I took a closer look at the pictures I had taken, some of the flowers are floppy and others not so much. Perhaps all water bottles aren’t quite the same and there may some brands that use a thinner plastic than others or have slightly different tops. So I decided I was doing an Ok job of it after all. 🙂
How to make Water Bottle Sunflowers
The complete printable instructions for making these water bottle sunflowers are below, but here also is a quick summary of the materials needed and the steps I followed:
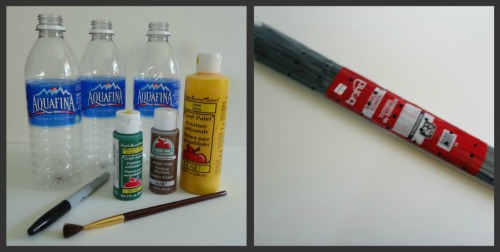
You will need the following supplies:
3 empty water bottles (about a 16 oz size)
Craft Paint: yellow, green, & brown (I used what I had on hand)
Paintbrush
Black Sharpie Marker
Exacto Knife or Scissors
Hot Glue Gun
2′ Bamboo Garden Stake
(I was able to buy a 25 pack of the garden stakes for $2.39 at a local garden store. If you can’t find them at a local store, here’s a link for purchasing them online: 2′ Bamboo Plant Stakes
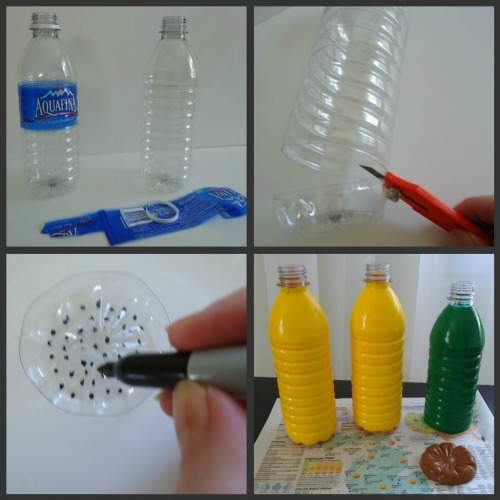
To begin, you’ll remove the labels from your empty water bottles, You’ll also cut the bottom off one of the bottles. Use a black sharpie marker to make small dots on the inside of the bottom piece that was cut off (this will become the center of your sunflower).
Paint two of the bottles yellow. Paint the third bottle whose bottom is already cut off with green. Paint the outside of the bottom piece you put the dots on with brown. I used two coats and let the final coats sit overnight to dry.
Next, you’ll cut the bottoms off the two bottles painted yellow too.
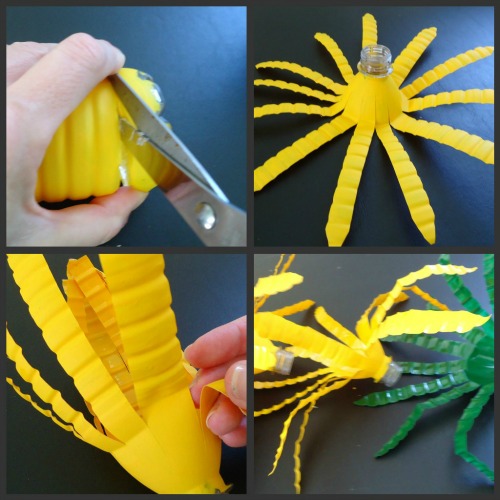
Then, cut the bottles into 12 strips, leaving about 1.5″ at the top uncut. To arrive at the 12 strips I found it easiest to first cut the bottle in half, then cut each of those pieces in half again so you have quarters, and then cut each quarter into 3 pieces. Fold them back a little bit if they are not flopping over very well. Cut the end of each strip into a point.
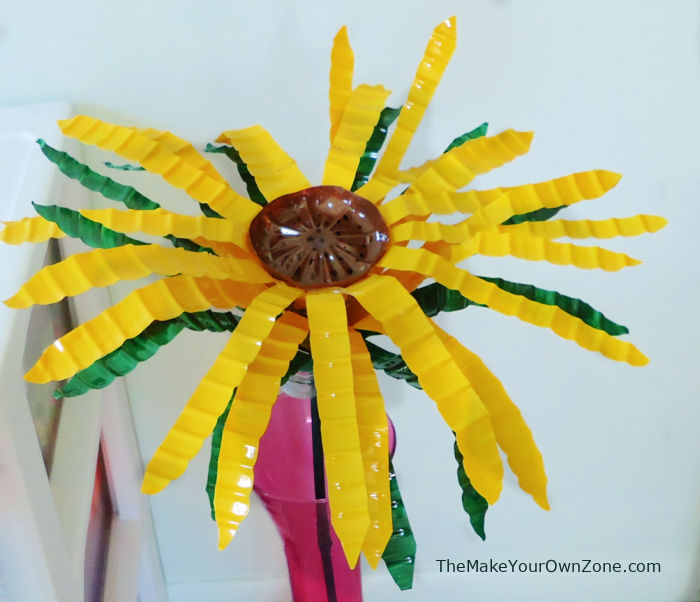
Now you will nest the three pieces together with the green first and then the two yellow pieces on top of that. Use a hot glue gun to glue them together. It’s actually the inside of the water bottle that faces out with the color of the paint showing through. Glue the brown piece with the “open” side facing up onto the top. Glue the brown piece with the “open” side facing up onto the top.
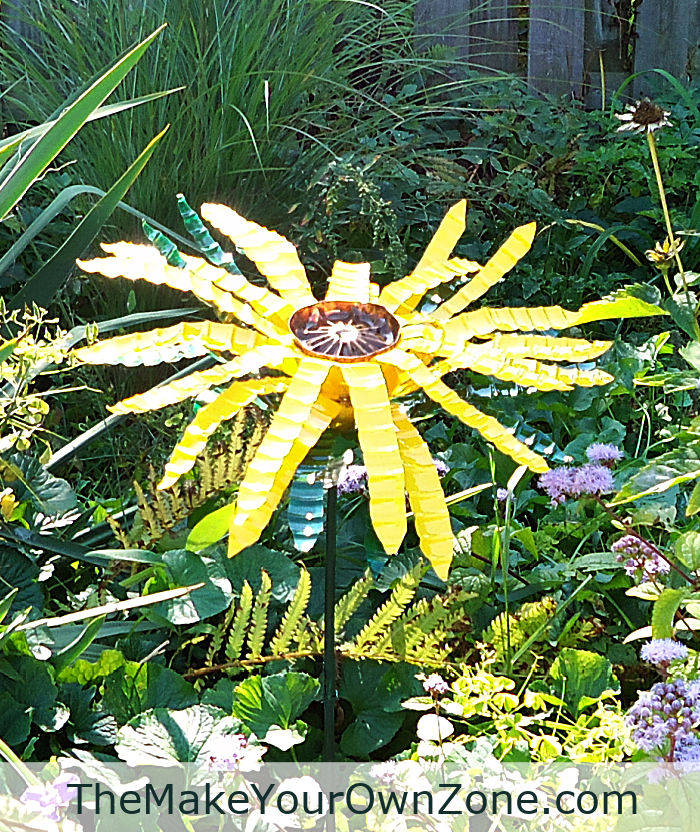
Finally put the garden stake in and use hot glue to secure it to the edge of the bottles. You should now have a completed sunflower made from recycled water bottles
I think my sunflower looks a little lonely out there in the garden. I better get busy and make him a few more friends!
Water Bottle Sunflowers
Materials:
- 3 Empty Water Bottles (about a 16 oz size)
- Craft Paint: Yellow, Green, and Brown
- Paintbrush
- Black Sharpie Marker
- Scissors or Exacto Knife
- Hot Glue Gun
- 2' Green Bamboo Garden Stake
Instructions:
- Remove the labels from the water bottles. I also removed the plastic ring around the top but this might not be necessary.
- Cut the bottom off one of the bottles. I cut where the last ridge was, but then still cut an additional 1/4" off the bottom piece. You don't want a very high edge.
- Use the Sharpie marker to make small dots on the inside of the bottom water bottle piece. (This will be your sunflower center)
- Paint two of the bottles yellow. Paint the third bottle whose bottom is already cutoff with green. Paint the outside of the bottom piece you put the dots on with brown. I used two coats and let the final coats sit overnight to dry.
- Cut the bottoms off the two yellow bottles.
- Next you will cut the bottles into 12 strips, leaving about 1.5" at the top uncut. To arrive at the 12 strips I found it easiest to first cut the bottle in half, then cut each of those pieces in half again so you have quarters, and then cut each quarter into 3 pieces. Fold them back a little bit if they are not flopping over very well.
- Cut the end of each strip into a point.
- Now you will nest the three pieces together with the green first and then the two yellow pieces on top of that. Use your hot glue gun to glue them together. It is actually the inside of the water bottle that faces out with the color of the paint showing through.
- Glue the brown piece with the "open" side facing up onto the top.
- Finally put the garden stake in and use hot glue to secure it to the edge of the bottles.

What a lovely craft to use up plastic bottles. Thank you for posting and am going to try making some.
Deirdre
I think I’m going to try this, if it works well I plan on doing this with my grandkids as a fun craft on our next camp out.
Hi! How did these fair out in the weather?
I use some long twisty ties and tie them to my trellis.
I tried these and had trouble with hot glue warping the neck of the bottles and not holding. Also, I cut the top where the lid screws on off so the two yellow layers would fit together better. I screwed the cap on the green, back side of the flower and used mechanic’s wire which can be twisted without breaking to attach to a straighten clothes hanger. I poked 2 holes in the lid and 2 holes in the brown center and looped the wire into a U shape, put each end into the center piece holes and down and out the holes in the cap and twisted it tight to the curled end of the hanger. It will not come apart in any weather, hot or cold or wind.
Can you post a picture of your variation?
thanks for the instructions, i wish i could find some instructions for the used blujeans flower pot.
Do you find the hot glue softens and loses it’s hold on the petals of the flowers in the sun?
I have not seen that problem, and my understanding is that hot glue needs very hot temperature to melt (like 170 degrees!)
Prachtig gemaakt en kost bijna niks
(Translation: Beautifully made and costs next to nothing) Thank you!
Thanks for the instructions, I will make flowers with my students. I really liked the sunflowers.
Love it, I’m going to try it
Looking to Find Libby Hodges, the artist who made these yellow plastic water bottle sunflowers. She exhibited this garden at ARTPRIZE in Grand Rapids ,MI , I believe in 2011 ? Tried finding her at the end of ARTPRIZE, but no luck. I would like to find her to make some of these suNflowers ffor me. I can’t do it myself.
ThAnk you !
Looks good and I cant wait to try it.
Beautiful. I have been thinking about trying to make something from bottles. I’m always looking for ideas on Pinterest. Thanks for all the details.
You gave wonderful instructions. Thanks so much.
I wondered about that too. Going to try the E6000. Thank you for the suggestion.
I like this idea – thanks for sharing directions
Beautiful!! Now when winter comes around again, maybe I’ll have flowers still blooming! Thank you for this great idea!!!
The instructions you gave are probably the best I’ve seen for this type of plastic flower. The pictures were a big help too.
I think you’ve done a wonderful job. Thank you. Can’t wait to try it 😁
Very nice art work!
Very cute idea, but hot glue will melt in hot weather, might want to reinforce where you glued with E6000
With the centre basically (cupped) open upwards, I thought if you put bird seed inside it would be a great. bird feeder as well. Excellent recycle idea to use up water bottles.
Thank you for easy instructions, will be giving this a try too!
How did you paint them…on the outside or pour paint into the bottles? I’ve heard of both ways and not sure which is best.
I painted the outside of the bottles, which to me seems a little easier than putting the paint inside the bottle.
What type of craft paint did you use?
Should be waterproof I guess.
That looks pretty creative, very impressive. Who would have thought that simple empty bottles that were meant to be thrown could turn out that sweet and lovely creations.
So Fantastic!! I saw the sunflowers at ArtPrize and I think yours is great!! You know, I never even noticed the green 'layer' in the sunflower until I read through your directions here…. not too observant I guess. Nice post- very cheerful!
PS – do you remember that we met last year at a WestMichiganBloggers event? Do you still attend those?
Very cute! I think they would be fun in a centerpiece. They would be a real conversation piece.
Those are cute. I would like to build a garden full of poppies!